

How To Change Apple Camera Settings
The iPhone's built-in Camera app is loaded with astonishing features to help you take stunning photos. In this tutorial, you'll discover 10 iPhone camera settings that volition instantly improve your photography. Read on to acquire how to use these iPhone photographic camera settings to shoot incredible photos every time you printing the shutter!
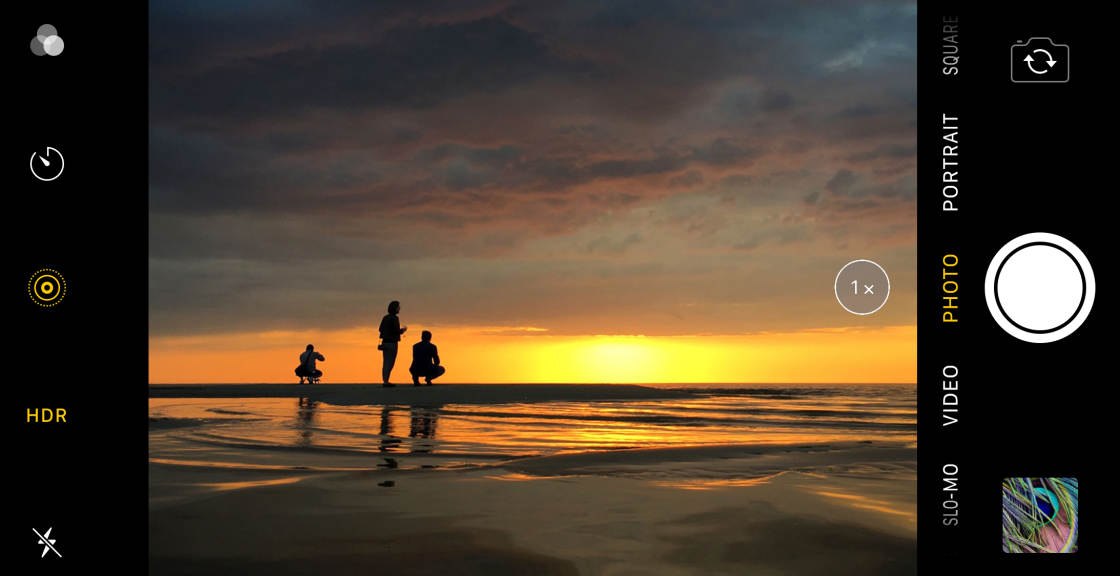
Table Of Contents: How To Use iPhone Camera Settings
Click any title link beneath to go straight to that section of the article:
1. Set The Focus For Tack-Sharp Photos
2. Accommodate Exposure To Achieve Perfect Effulgence Levels
3. Switch Between iPhone Lenses To Zoom In & Out
4. Utilize Nighttime Mode For Unbelievable Low Calorie-free Photos
five. Blur The Groundwork In Your Photos With Portrait Mode
6. Use Portrait Lighting To Add Studio Light Effects To Your Photos
7. Activate Burst Mode For Jaw-Dropping Activity Shots
viii. Shoot Live Photos To Preserve Those Special Moments
9. Set The Timer For Hands-Free Shooting
10. Switch On The Grid In iPhone Camera Settings For Ameliorate Compositions
1. Fix The Focus For Tack-Abrupt Photos
The starting time step to shooting stunning iPhone photos is to ensure your subject is in sharp focus.
If the subject area isn't in focus, you won't be able to capture its intricate detail.
A photo with an out-of-focus subject volition look like an amateur snapshot. And it won't accept the affect y'all'd hoped for.
Fortunately, the iPhone Photographic camera app makes information technology super-easy to set focus.

Simply unless you know what you're looking for, yous might not even realize the camera has a focus setting.
Information technology's i of those subconscious iPhone camera features that most people don't know about.
Then, how do you lot gear up focus on the iPhone camera?
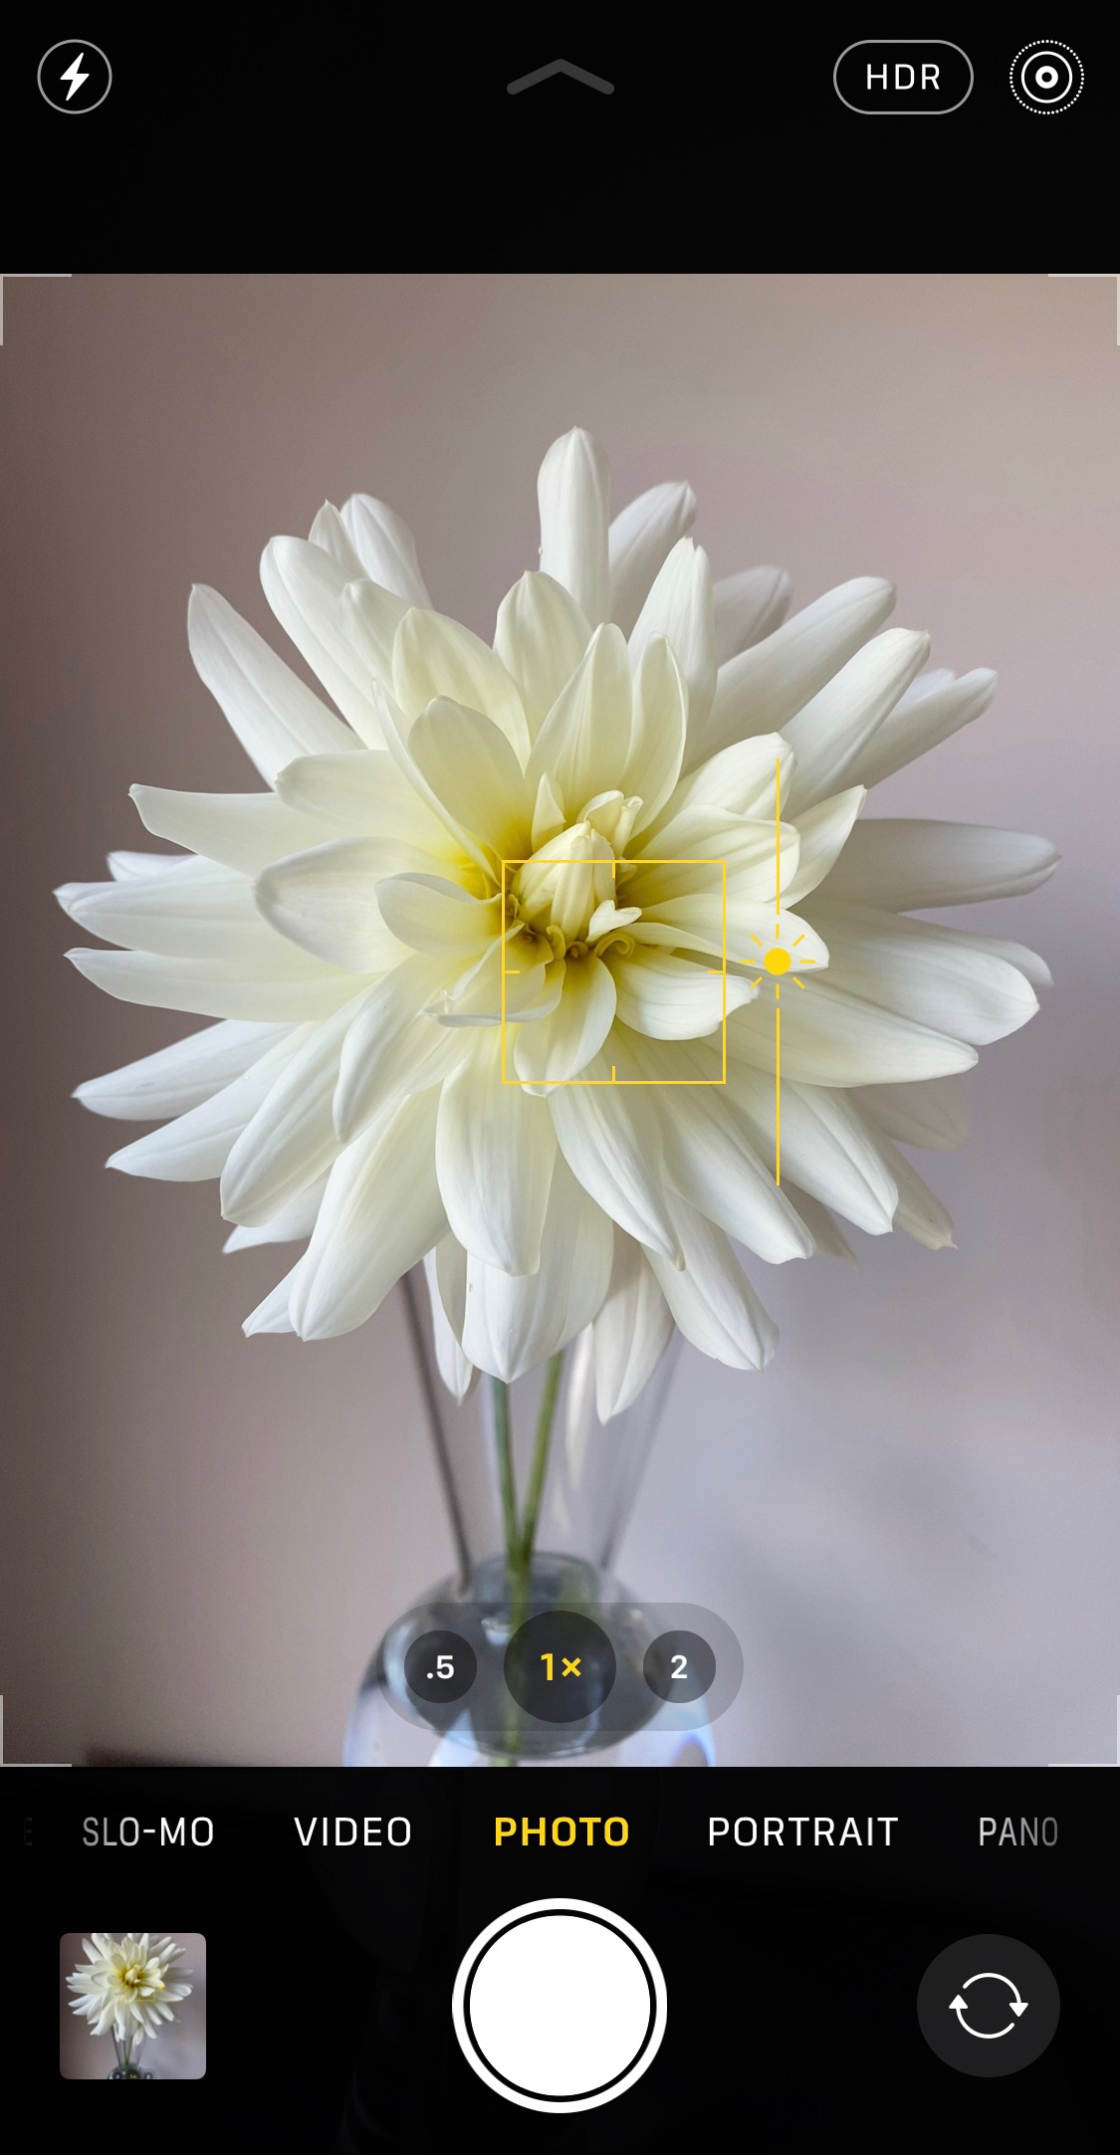
But frame your shot, then tap the screen where you want to gear up focus. A yellow box will announced to betoken the focus bespeak.
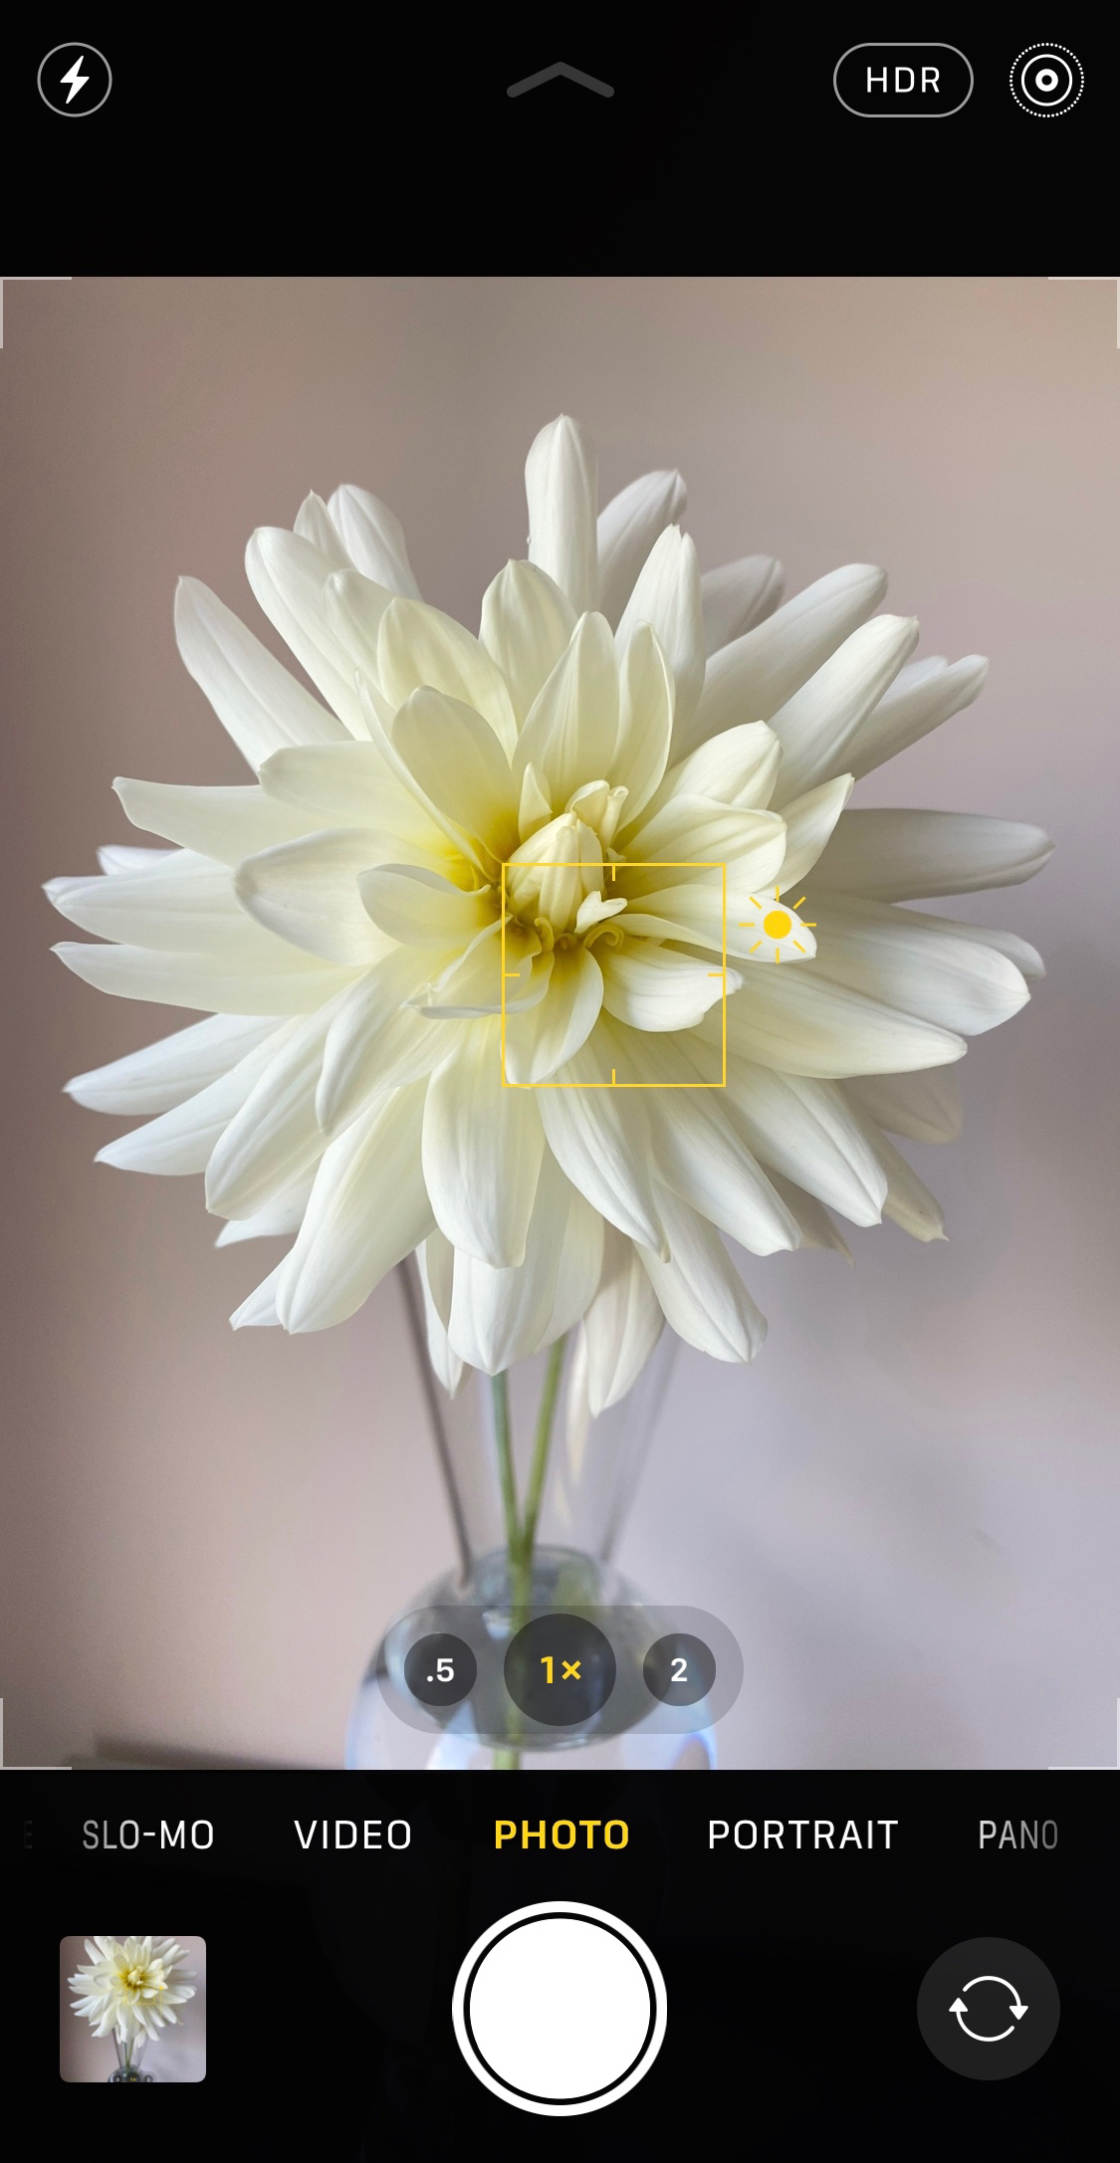
When you take the photograph, the area that you lot set focus on will appear well-baked and sharp.
Setting the focus point is especially important when shooting shut-up photos.
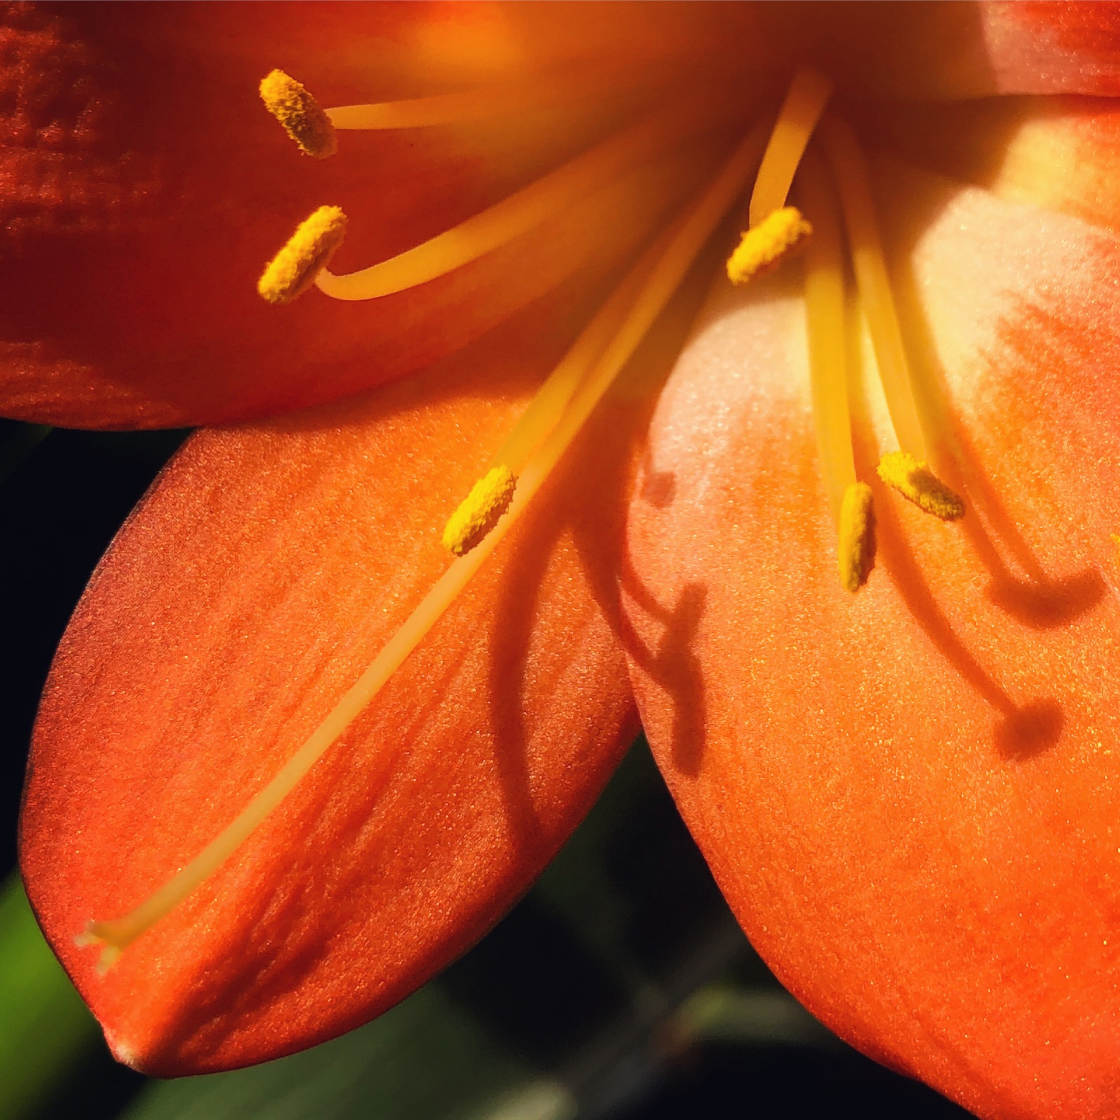
Why? Because when the photographic camera is close to the bailiwick, the depth of field in the photo will exist shallow.
A shallow depth of field means only a small portion of the epitome is in focus. Annihilation in front of or behind the focus bespeak volition appear blurred.
Setting focus is one of the all-time iPhone camera tricks yous tin learn.
And it'south 1 of the easiest iPhone photographic camera settings to use.
Information technology only takes a second to set focus. But it volition make a huge deviation to the quality of your photos.
2. Adjust Exposure To Achieve Perfect Brightness Levels
Exposure refers to the effulgence of an epitome.
If you don't get the exposure right, your photo will either exist too bright (over-exposed) or also dark (under-exposed).
If the photo is under-exposed, it volition lack detail in the shadows (night areas). And the highlights (bright areas) may appear dull.
If the photo is over-exposed, the highlights (bright areas) may announced completely white with no item at all. And the shadows volition exist overly vivid.
Some exposure problems can be stock-still in editing (such as brightening up shadows). But yous'll never be able to bring dorsum detail in the over-exposed whites.
So information technology'south important to get the exposure right in the camera.
Adjusting exposure is easy. Only, like the focus characteristic, exposure is one of those hidden iPhone photographic camera settings. And almost people don't fifty-fifty realize information technology exists.
And so, how practice you adjust exposure in the Camera app?
First, yous need to tap to gear up focus on your subject.
Then, simply swipe up or down on the screen to adapt exposure.
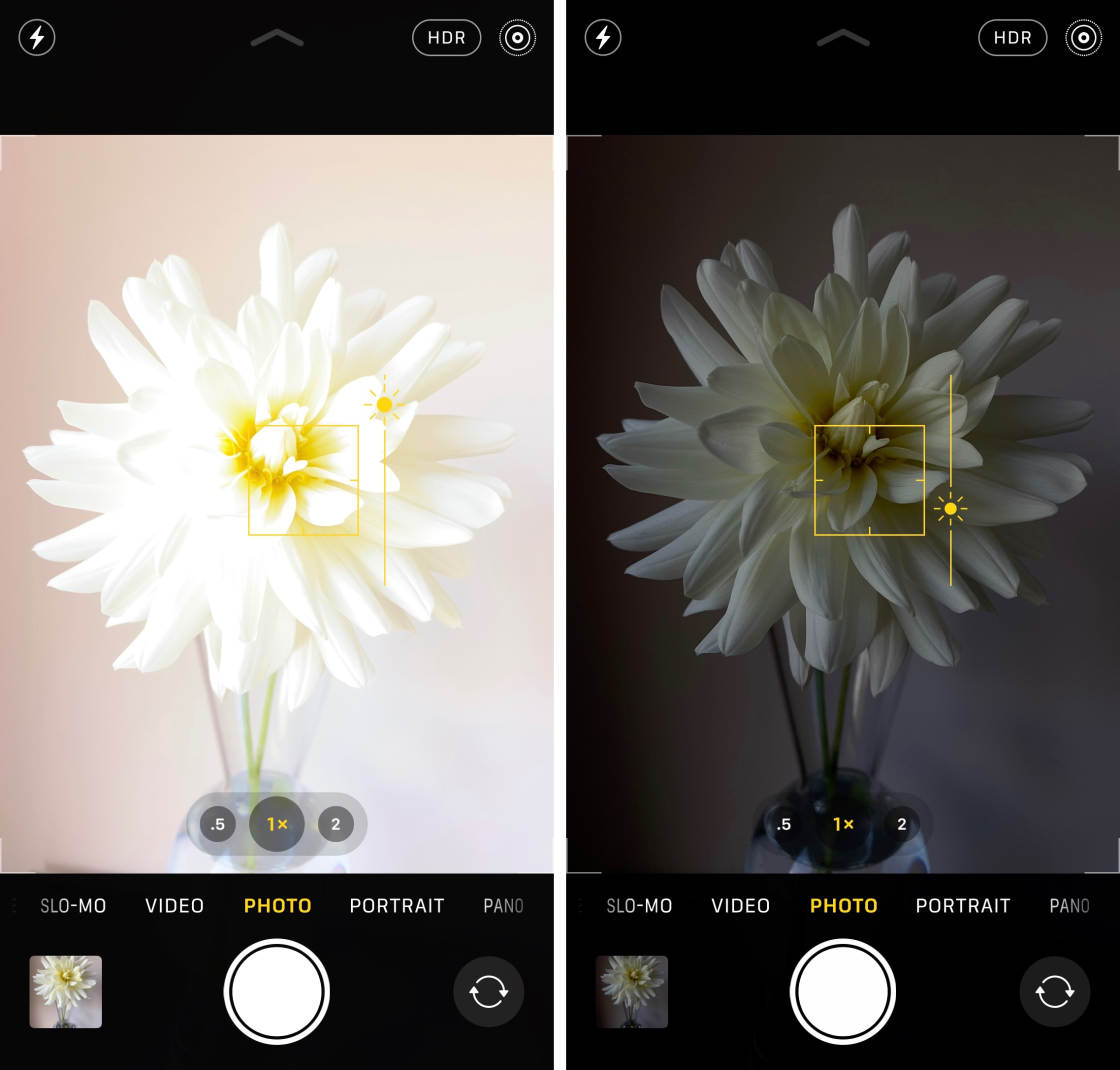
Swipe up to make the image brighter. Or swipe down to make it darker.
In general, you should aim to capture as much colour and detail as possible. Try to avoid over-exposed highlights and under-exposed shadows.
Nevertheless, in some cases, yous might desire to deliberately under or over-expose your photo.
For example, to capture a silhouette photo, y'all'll demand to under-betrayal and so that your discipline appears completely black.
Earlier you take a photo, always bank check whether the brightness levels look good.
If the image looks too bright or too nighttime, accommodate the exposure before you press the shutter button.
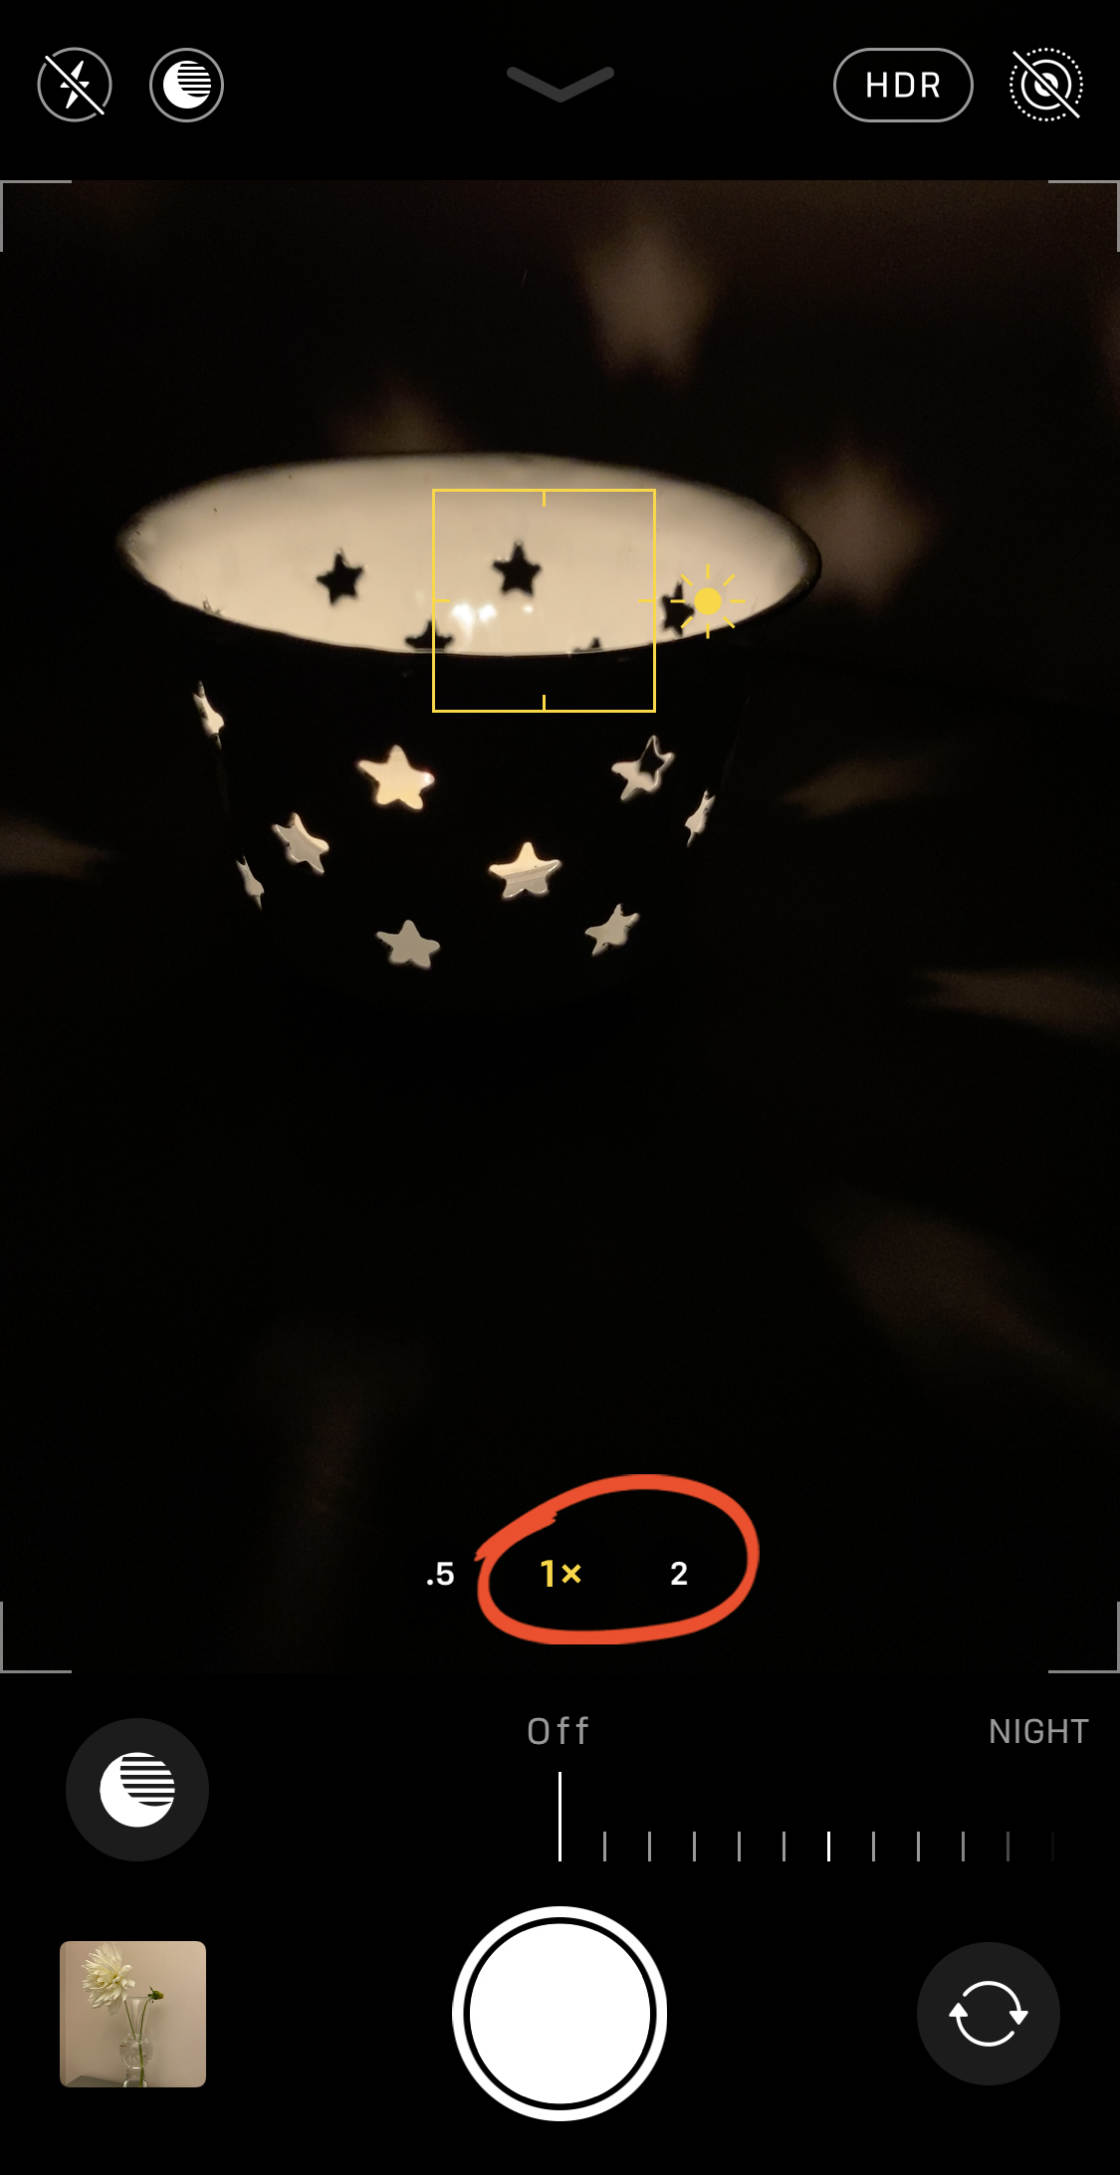
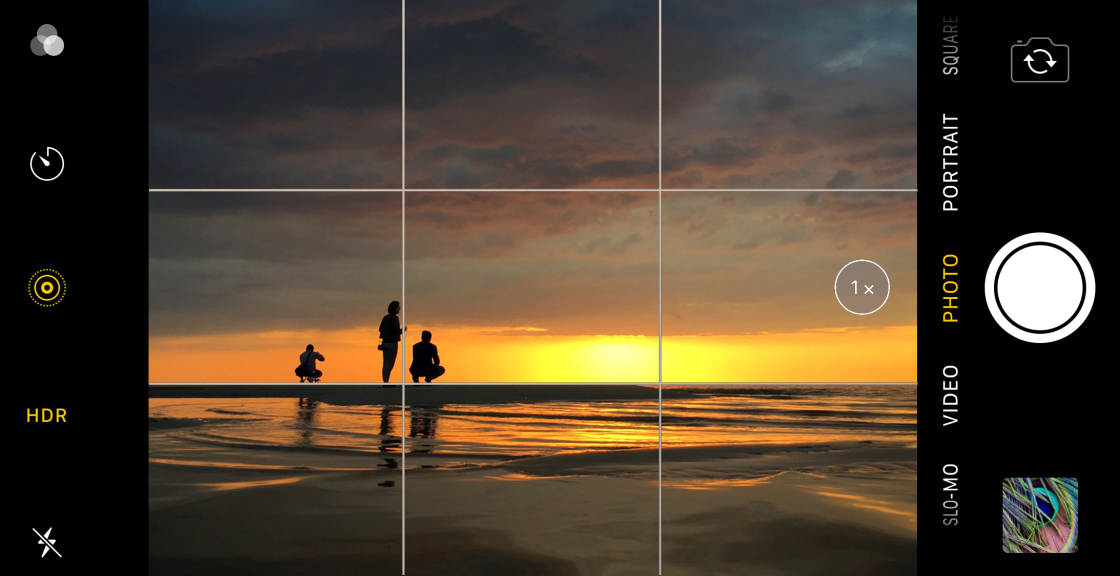
iii. Switch Between iPhone Lenses To Zoom In & Out
Do yous have one of the dual-lens or triple-lens iPhones?
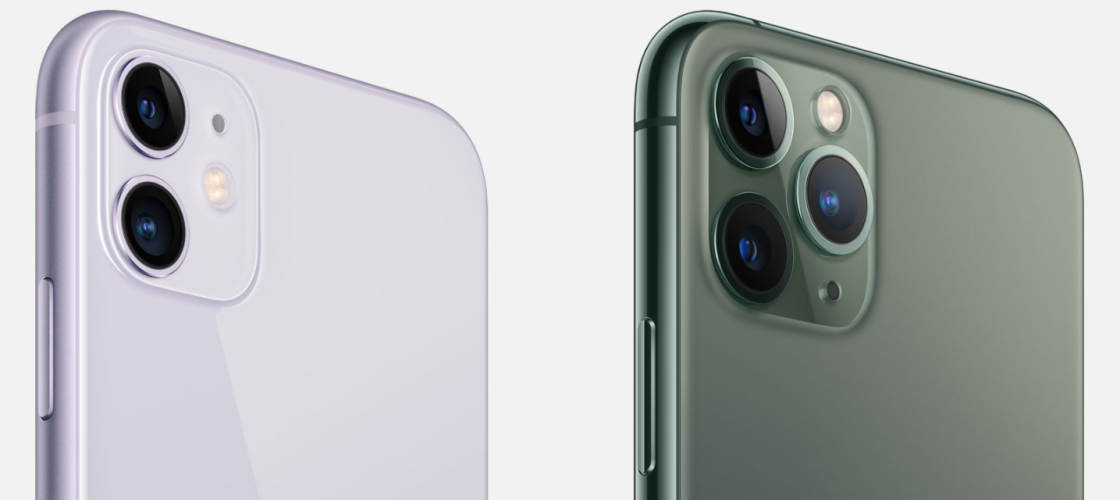
If so, yous tin zoom in and out on your scene past switching between iPhone camera lenses.
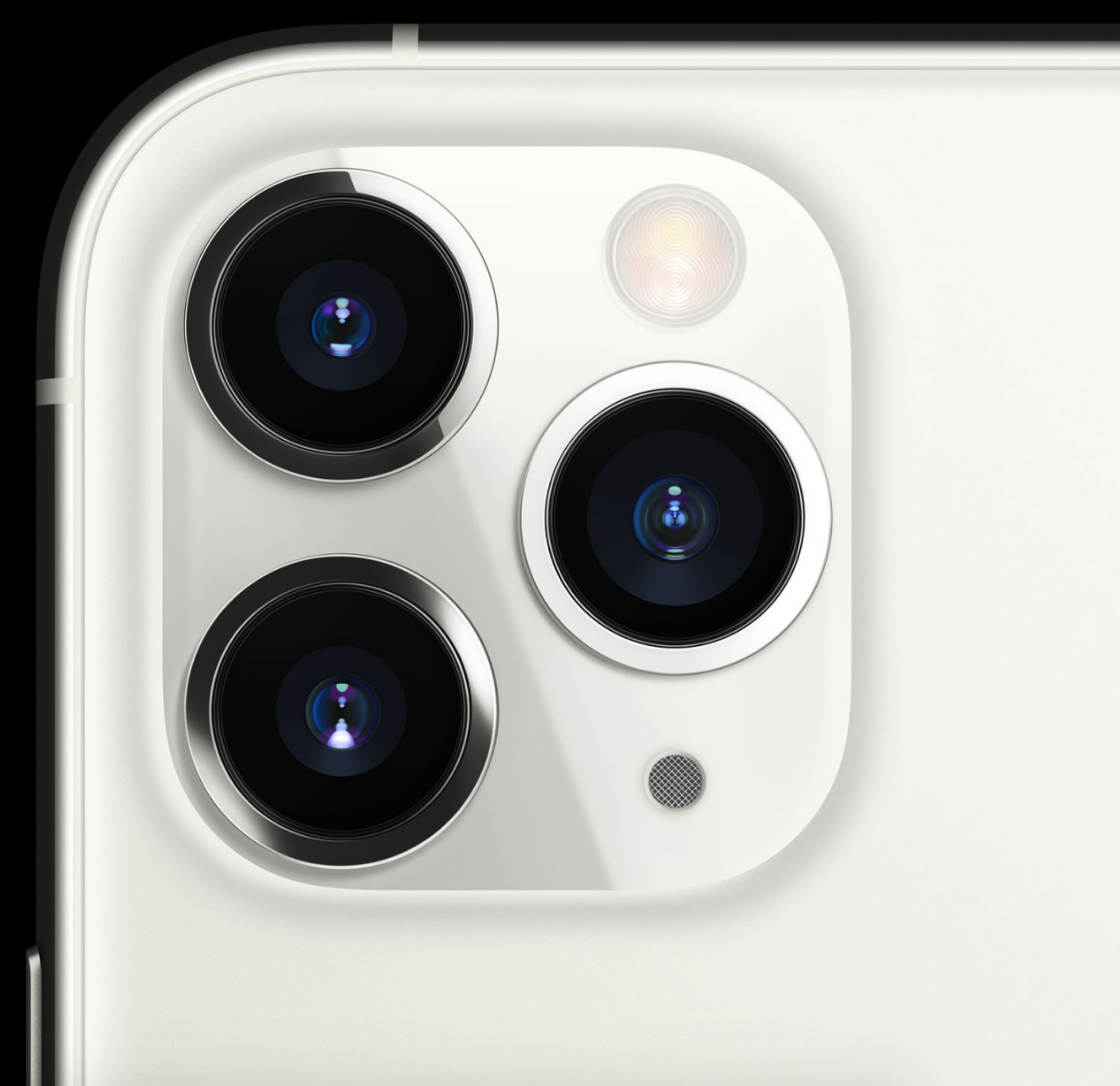
The iPhone eleven Pro and iPhone 11 Pro Max have iii lenses: Ultra Wide, Wide, and Telephoto.
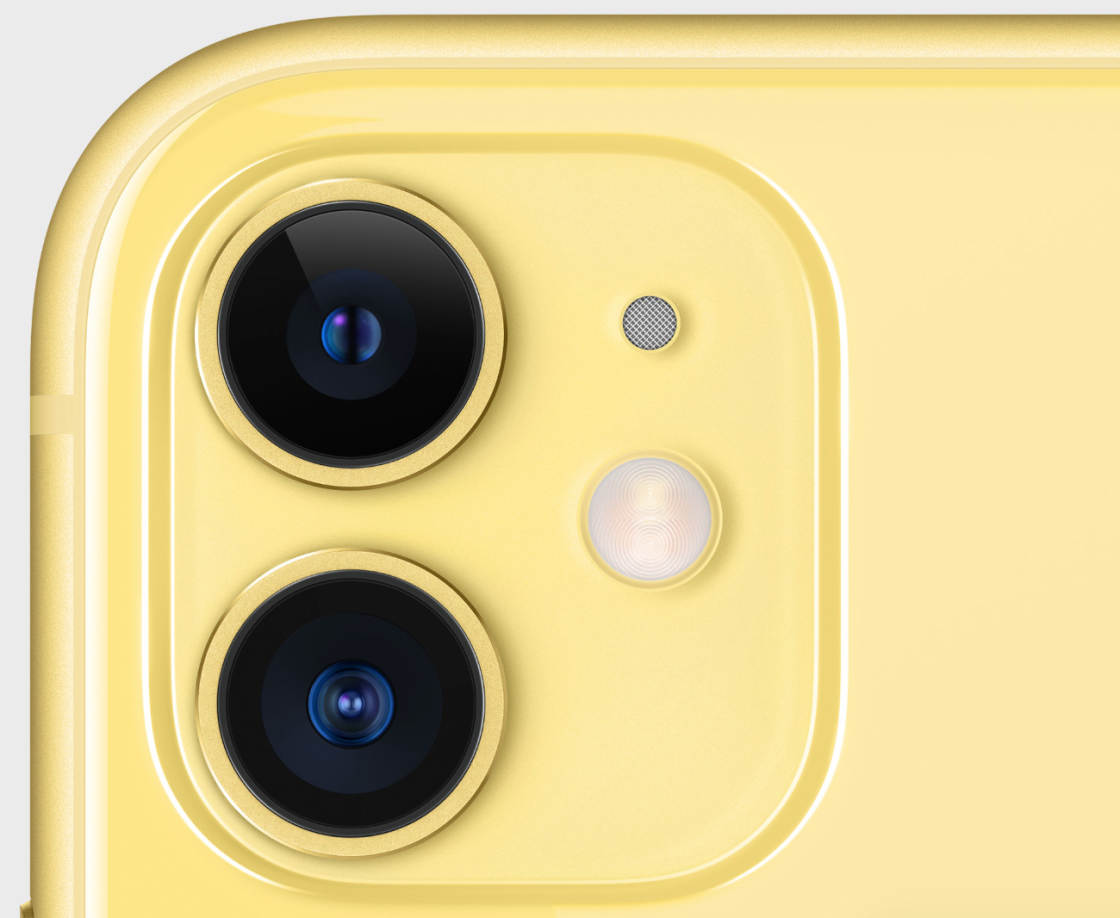
The iPhone 11 has two lenses: Ultra Wide and Wide.
Older dual-lens iPhones (iPhone XS, XS Max, X, 8 Plus, and 7 Plus) have the Wide andTelephoto lenses.
If you take a unmarried-lens iPhone, you'll just have the standard Wide lens.
And then, how do you lot switch between lenses on the dual and triple-lens iPhones?
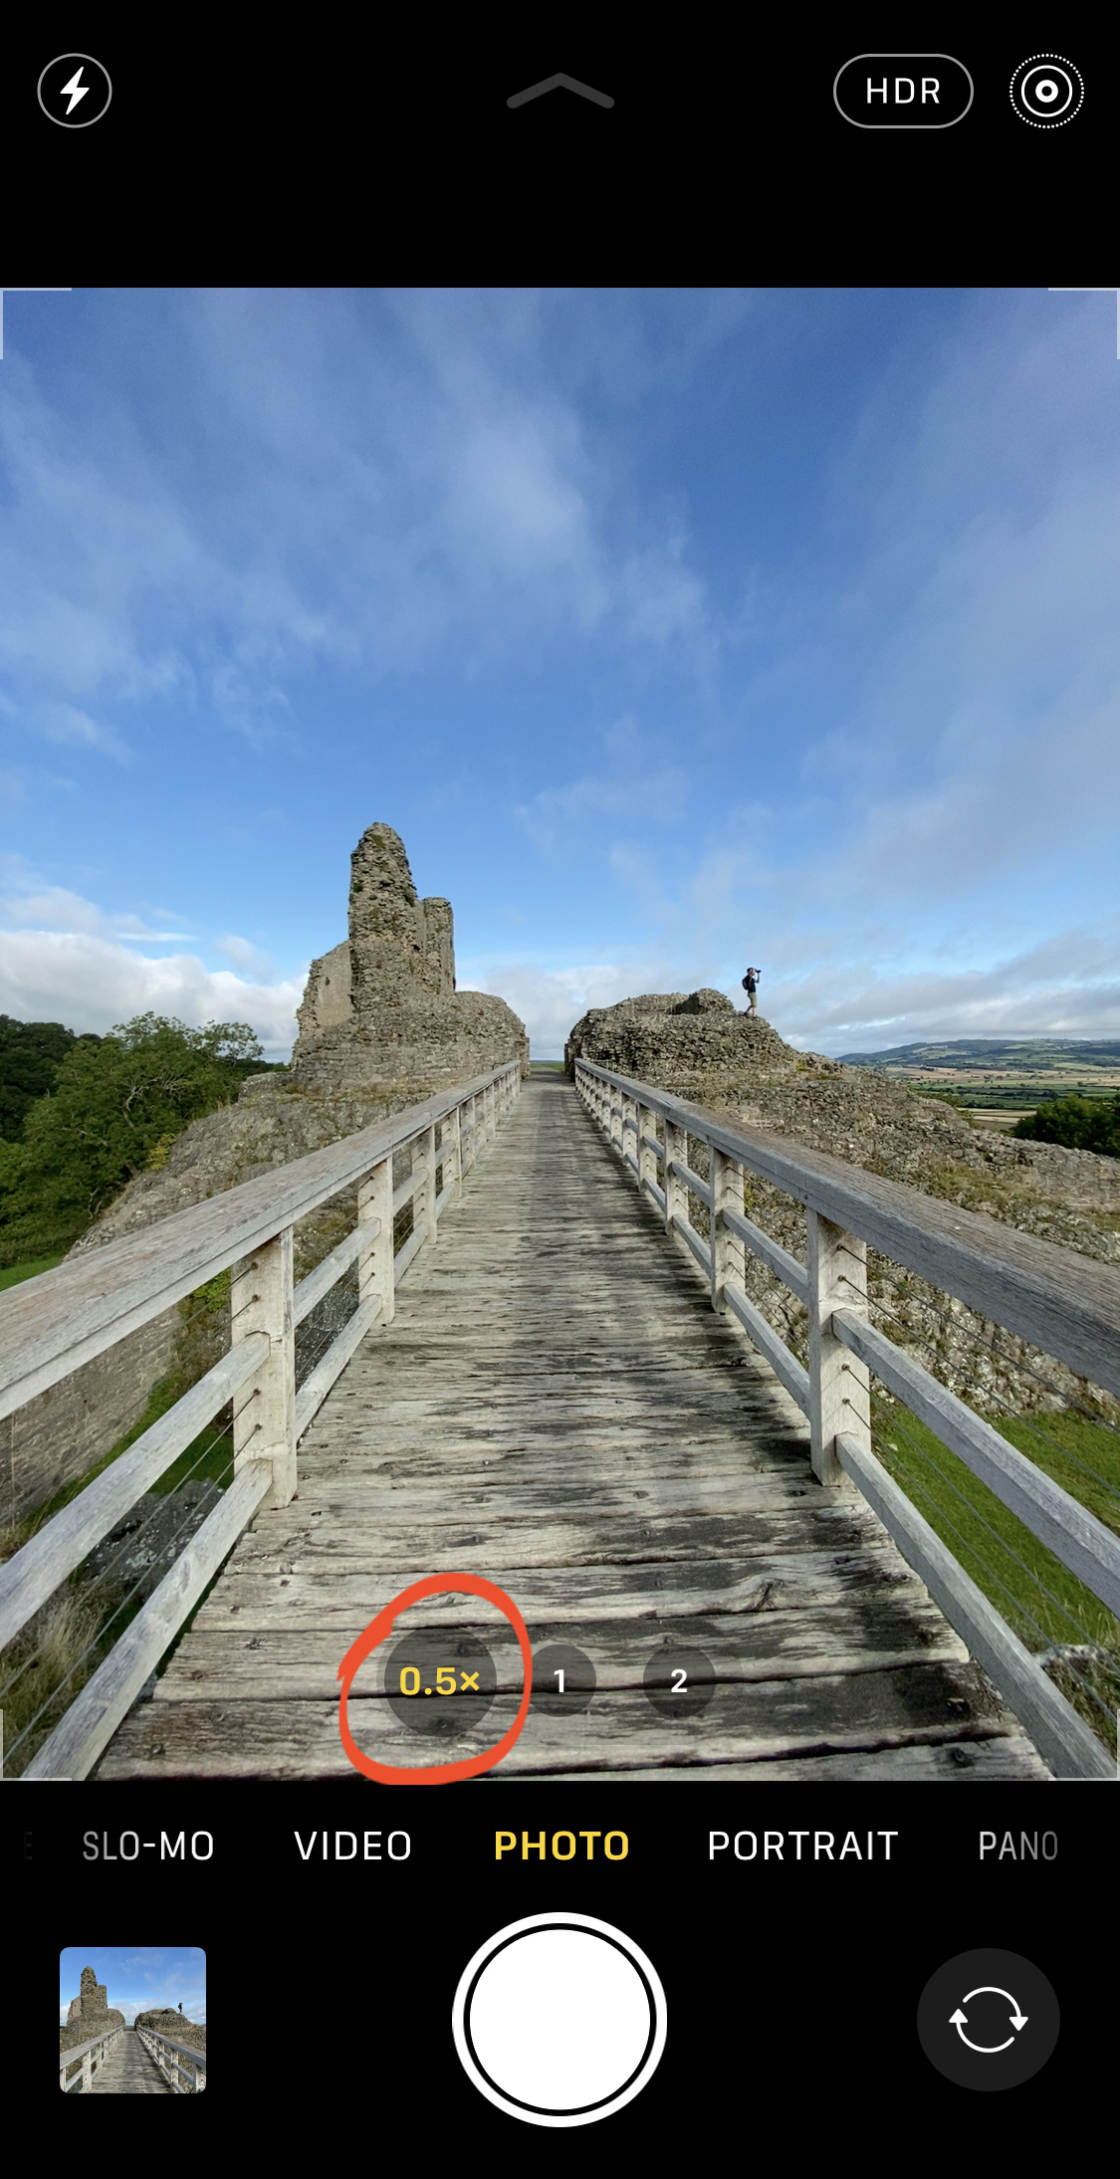
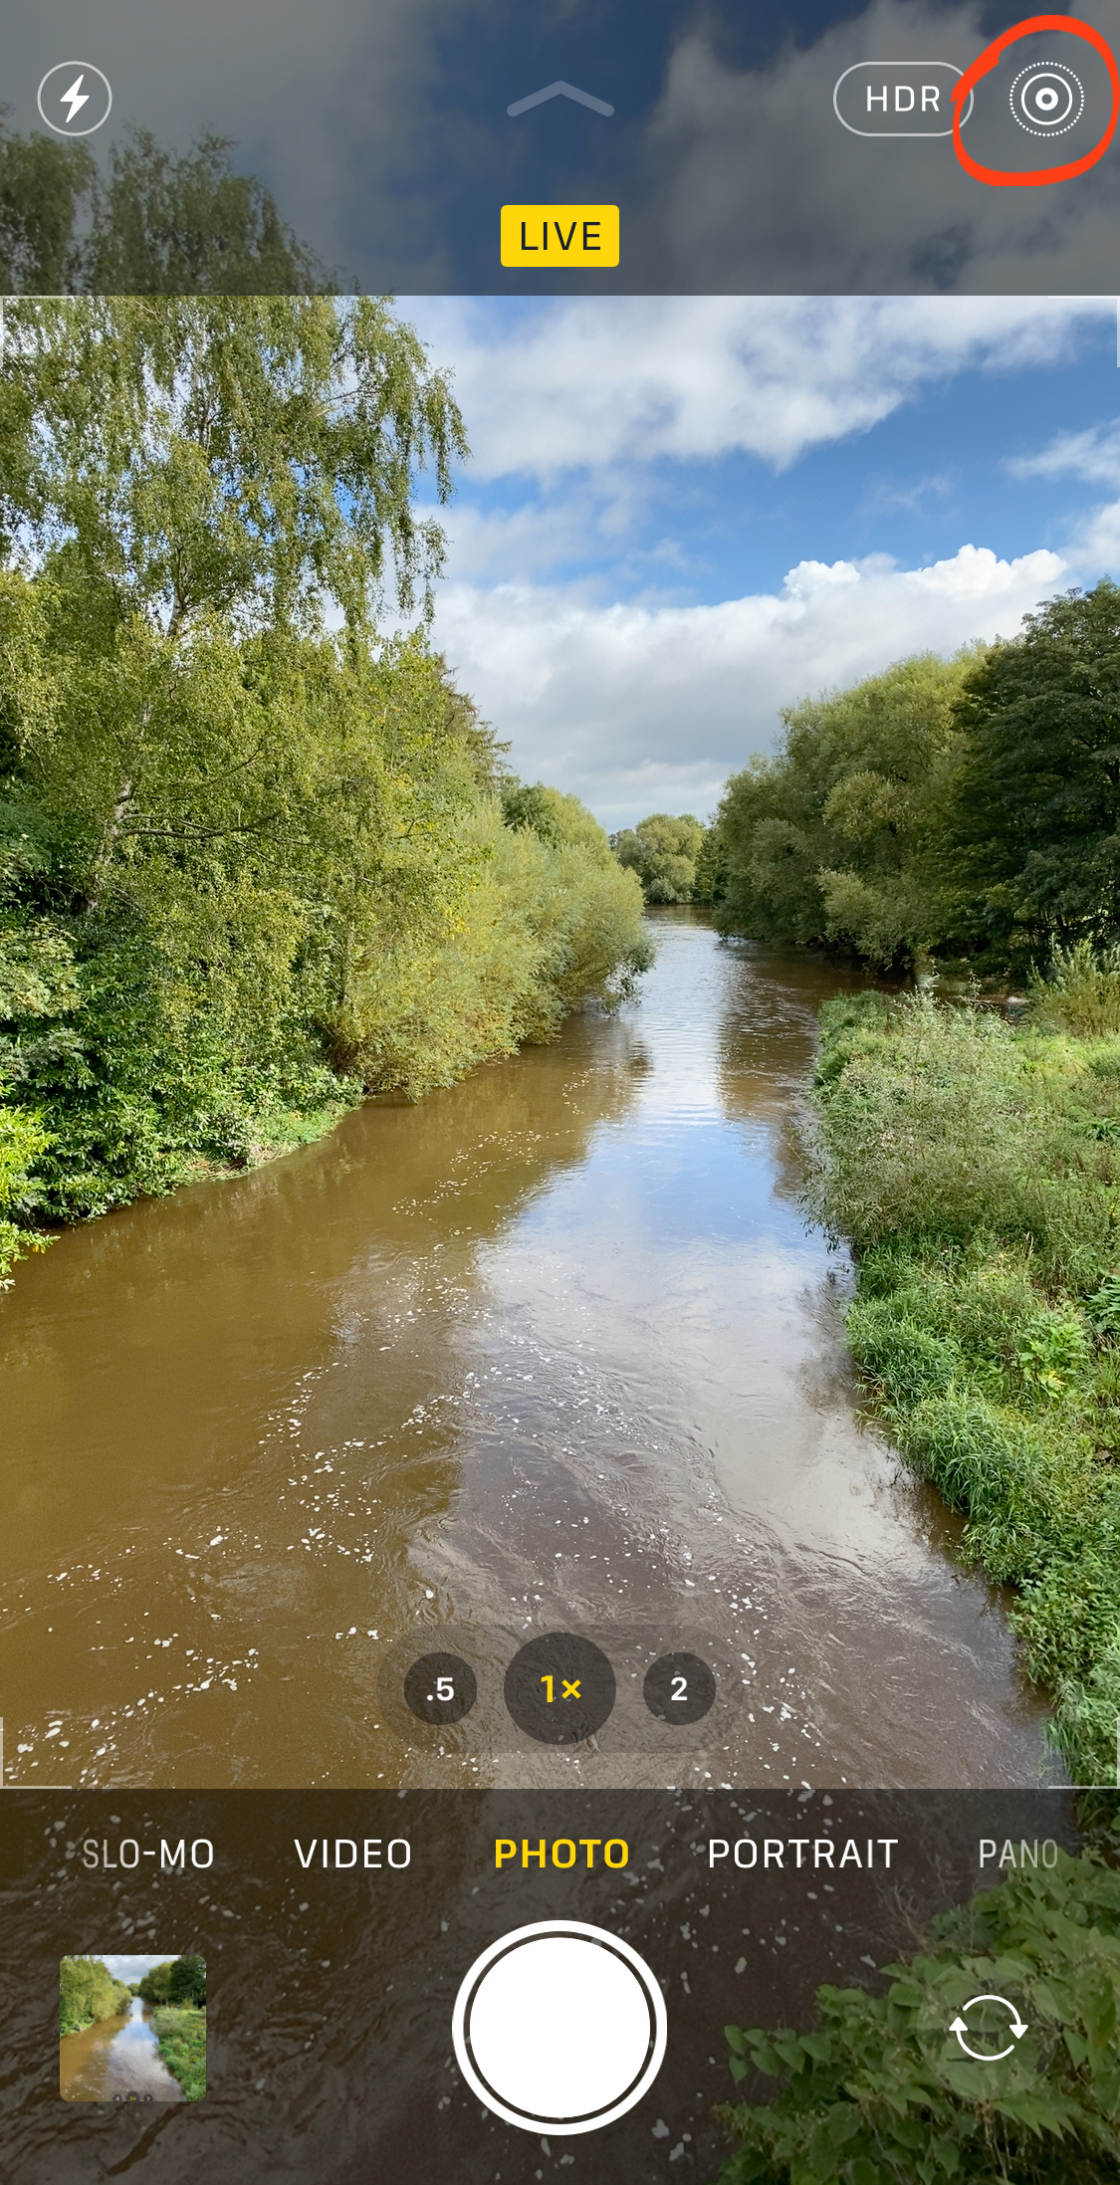
In the iPhone Photographic camera app, you lot'll see some numbers at the bottom of the viewfinder. These are the Zoom options that allow you switch betwixt lenses.
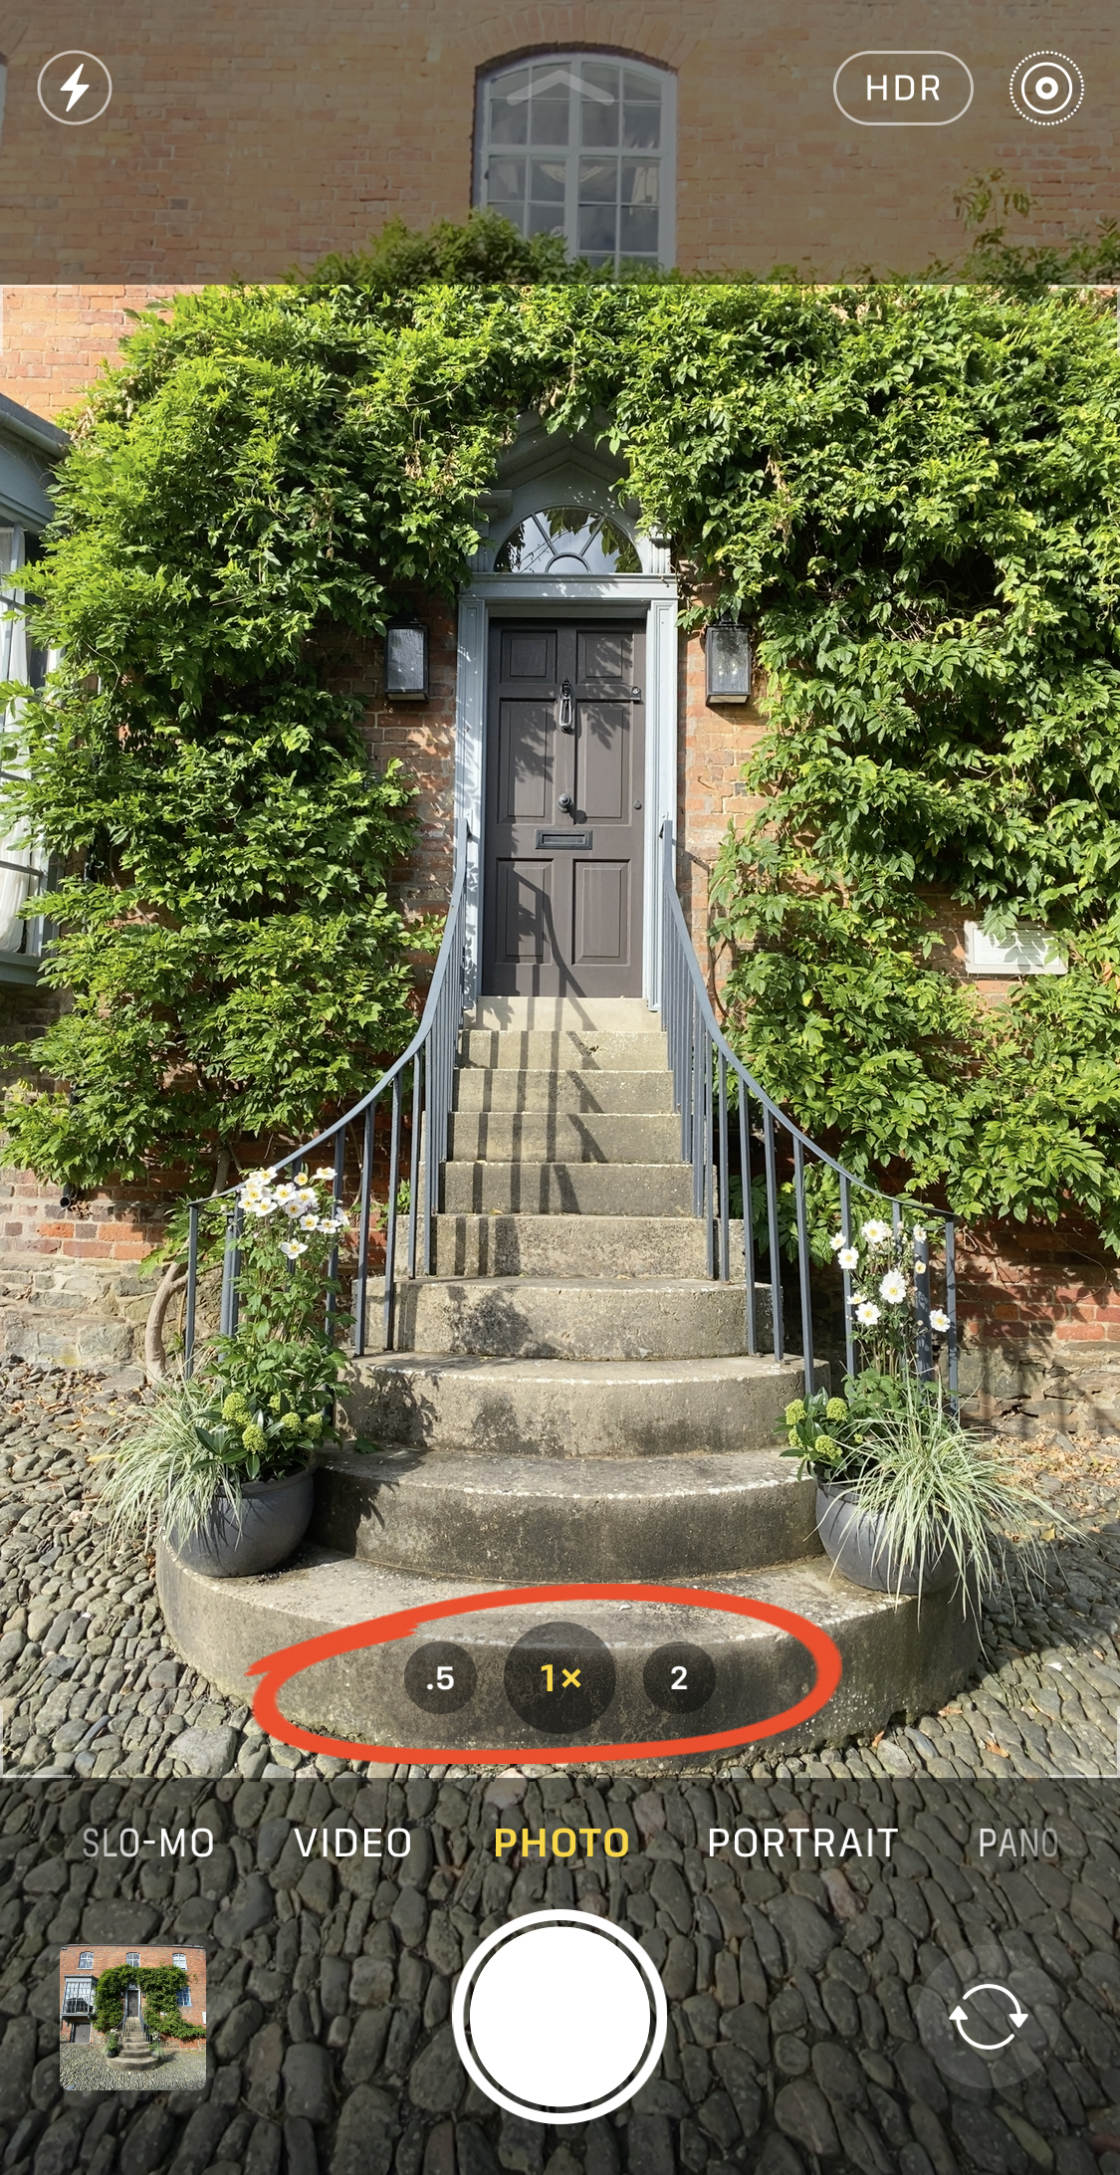
0.5x is the Ultra Wide lens. 1x is the Wide lens. And 2x is the Telephoto lens.
To use the Ultra Wide lens, tap0.5x.
To switch to the Wide lens, tap1x.
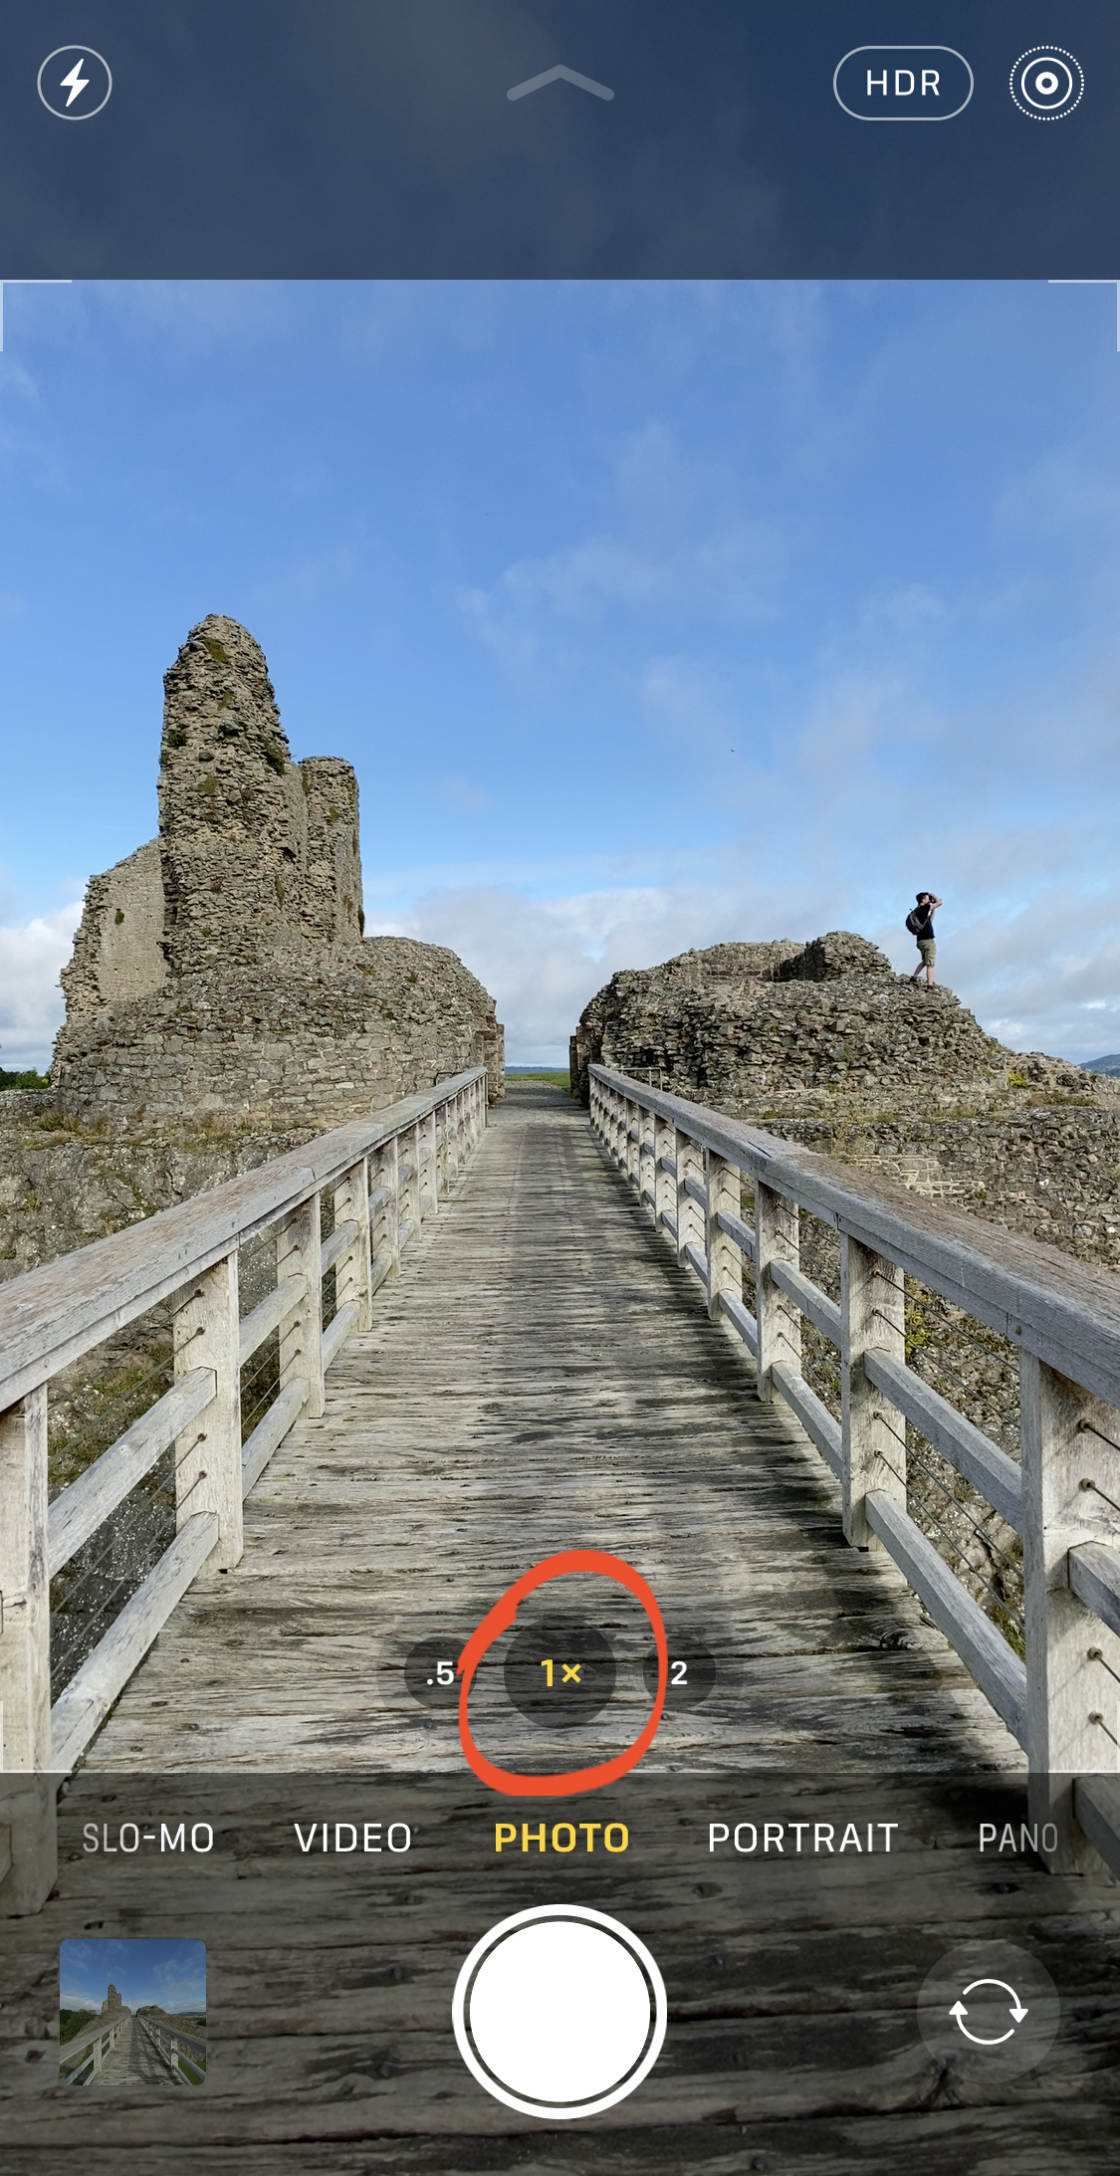
For the Telephoto lens, tap2x.
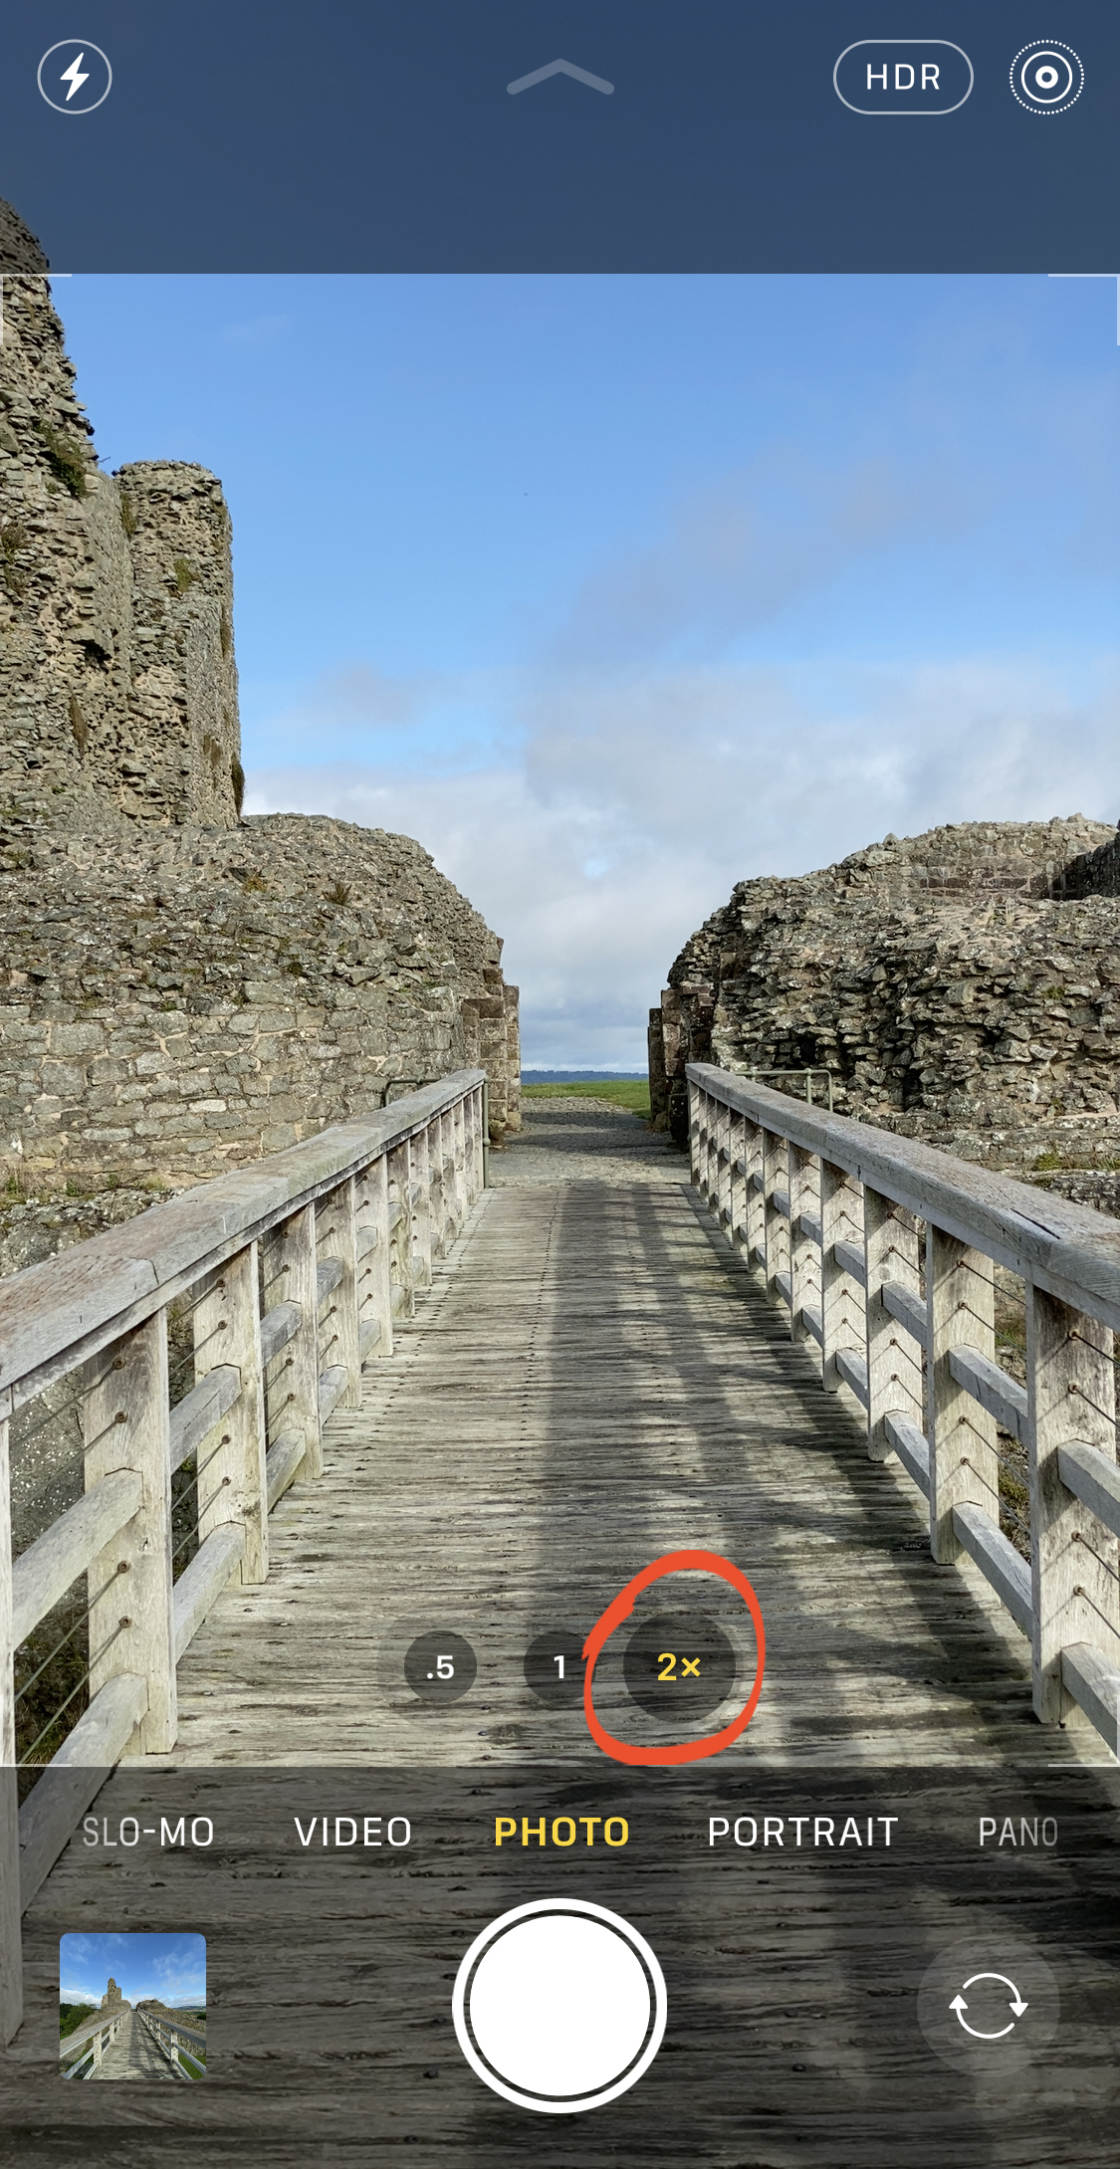
You know how to switch between lenses. But which ane should you choose for your scene?
The 1x Broad lens has a moderately wide field of view. This makes it suitable for most shooting situations.

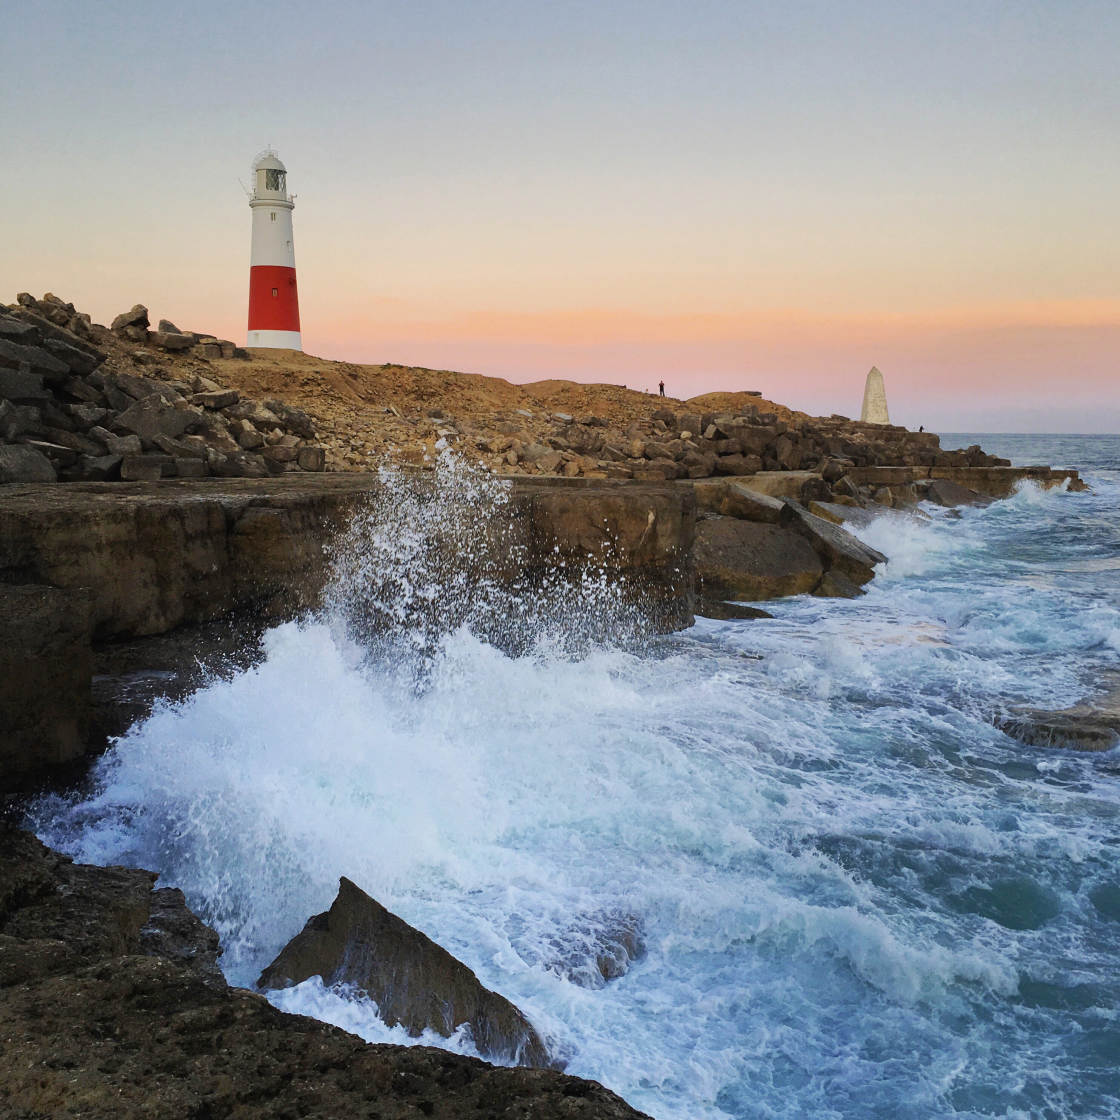
The 0.5x Ultra Wide lens has an extremely wide angle of view. This allows you to capture super-wide photos that include much more than of the scene. It'south great for shooting wide landscapes, cityscapes, and architecture.
The 2x Telephoto lens allows you lot to capture a closer view of distant objects. Apply it to zoom in when you tin can't physically get closer to your subject.
As you can come across, the same scene can expect very different when captured with the Wide, Ultra Wide, and Telephoto lenses.
Having the option to zoom in and out allows you to be more than creative and versatile when shooting.
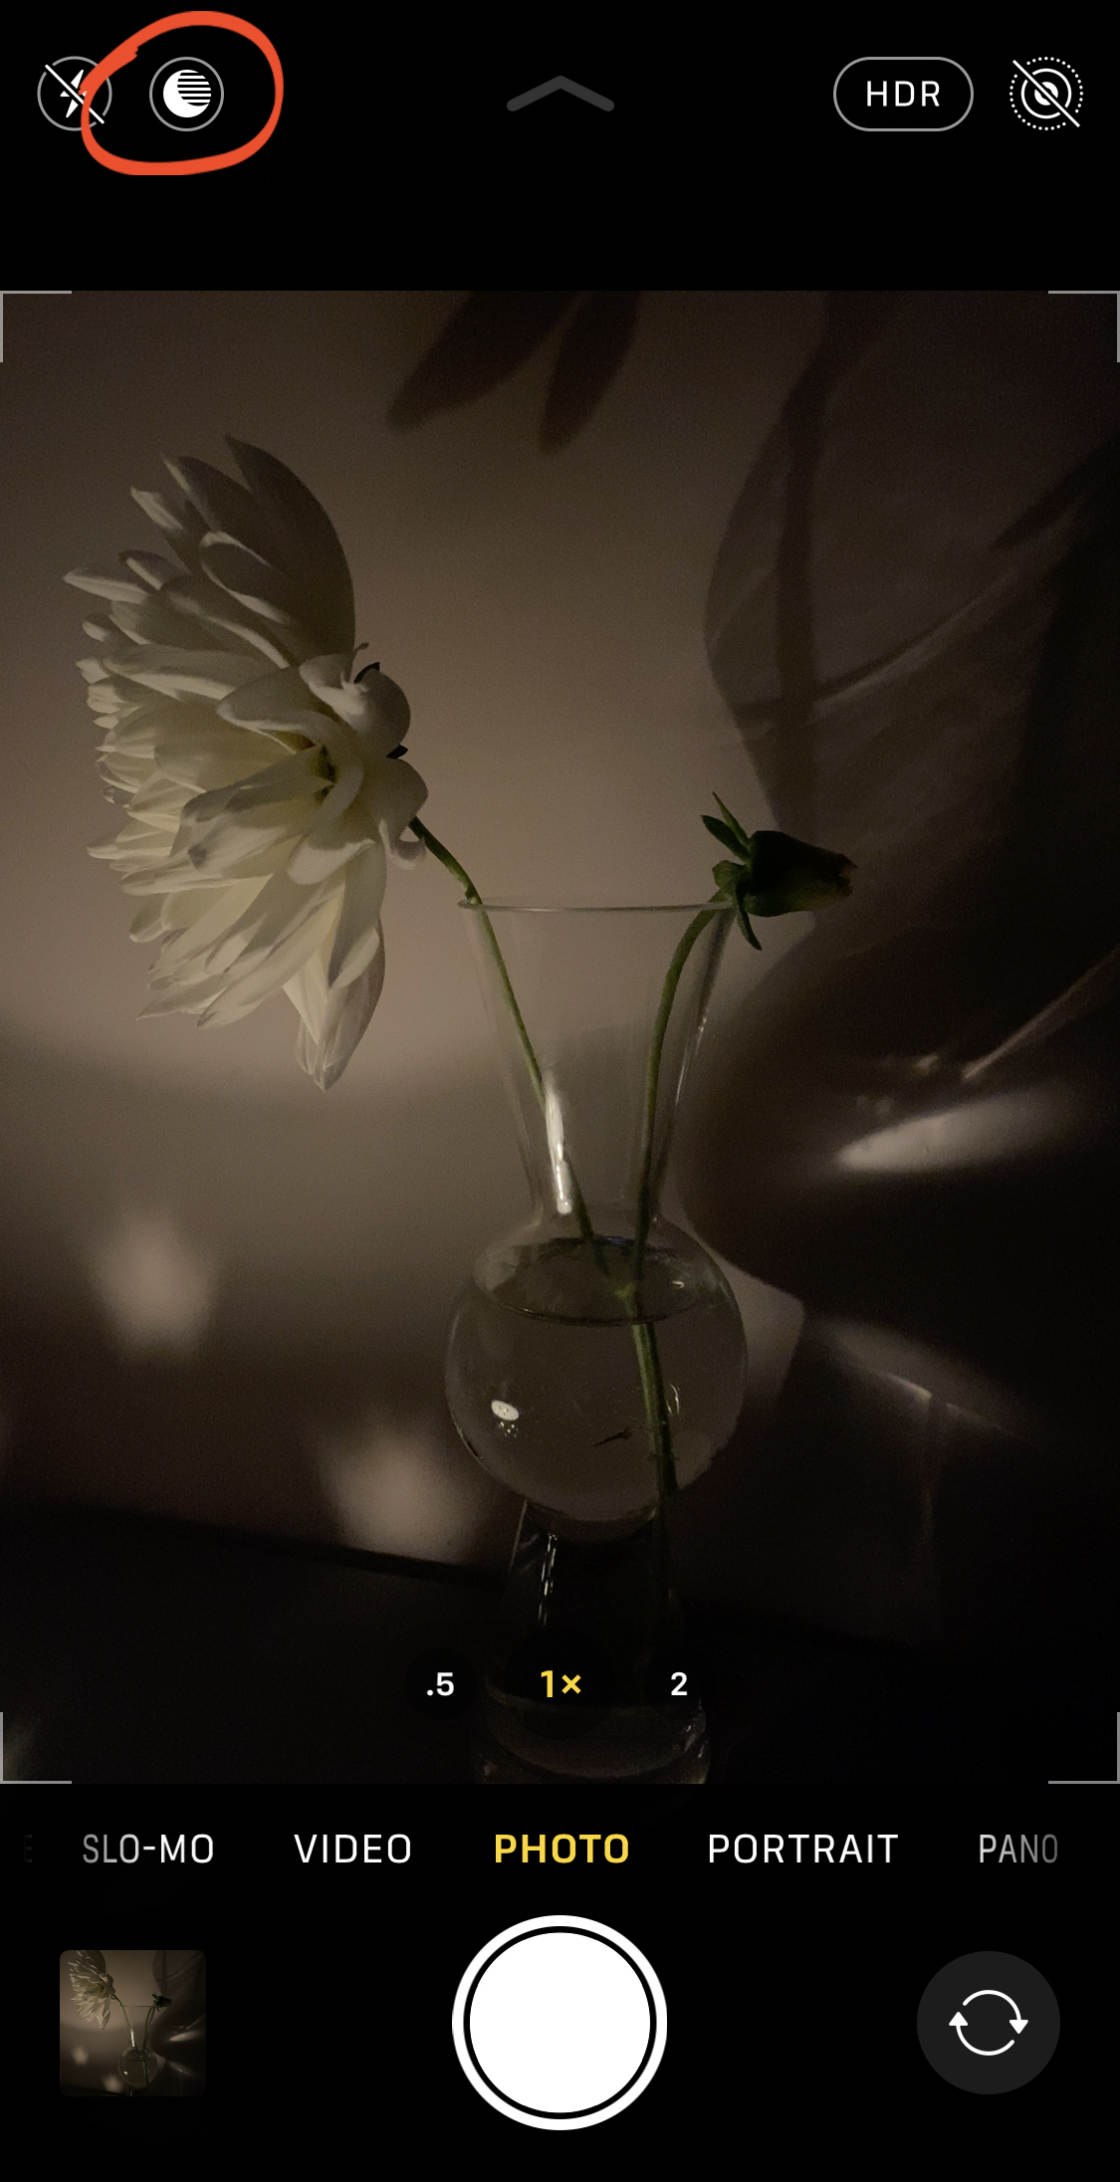
four. Utilize Night Style For Unbelievable Low Lite Photos
Do you struggle to take good photos when you shoot at night? Exercise your low light photos expect dull and grainy?
Well, if yous have the iPhone 11, iPhone xi Pro, or iPhone 11 Pro Max, night photography will never be a problem again!
The iPhone eleven Camera app has an incredible new characteristic called Night manner.
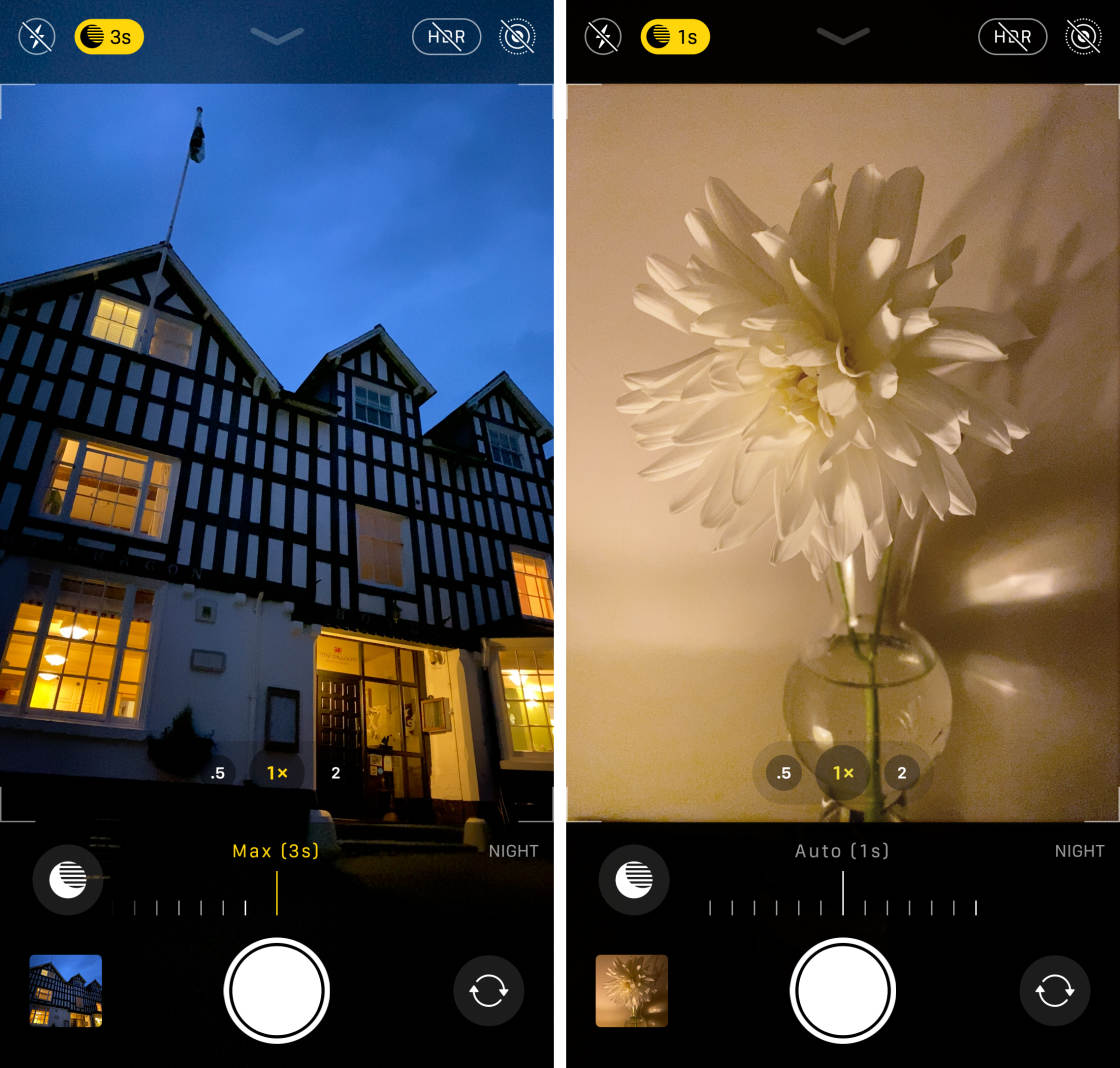
Nighttime mode uses intelligent photographic camera software to capture more color and item in your night photos.
Then, how do you utilize Night mode on iPhone eleven?
First, ensure yous're shooting with either the 1x Wide lens or 2x Telephoto lens. (Night mode doesn't work with the 0.5x Ultra Wide lens.)
Night mode will come on automatically whenever you shoot in depression low-cal.
If the calorie-free is adequately depression (but not very dark), the Night mode (moon) icon will be white.
The white icon means that Night mode is bachelor to use, just it's not notwithstanding active. To activate information technology, tap theNight manner icon and so information technology appears yellow.
If the scene is very dark, Night style will actuate automatically (the icon will appear yellow).
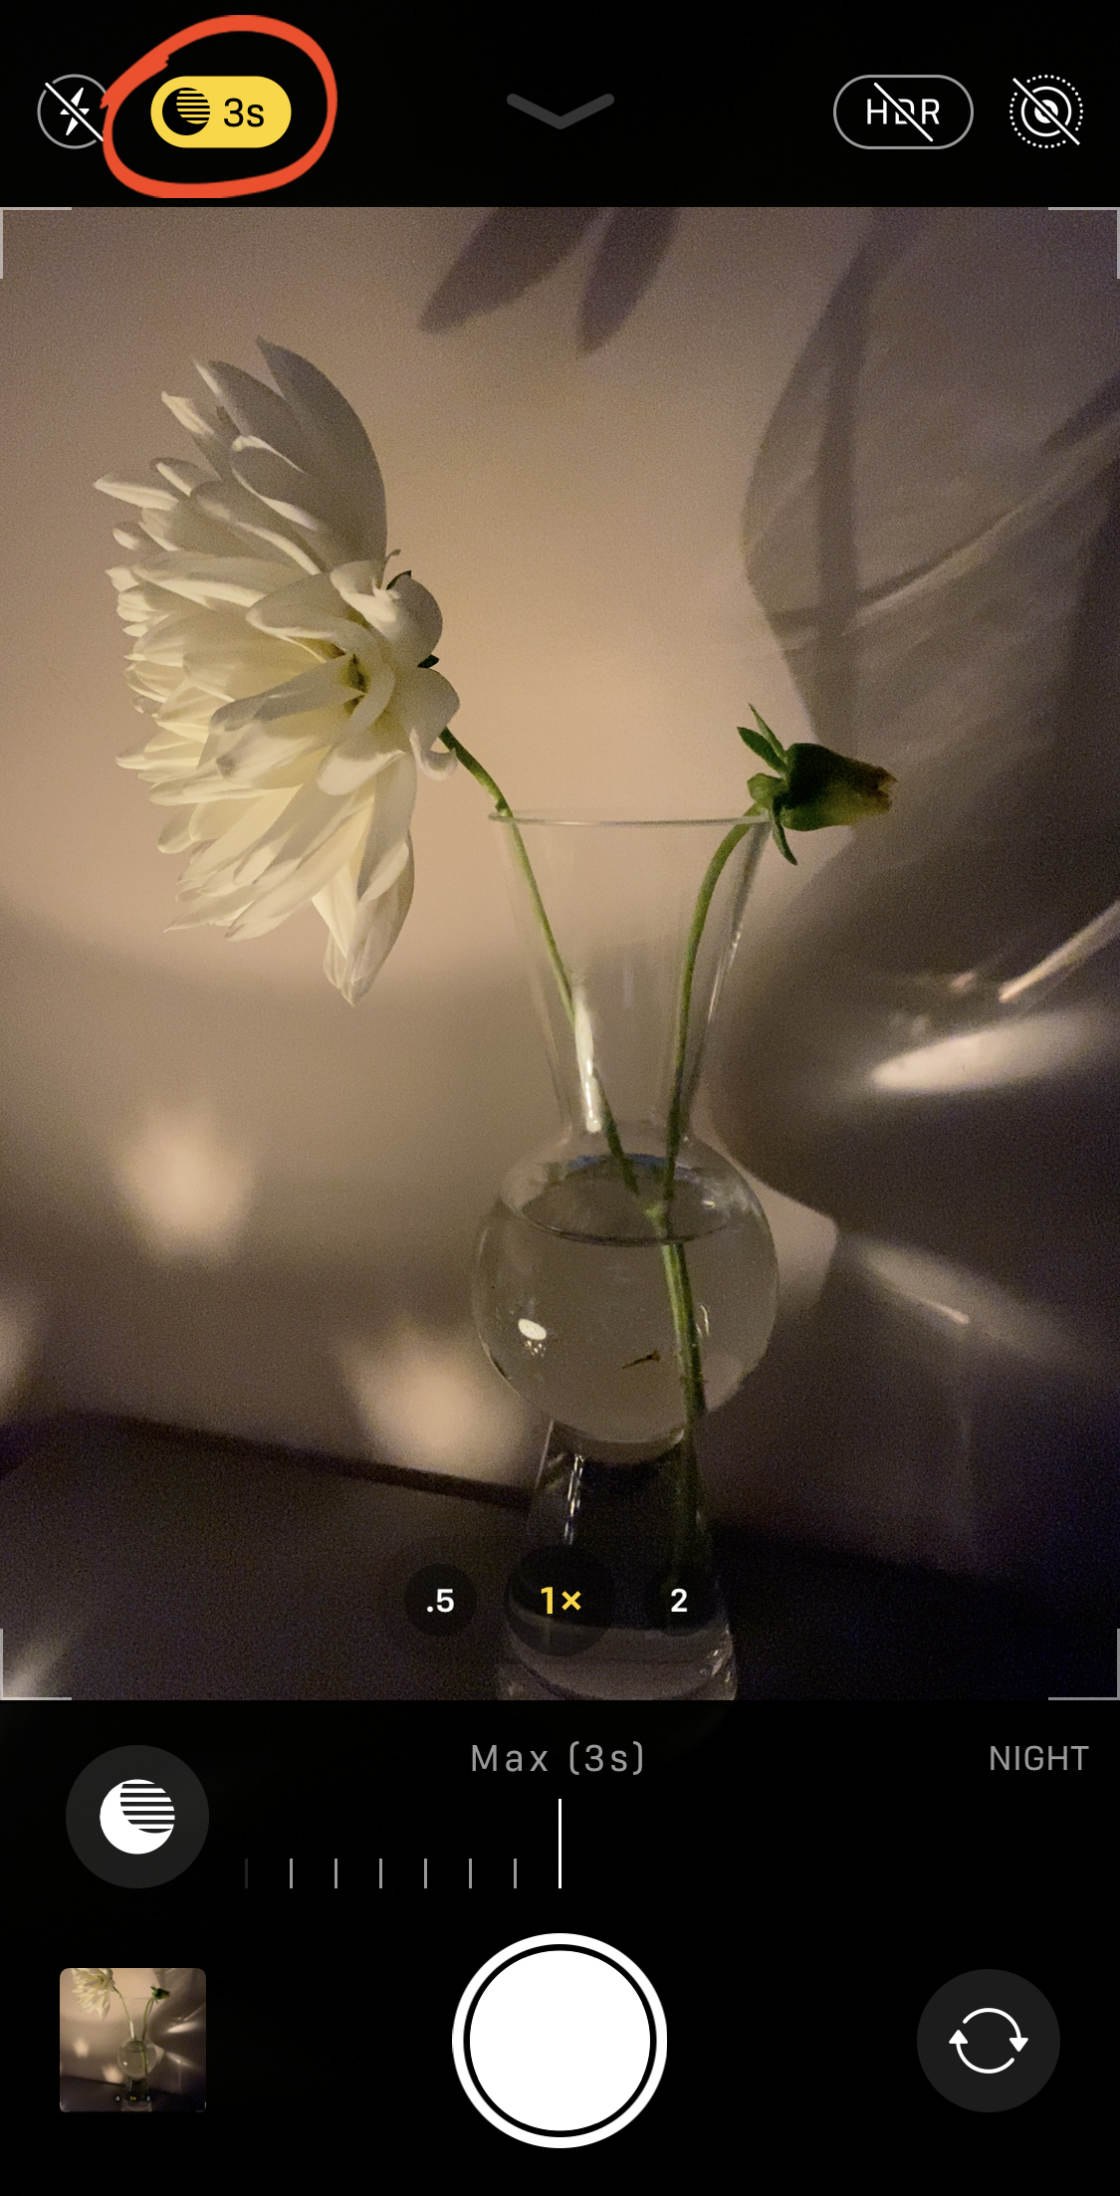
When Night mode is active, you'll see a number on the yellowish Night mode icon. This number indicates the exposure time, due east.g., 1 second, 3 seconds, 7 seconds, etc. This is the time information technology will take to capture the prototype.
TheMotorcar exposure fourth dimension is the time recommended by the camera.
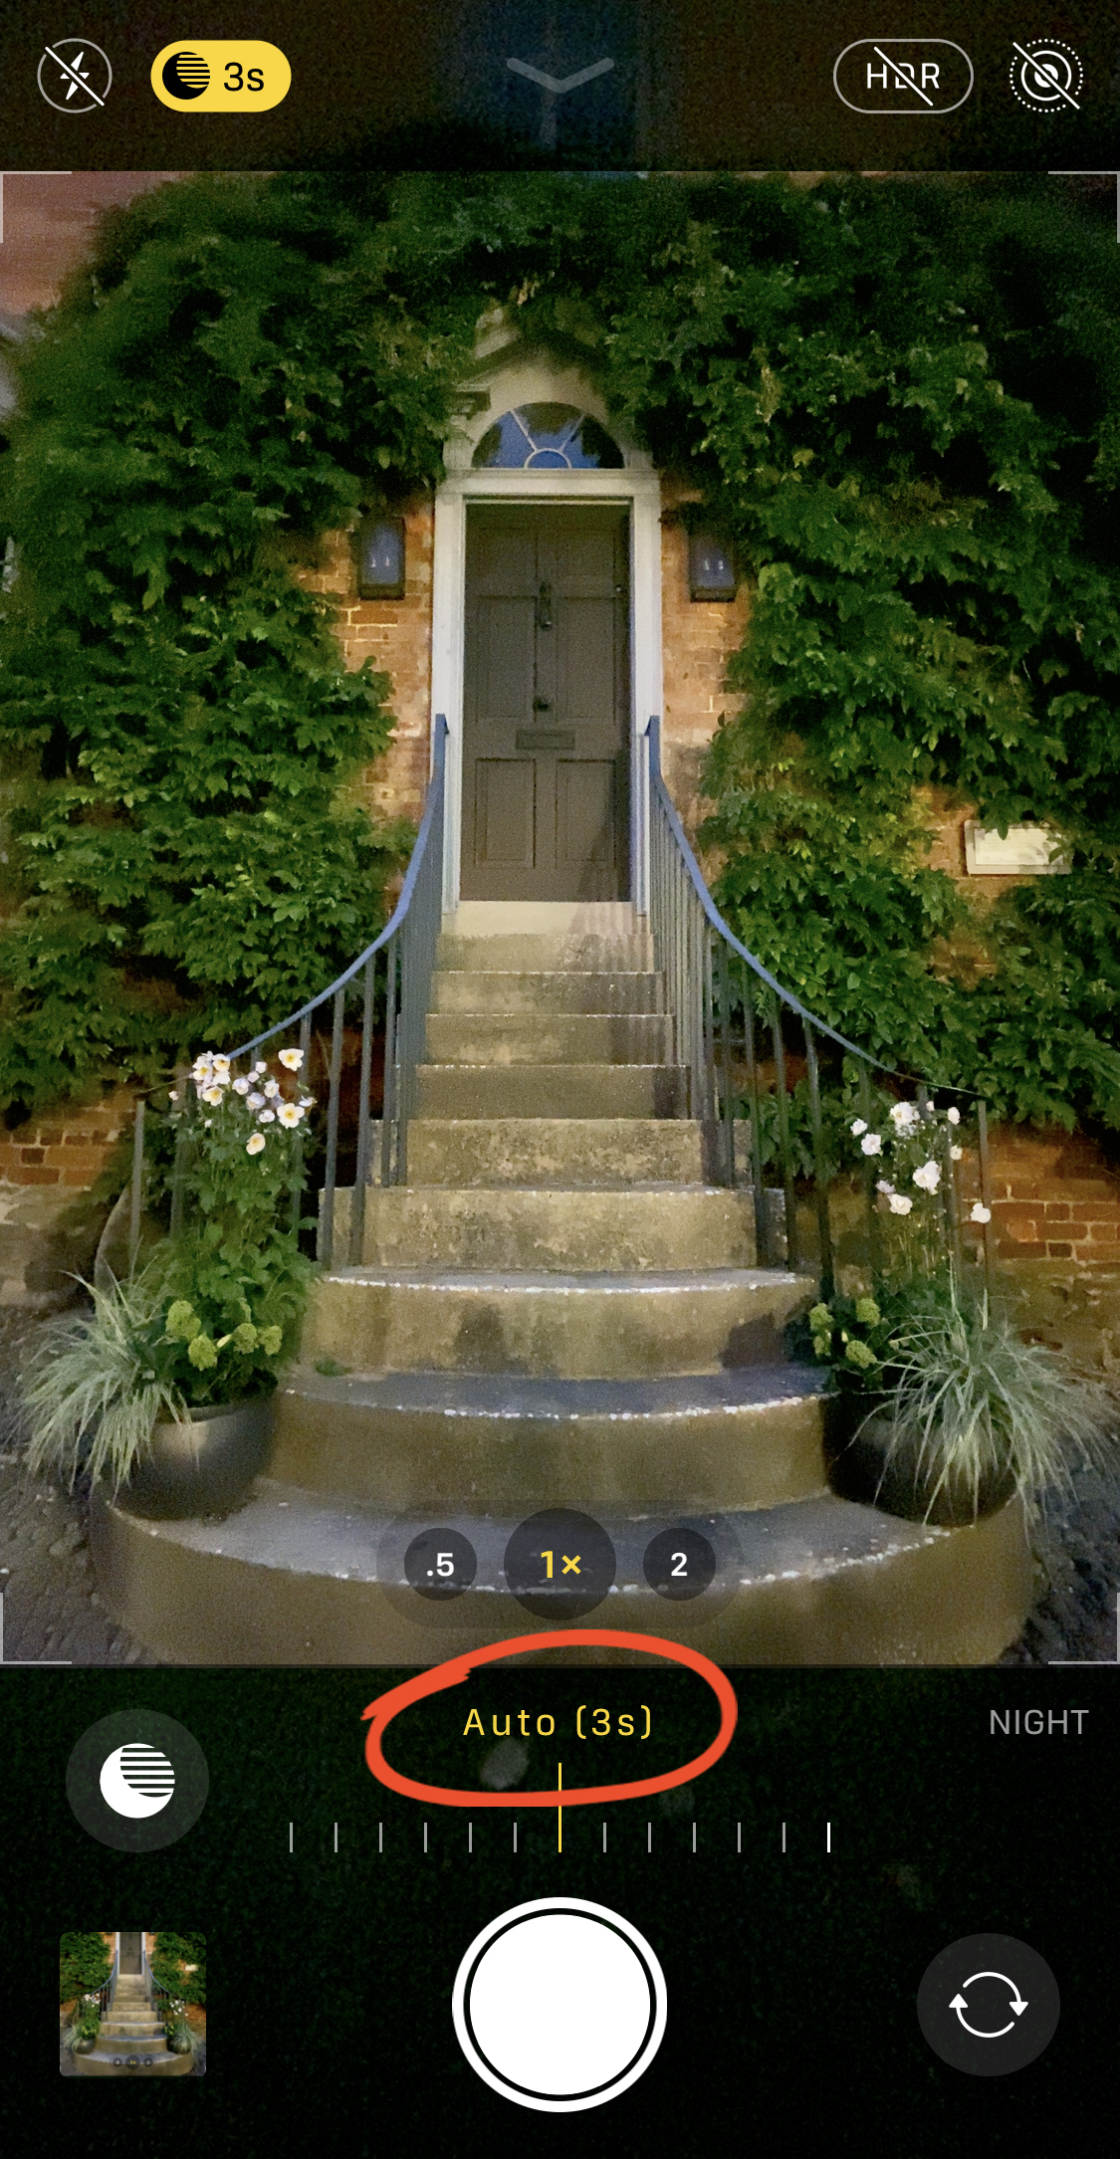
However, you can increase the exposure fourth dimension if yous wish. Simply drag theExposure Time slider correct to the Max setting.

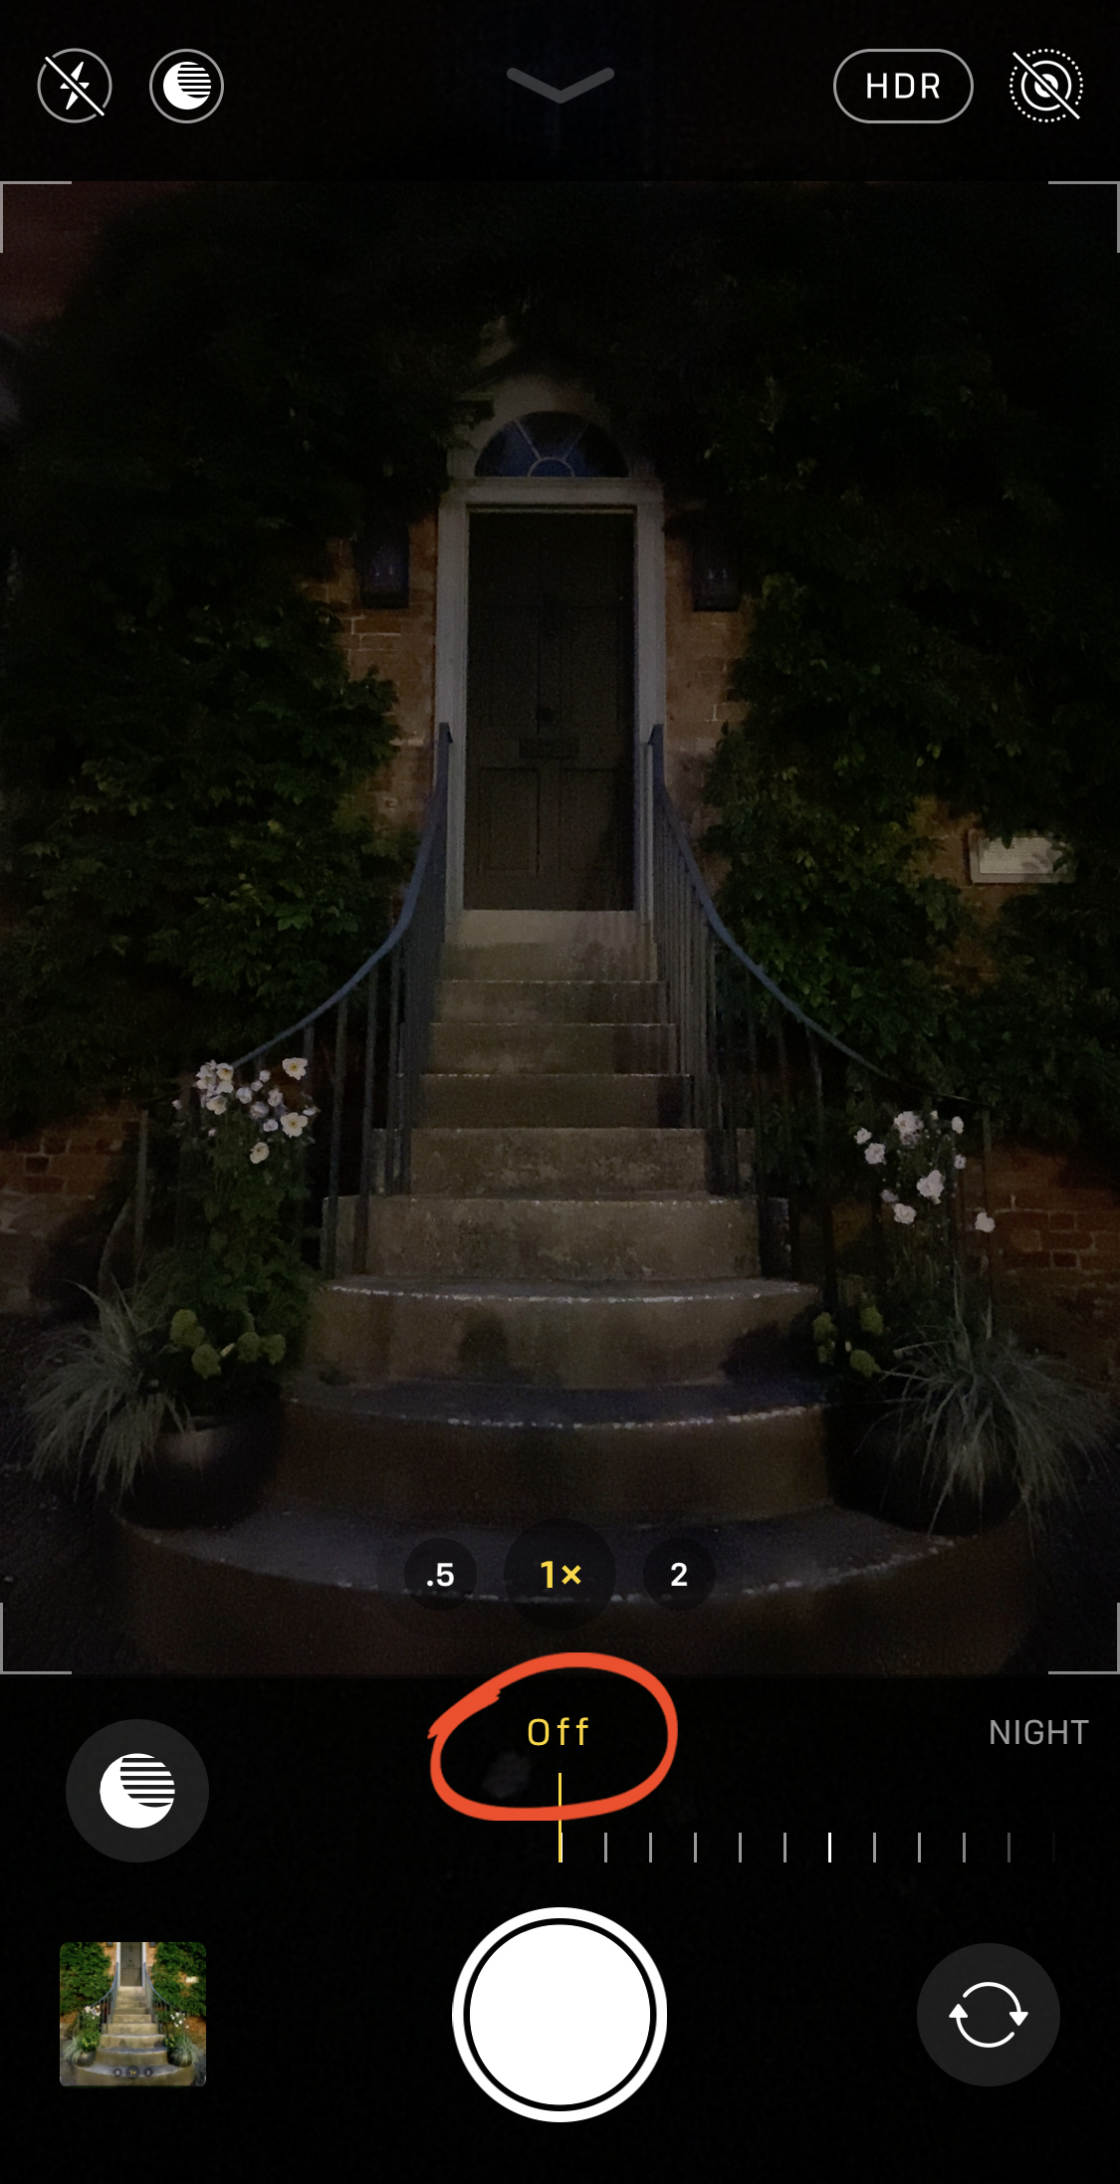
If you would prefer not to employ Night mode, drag the slider left to the Off setting.
When you've selected the Dark mode exposure fourth dimension, tap the shutter push to take your shot.
Hold your iPhone really nonetheless until the exposure is complete. If y'all move the camera, your photo might not be sharp.
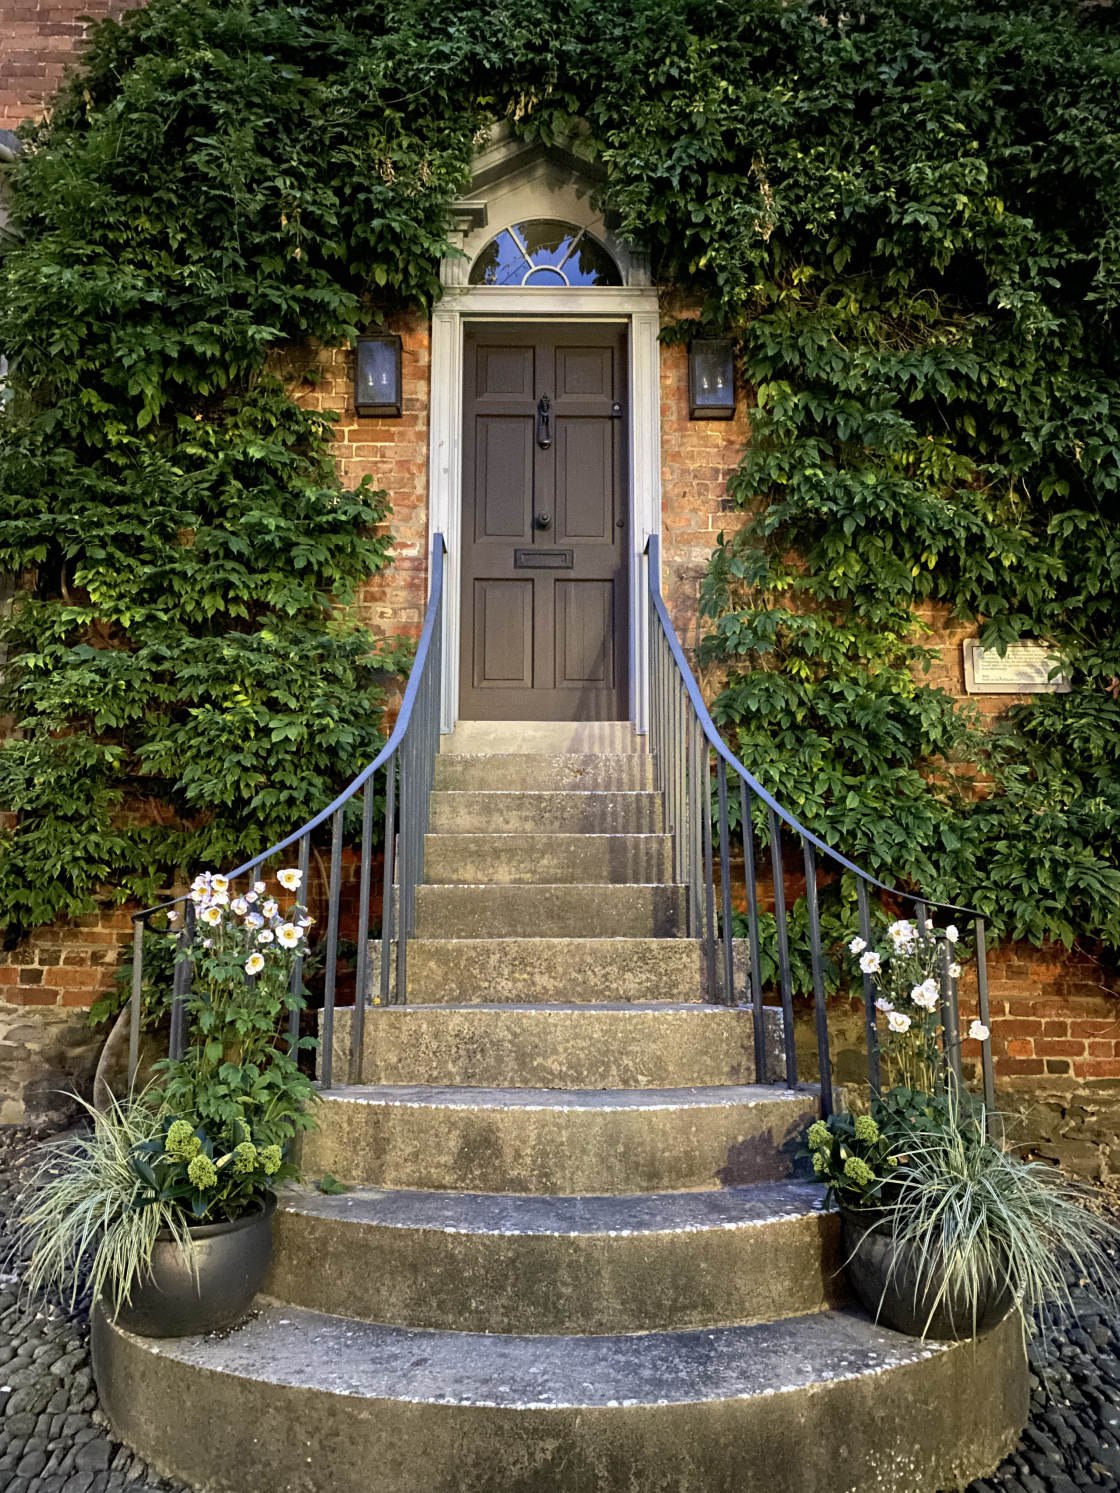
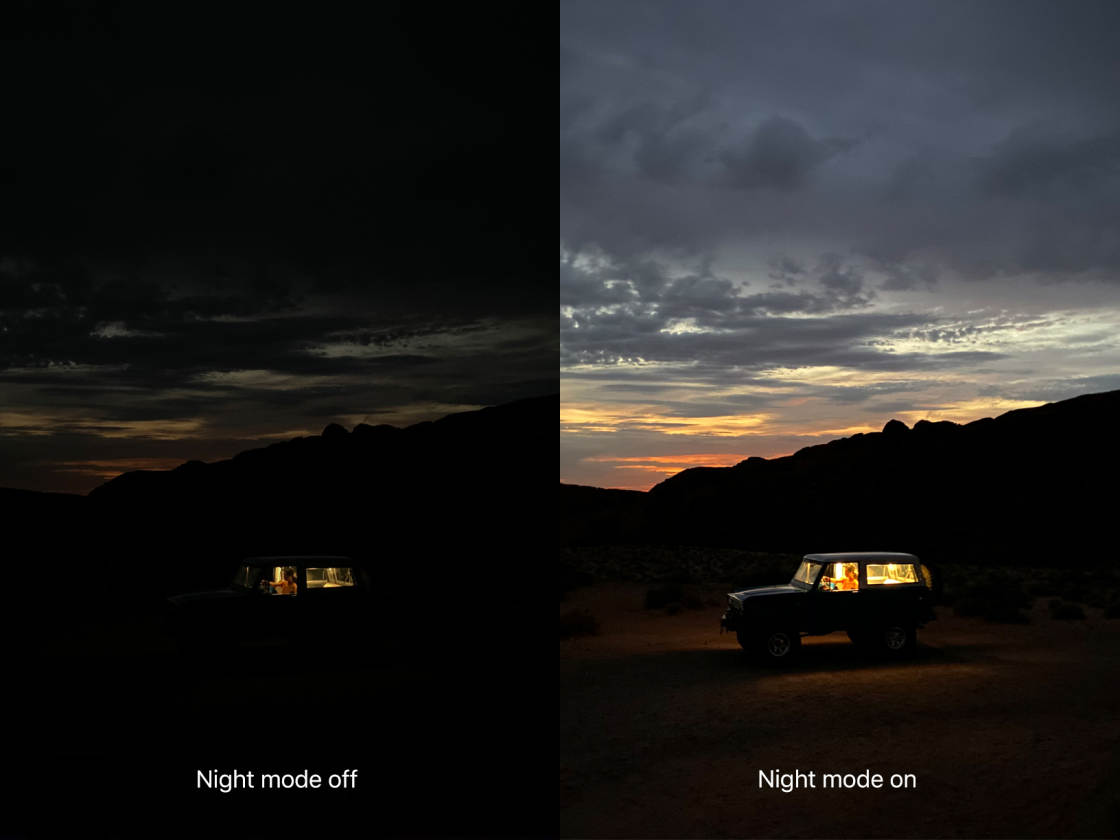
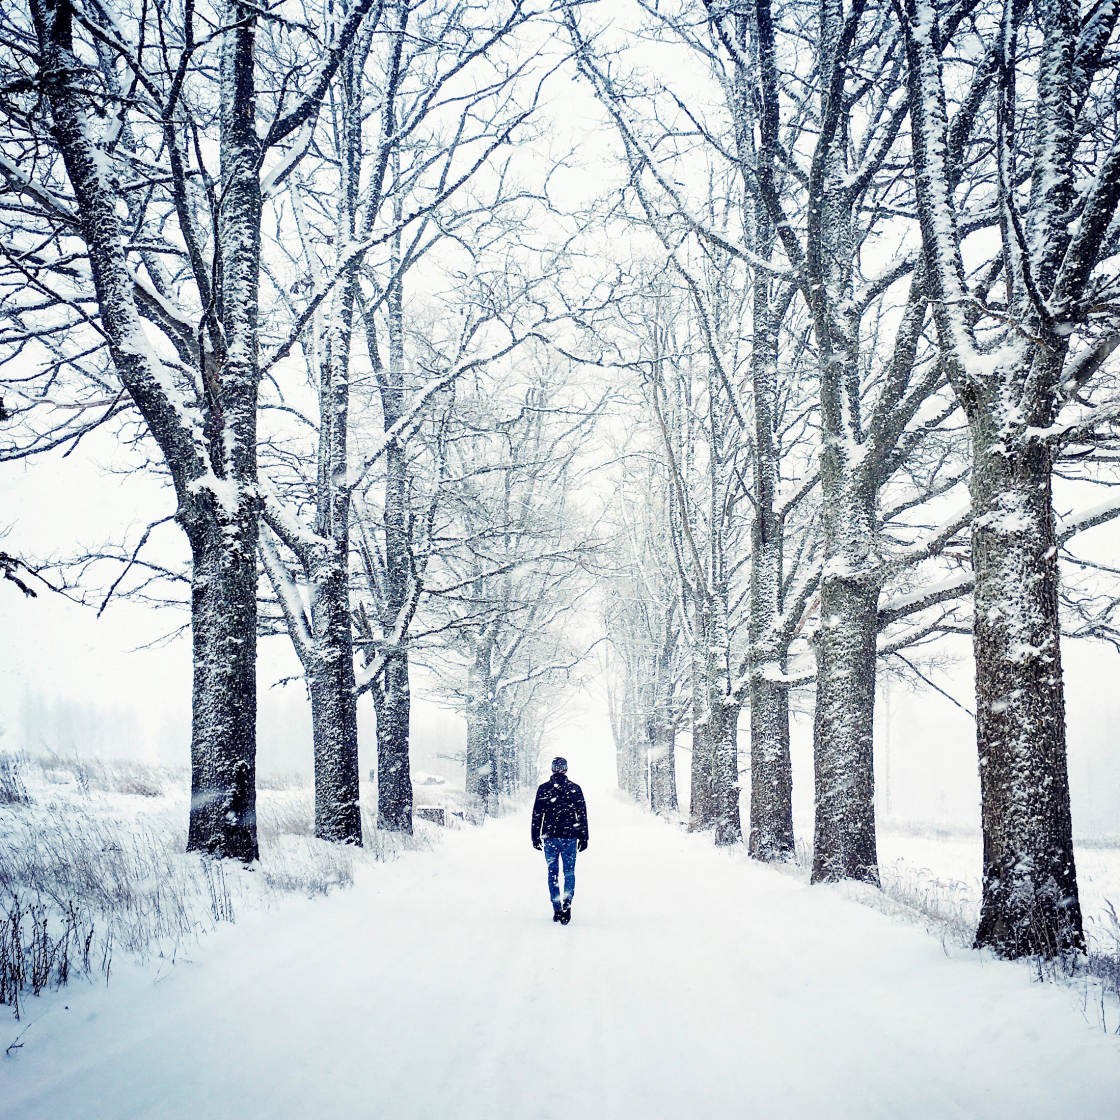
The above photograph was taken using Nighttime mode. It was taken at night with only a couple of street lamps illuminating the scene.
For comparison, below is the same building taken without Night mode.
As yous tin can see, Night mode allows yous to capture a brighter paradigm with vibrant colors and sharp detail.
So, if yous have i of the iPhone 11 models, don't exist afraid to shoot at night. You'll be amazed at the results!
Notation that if you're shooting in medium to low light, and Night mode isn't activated, your camera may utilize Deep Fusion instead. Deep Fusion is an automatic photographic camera feature (yous can't command it) that captures more texture and detail in medium to low light scenes.
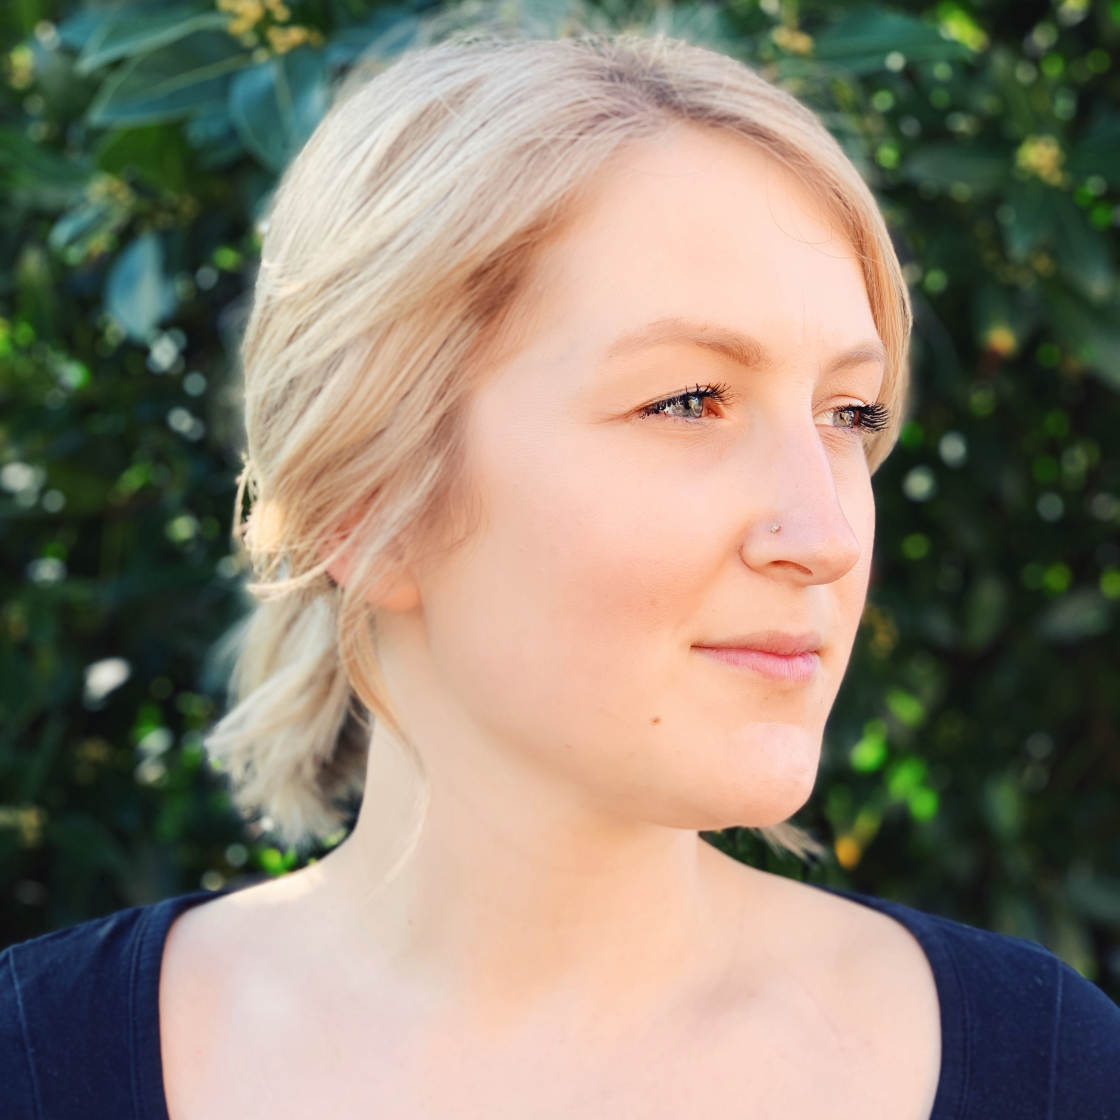
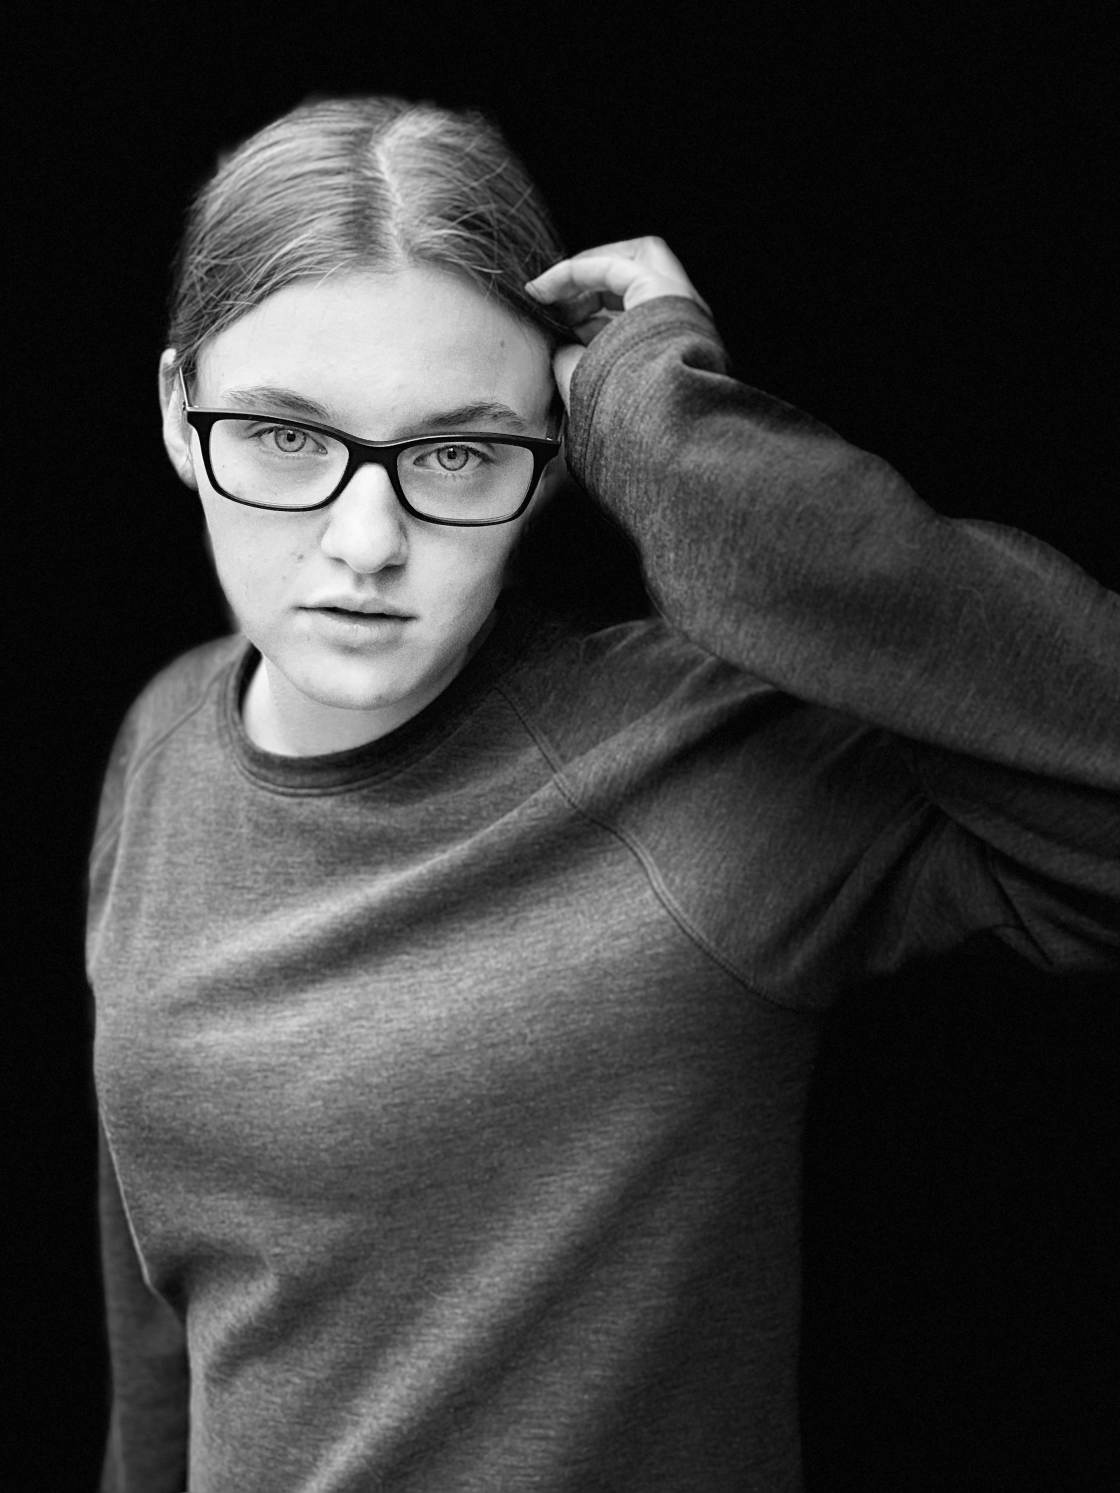
v. Blur The Background In Your Photos With Portrait Mode
Accept yous ever wondered how to blur the groundwork in your portrait photos?
With the iPhone camera, information technology's easy. Yous just demand to shoot in Portrait mode.
Portrait style is bachelor in the built-in Camera app on the post-obit iPhones:
iPhone 11, iPhone 11 Pro, iPhone 11 Pro Max, iPhone XS, iPhone XS Max, iPhone XR, iPhone 10, iPhone 8 Plus, and iPhone 7 Plus.
Portrait mode uses depth-outcome software to mistiness the background in your photos.
This ways y'all can hands create professional person-looking portrait photos with your iPhone.
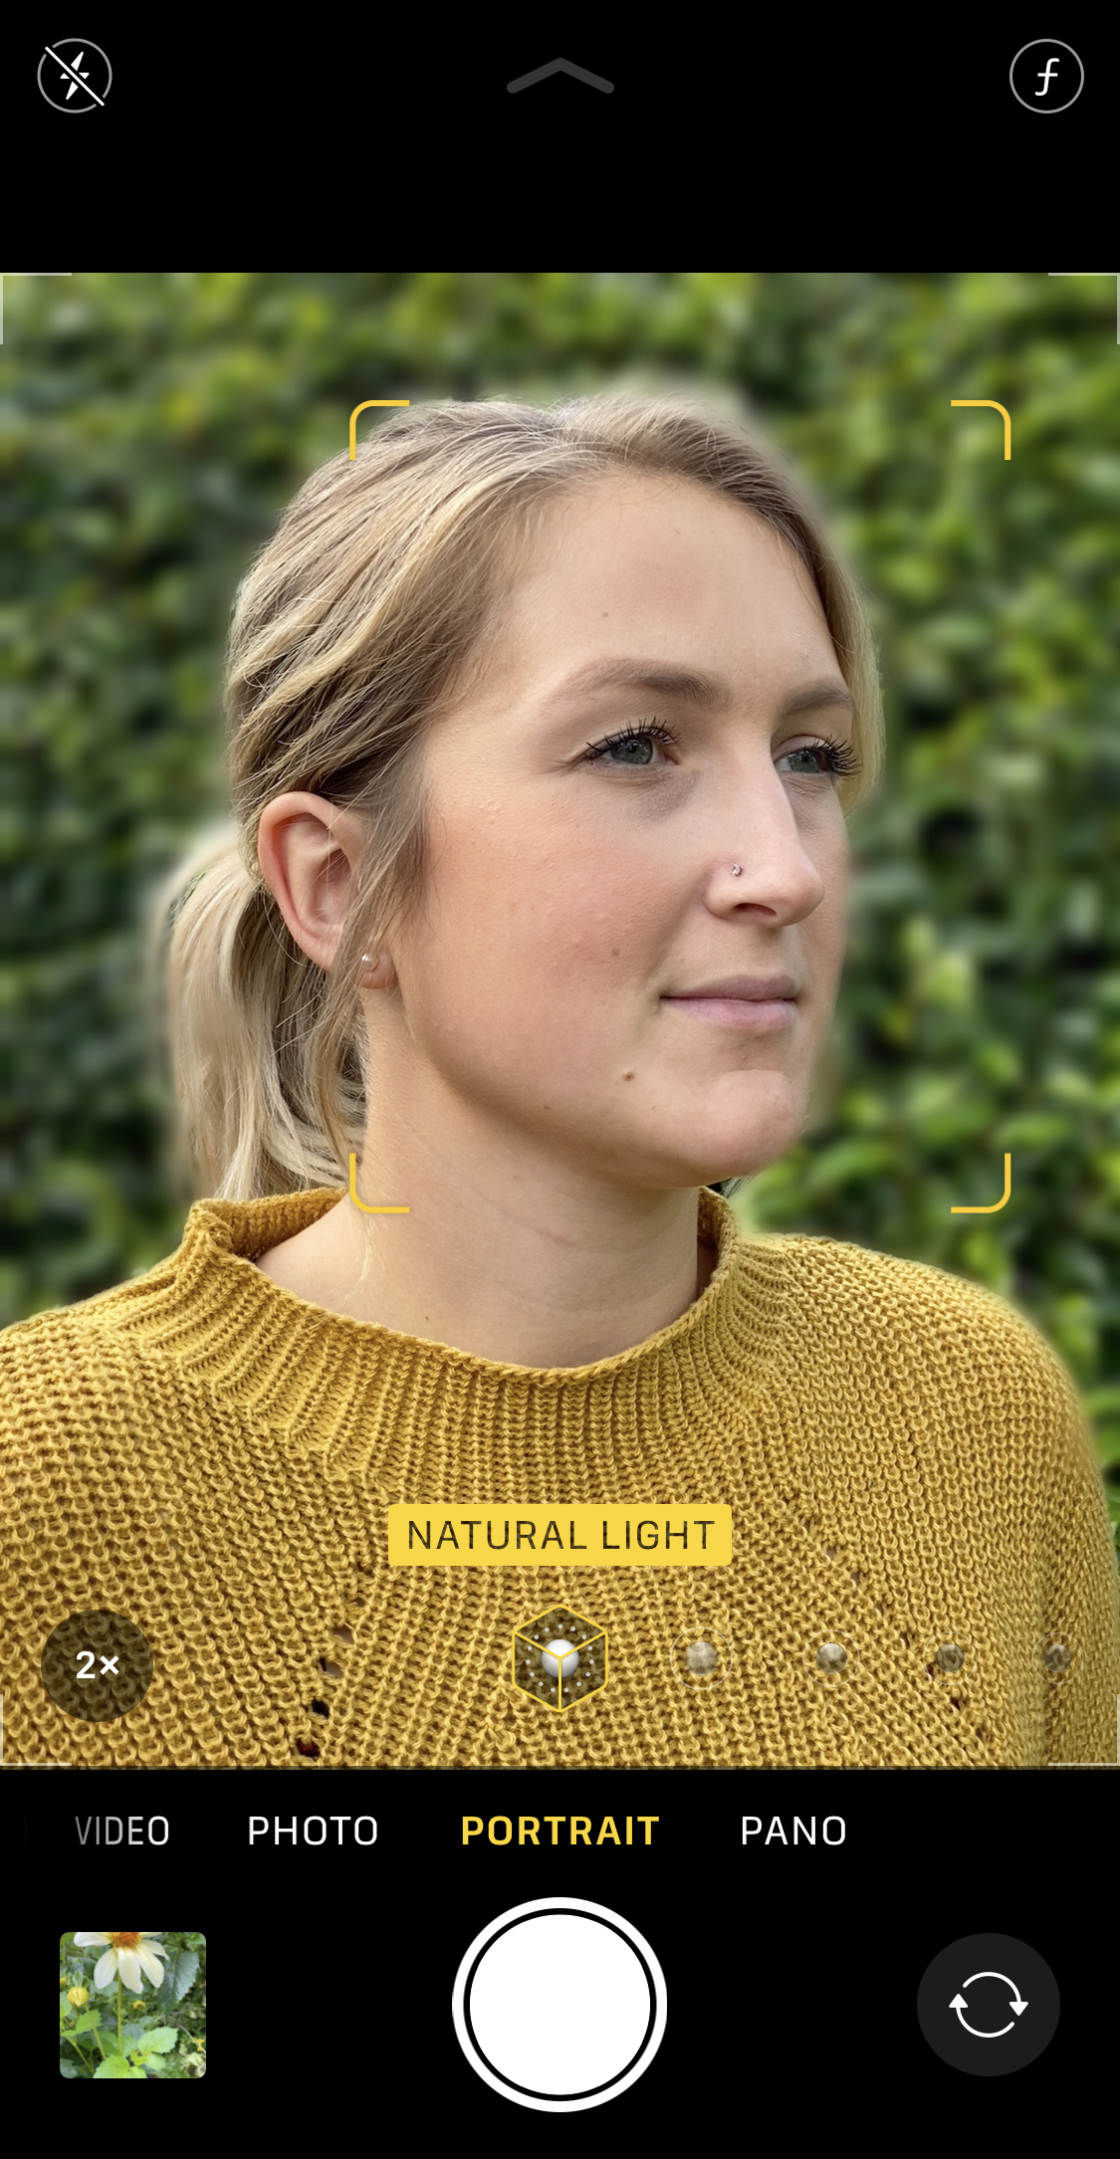
Then, how practise y'all use Portrait style?
Kickoff, swipe across the shooting modes at the bottom of the screen and selectPortrait.
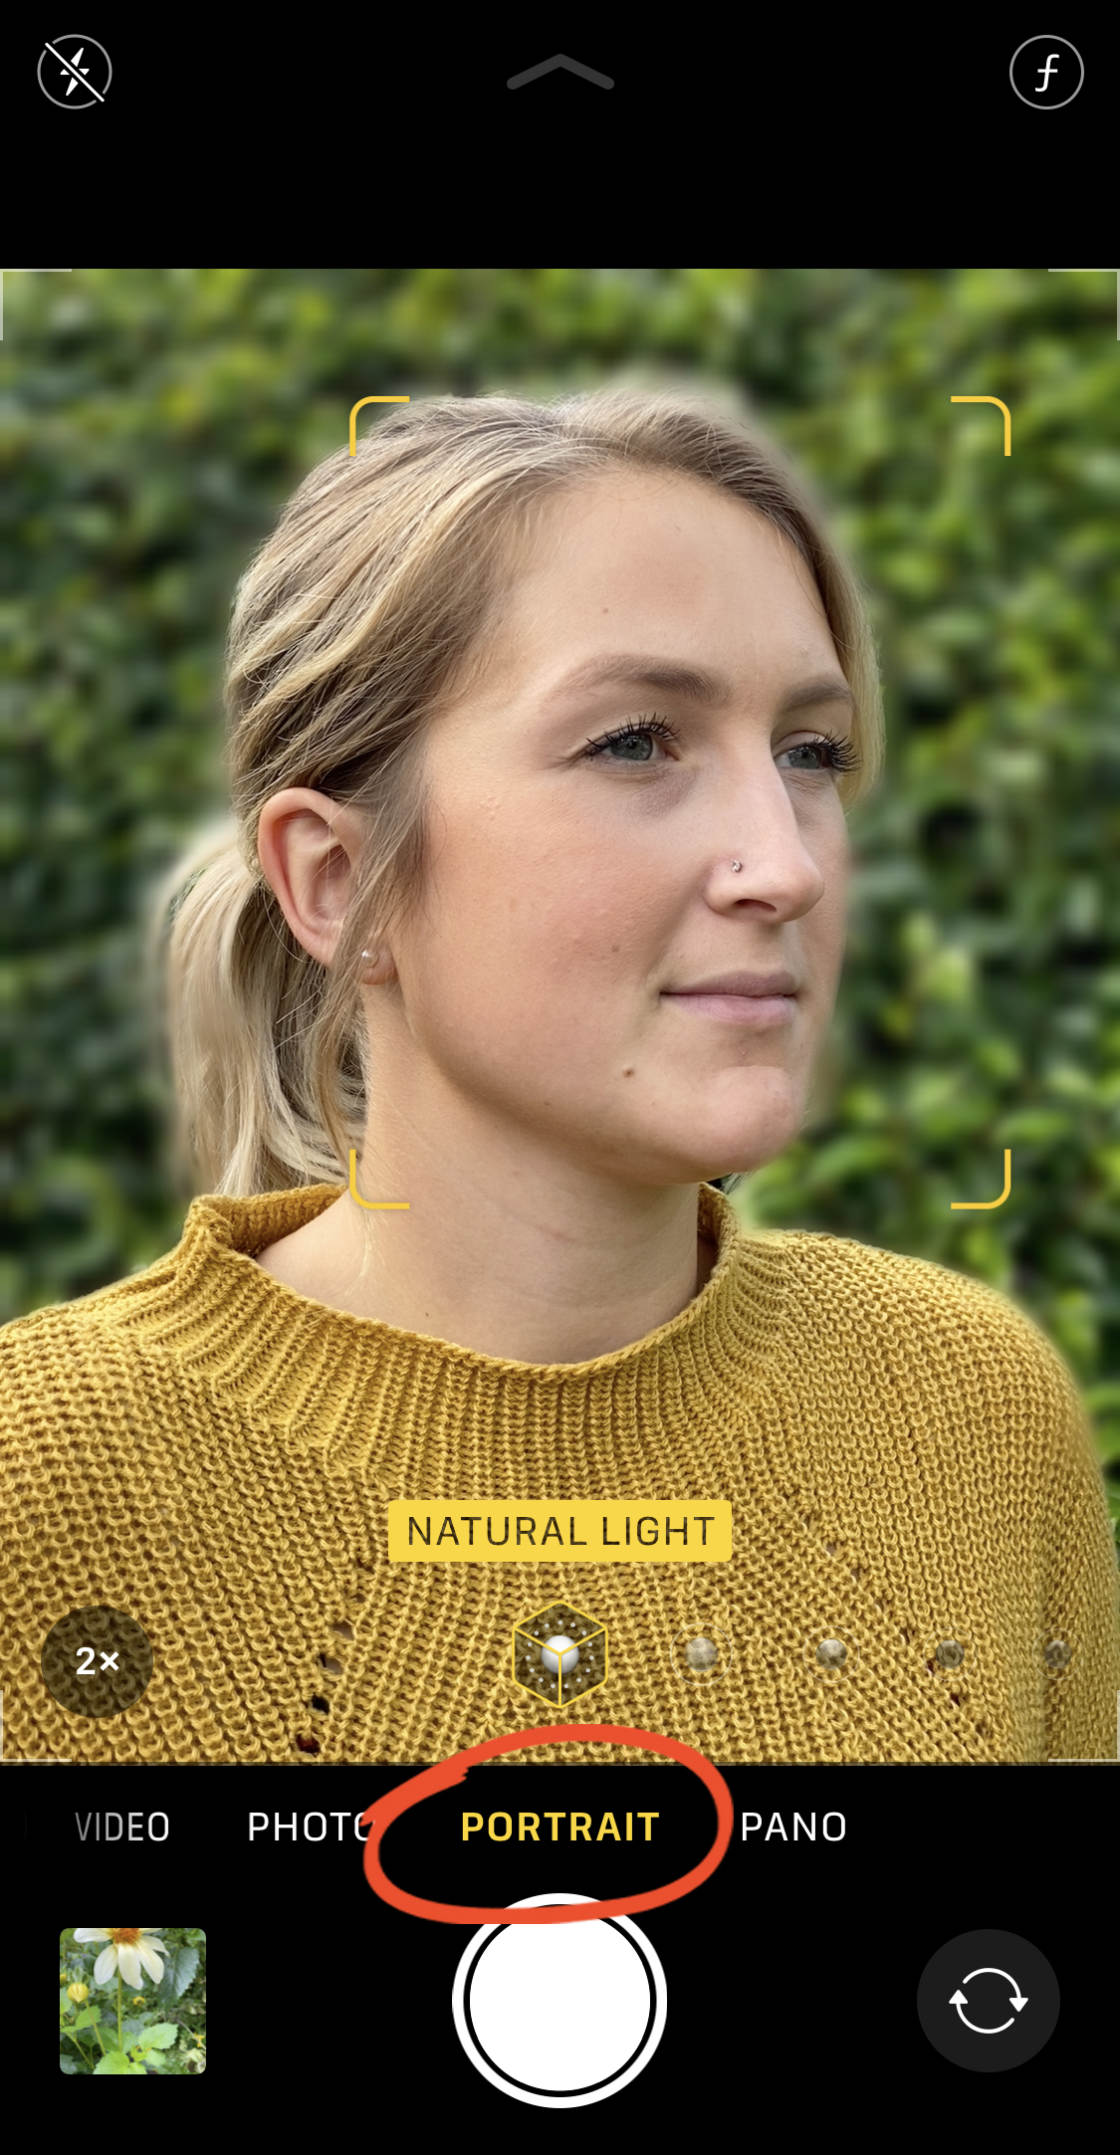
Ensure your subject is betwixt 2 and eight feet abroad. If they're likewise close or too far away, the depth-effect won't work.
When Portrait fashion is gear up, y'all'll run into the words Natural Light in yellow.
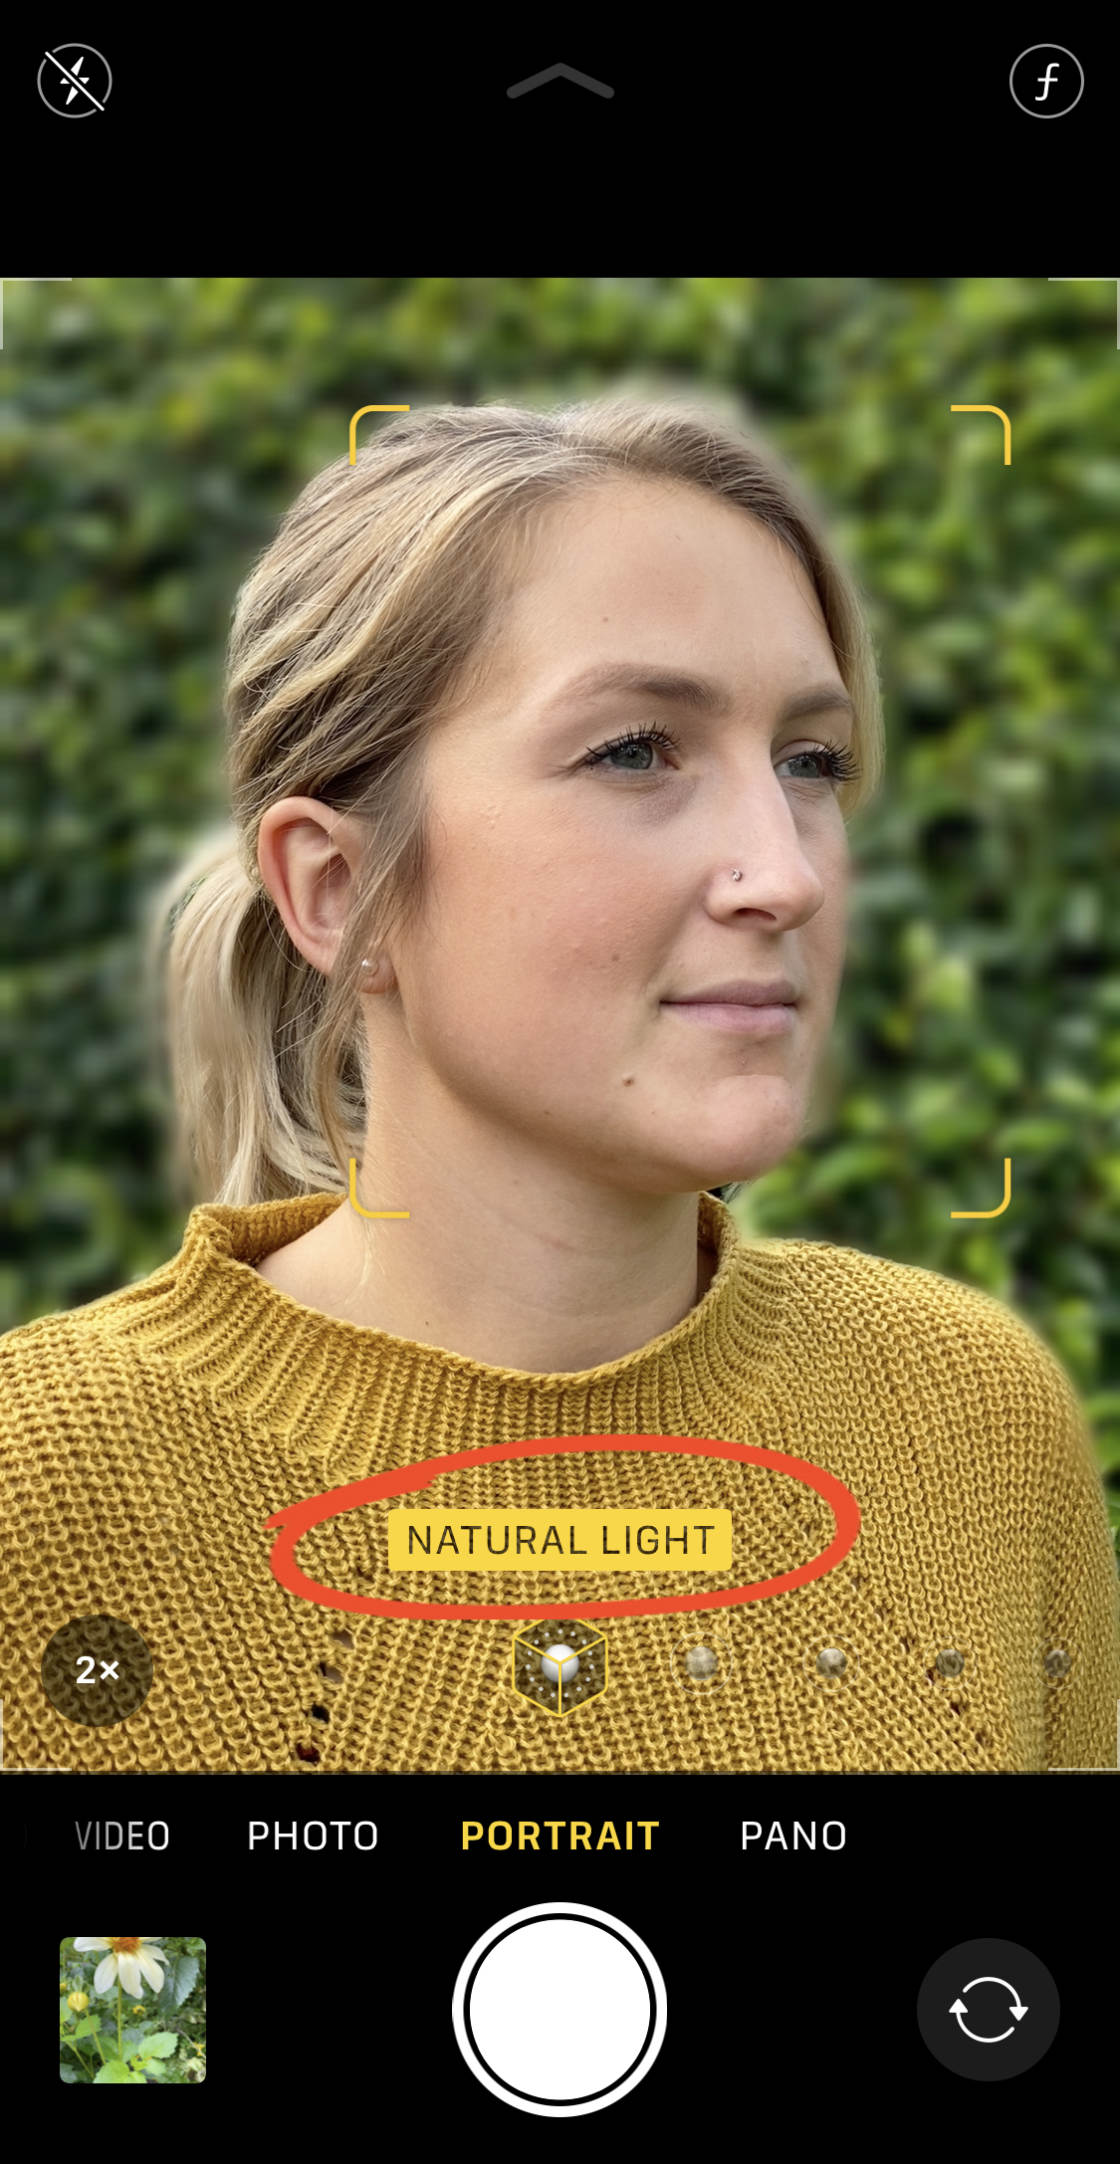
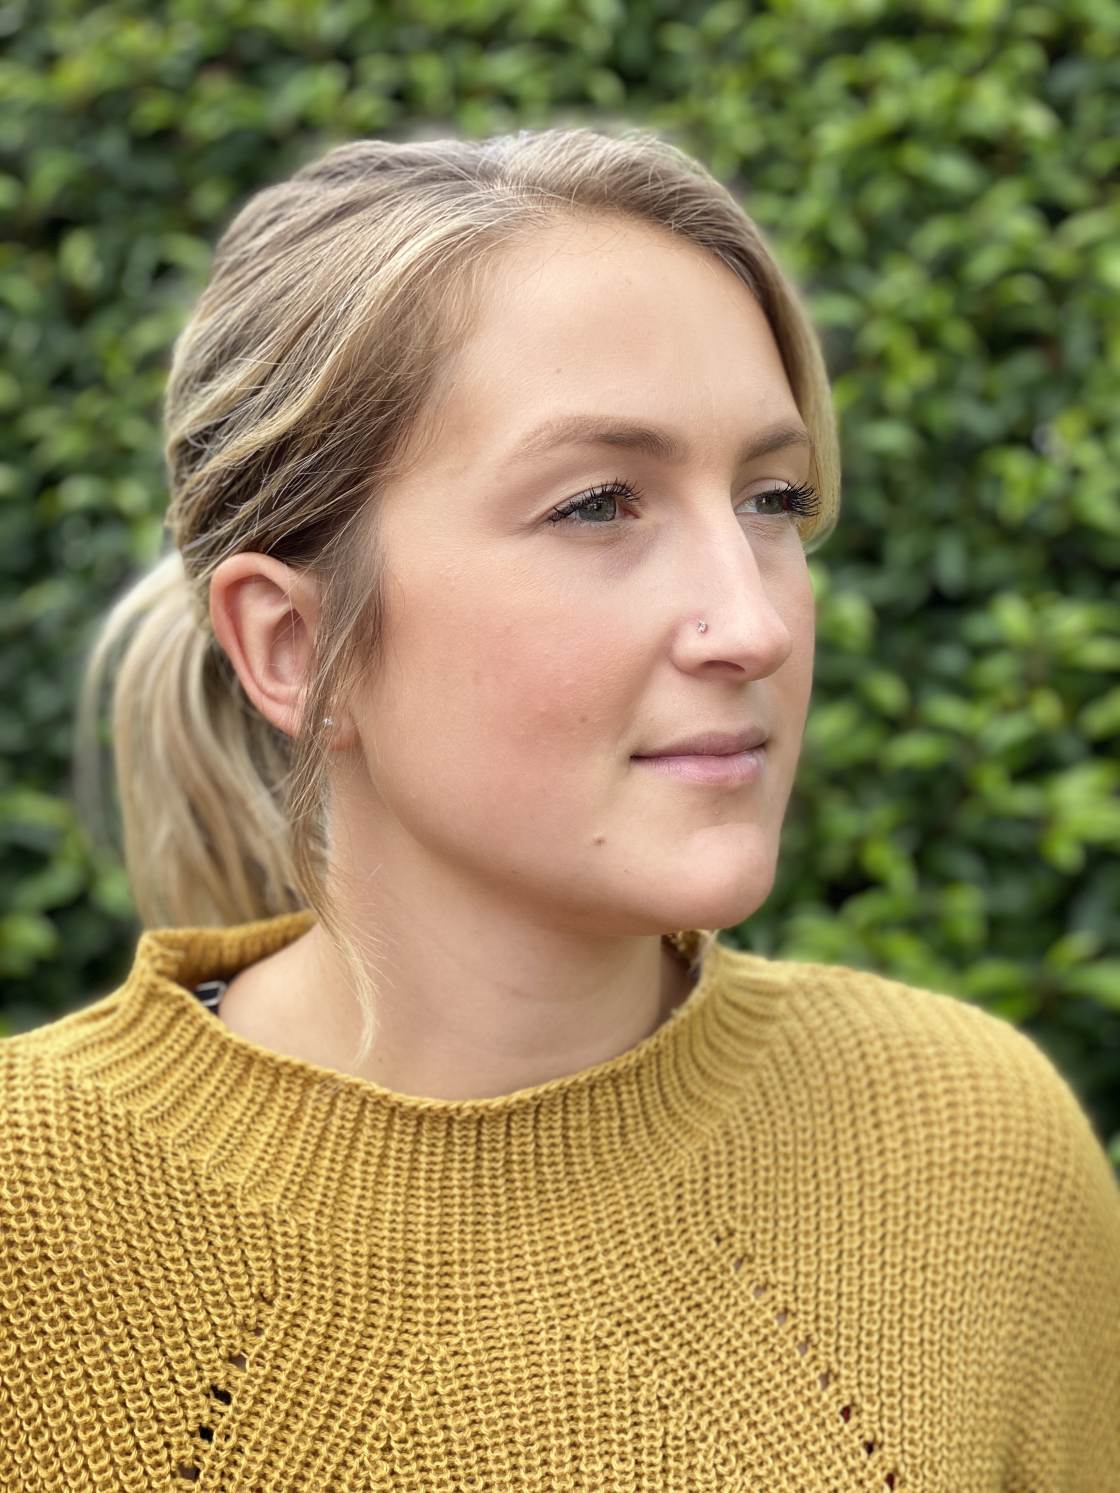
Now, printing the shutter push to accept a stunning portrait with a gorgeous blurred background!
But what if you change your listen and make up one's mind the photograph would look improve without the blurred background?
The iPhone makes it easy to remove the depth effectafter taking a photo.
To remove the blurred groundwork, open your portrait photo in thePhotos app, then tapEdit.
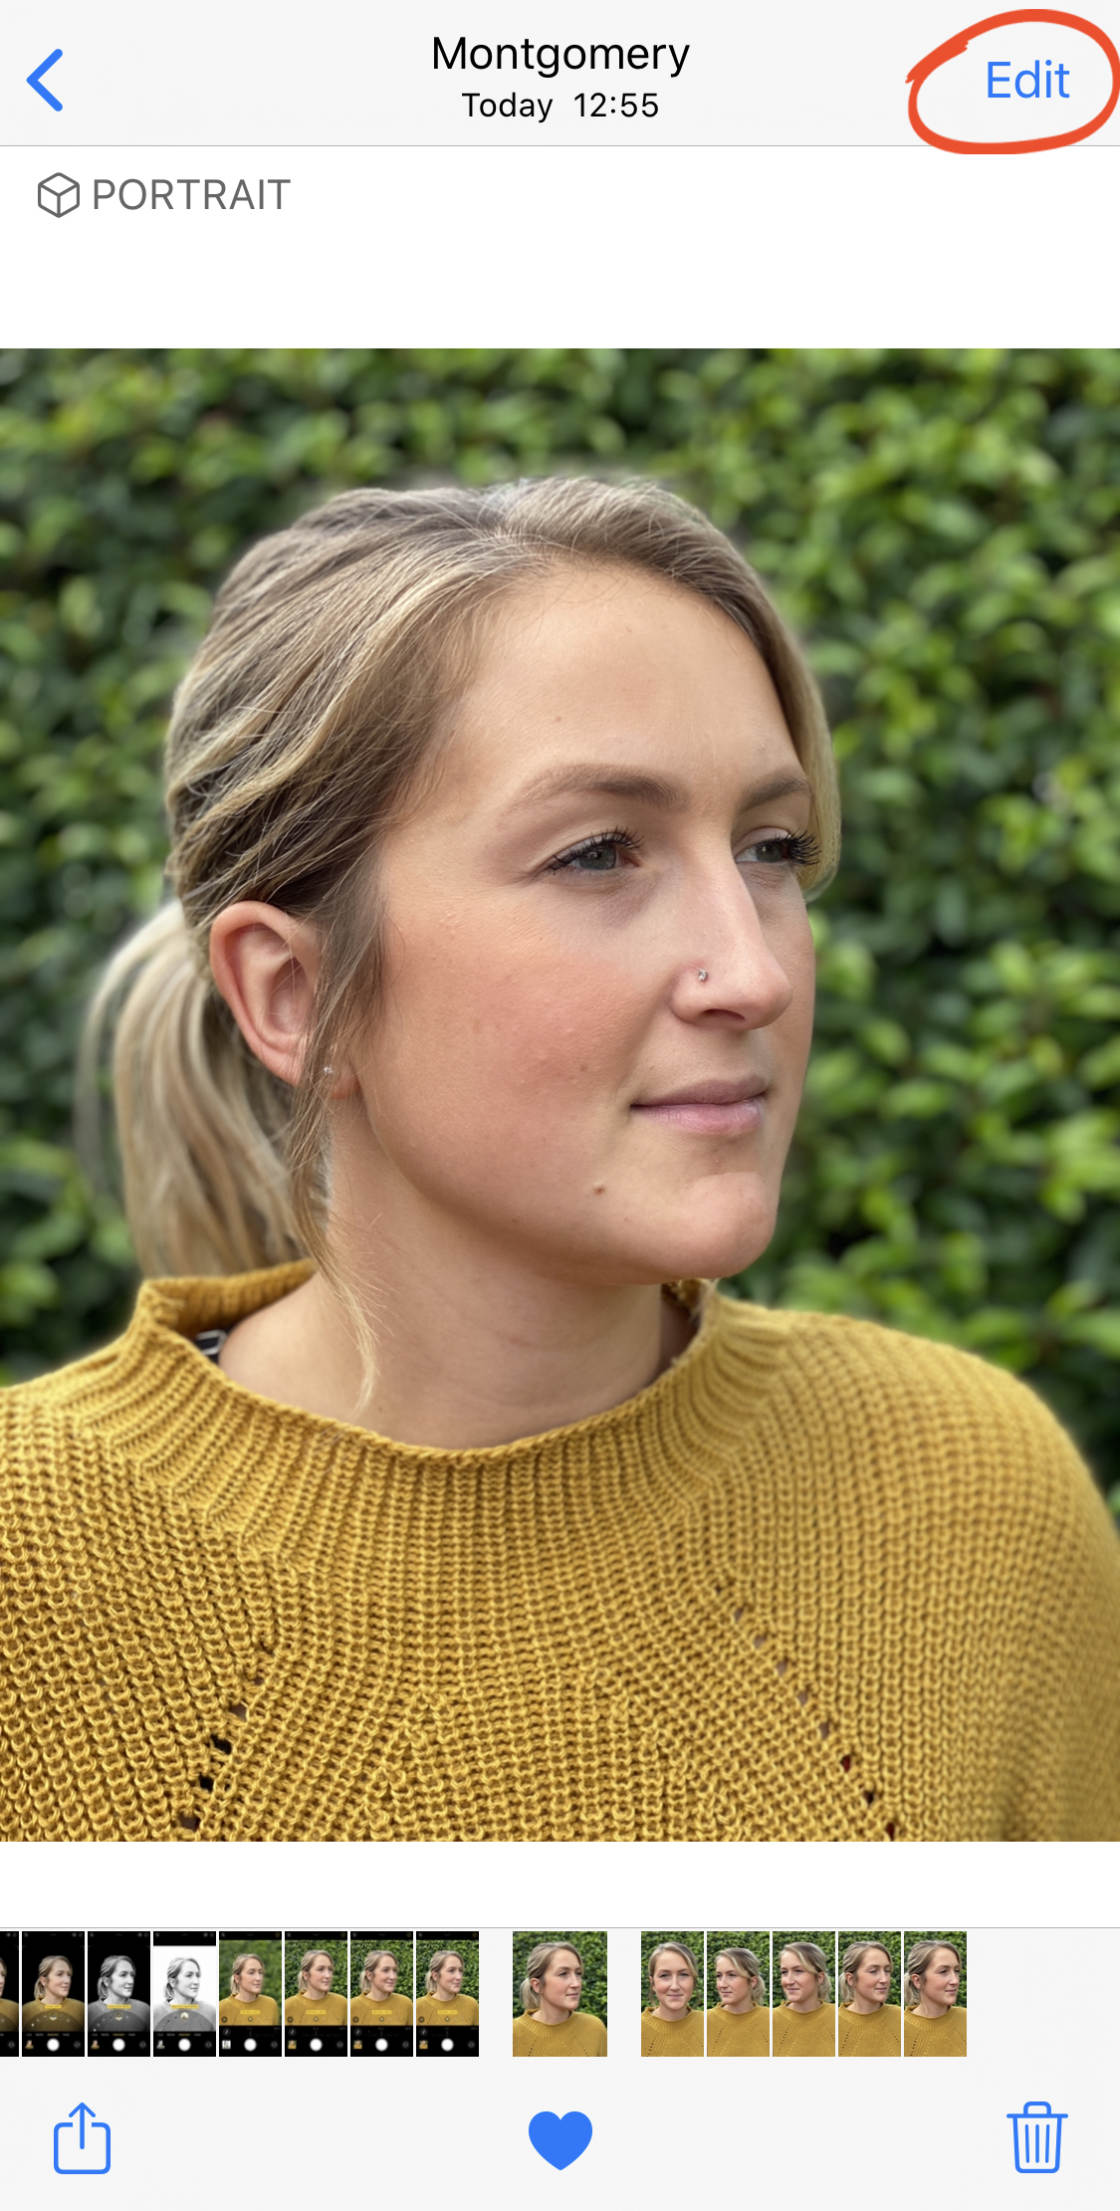
Tap the yellowPortrait icon at the top of the screen to remove the blur. Y'all tin re-apply the blurred background at whatsoever time past tapping the Portrait icon again.
TapDone to save the changes.
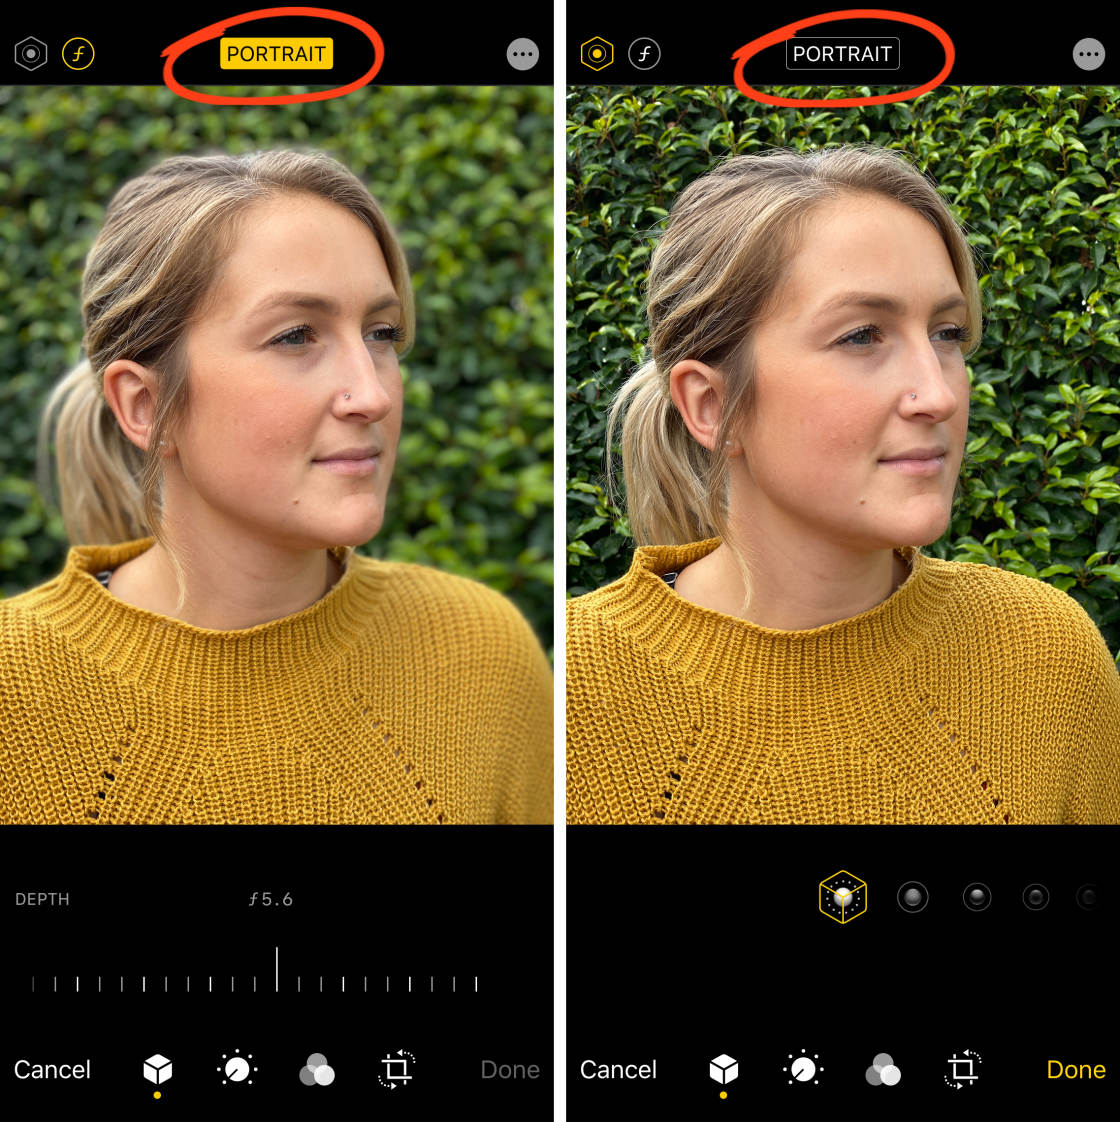
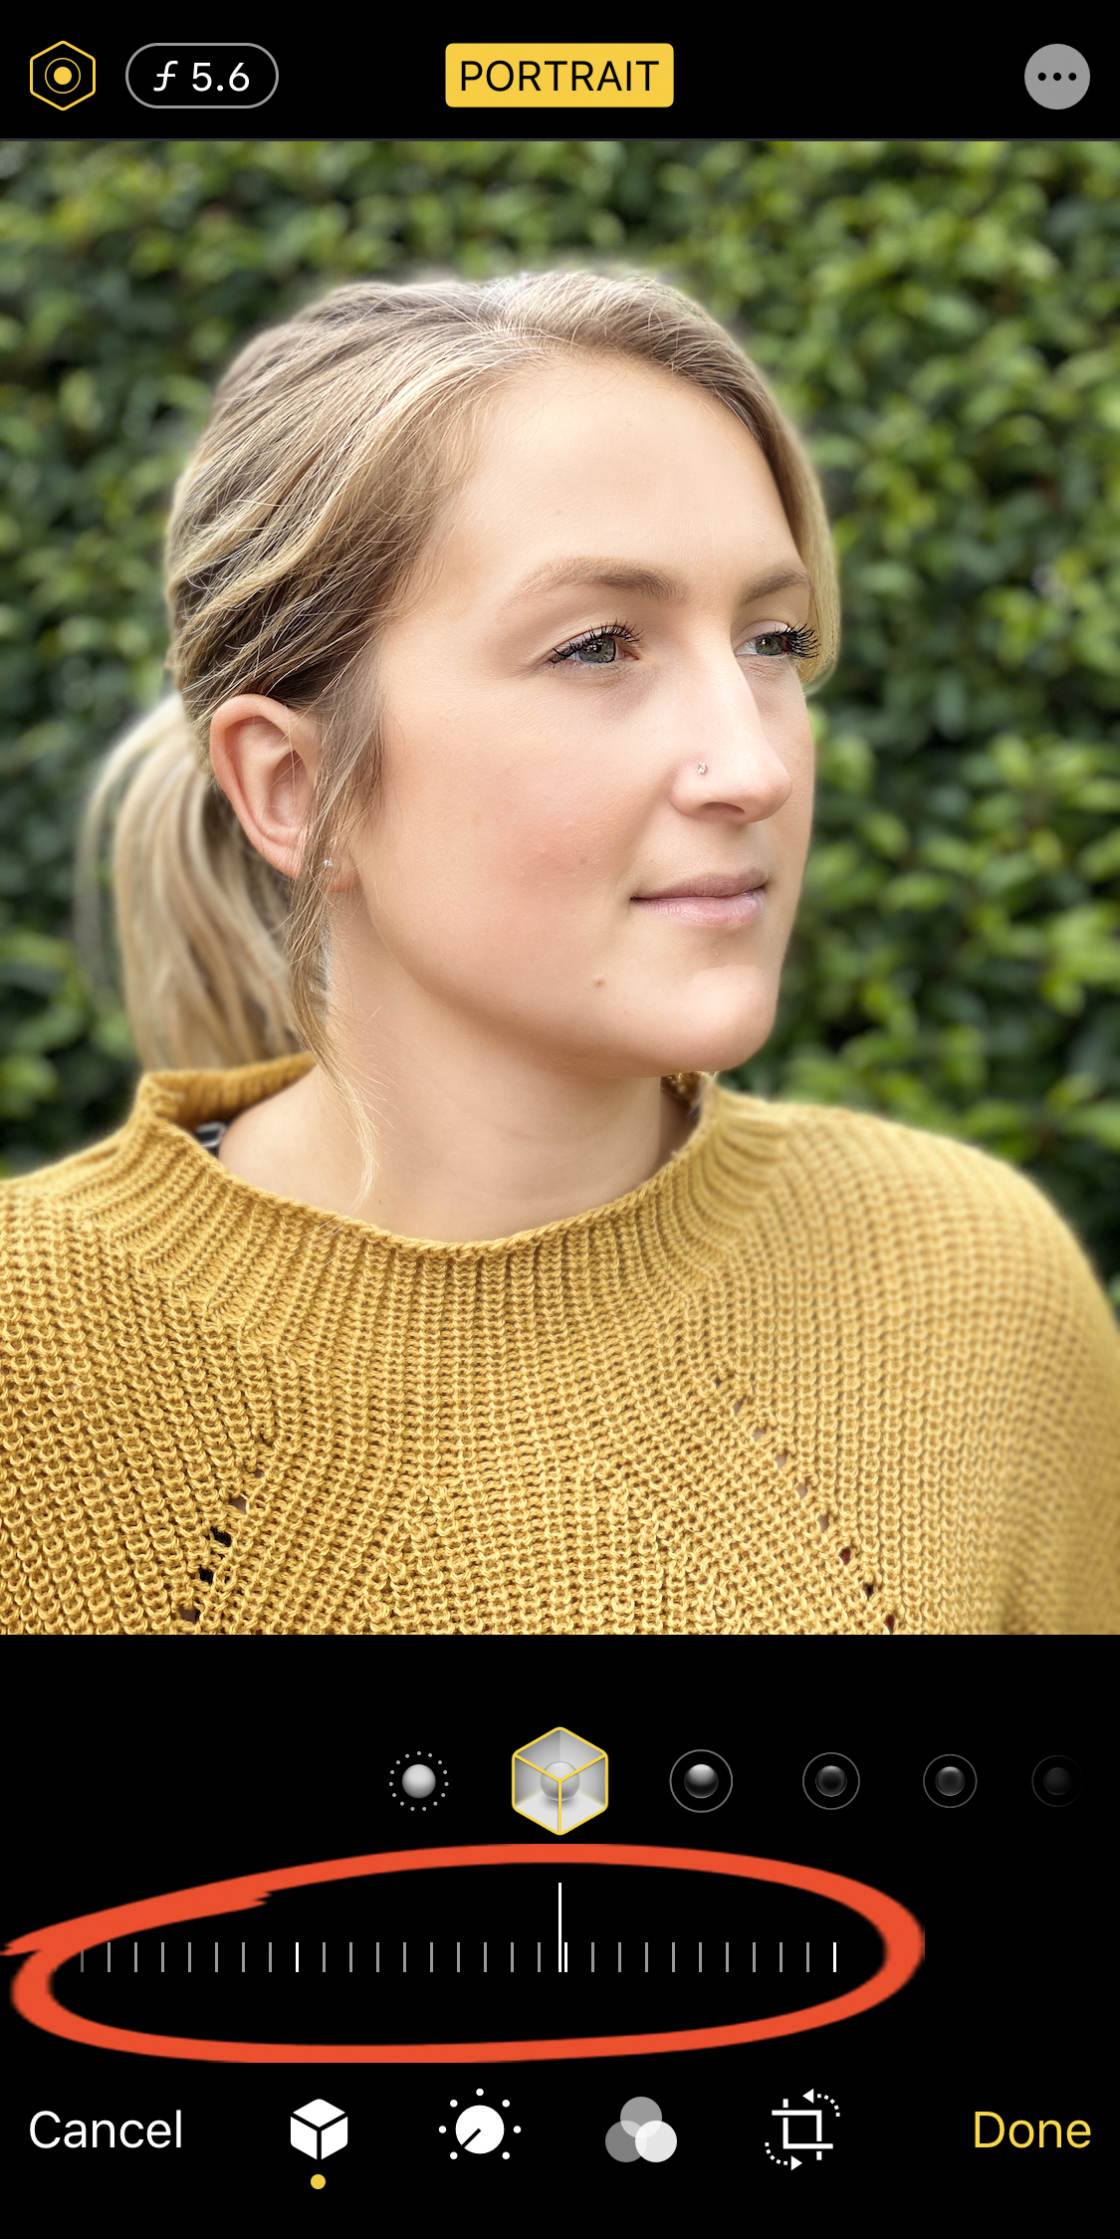
If yous take the iPhone 11, 11 Pro, eleven Pro Max, XR, XS, or XS Max, you can get even farther with the Portrait mode options.
On these iPhones, y'all tin control the strength of the background blur… after y'all've taken the shot.

First, y'all need to open your portrait photograph in the Photos app, and tap Edit.
Adjacent, tap thef/number icon at the summit left.
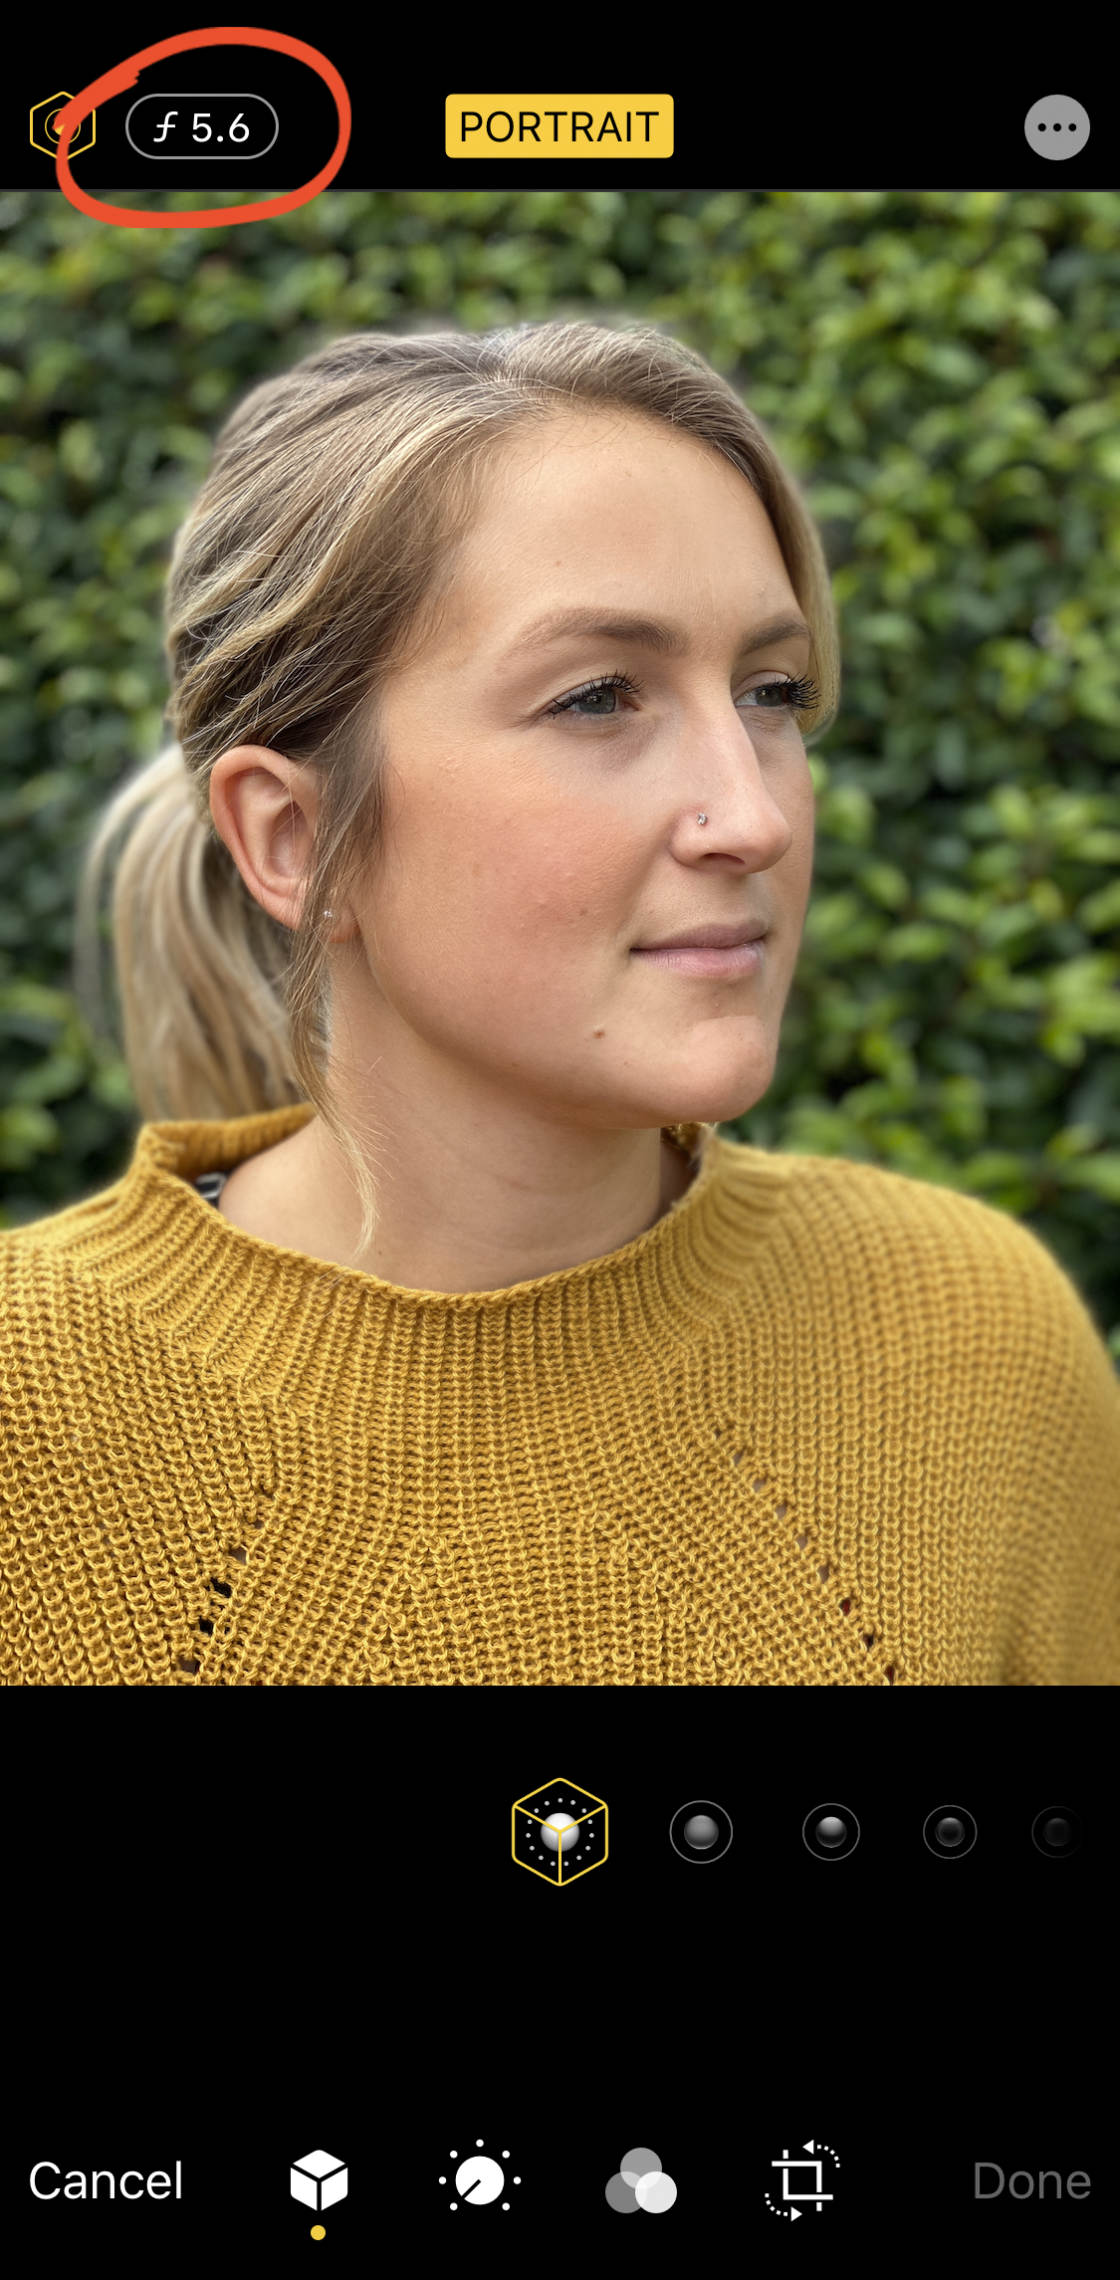
The Depth slider volition announced beneath your photo. Drag the slider left or right to make the background mistiness stronger or weaker.
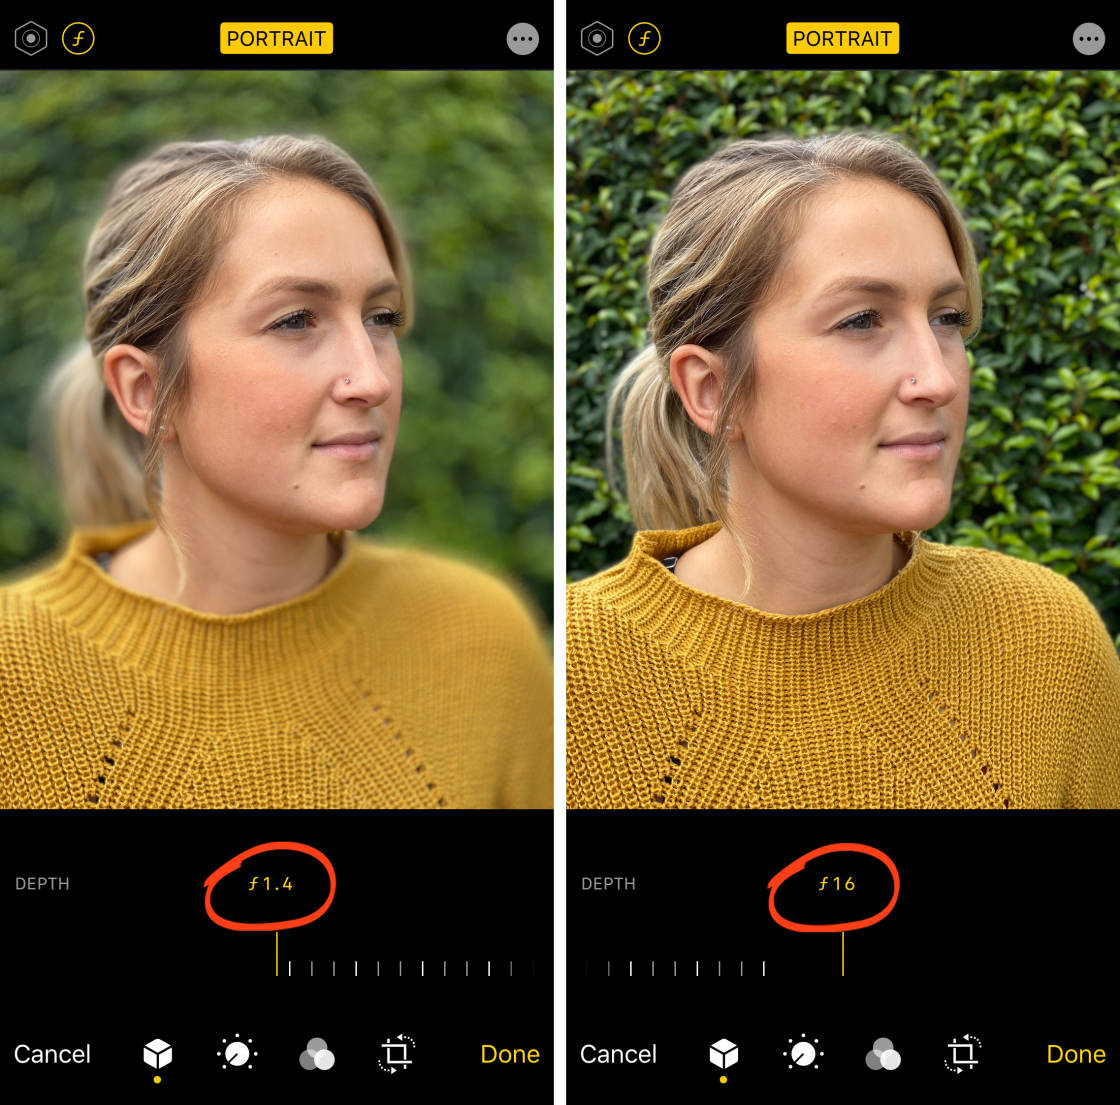
TapDone to relieve the changes.
Portrait manner allows you to take photos with beautiful, blurred backgrounds.
But there's even more than to Portrait manner than this!
Read on to find out how to make your portrait photos even more than stunning…
6. Apply Portrait Lighting To Add Studio Low-cal Furnishings To Your Photos
Do y'all desire to add professional studio lite furnishings to your portrait photos?
Yous can do merely that with the iPhone'south Portrait Lighting feature.
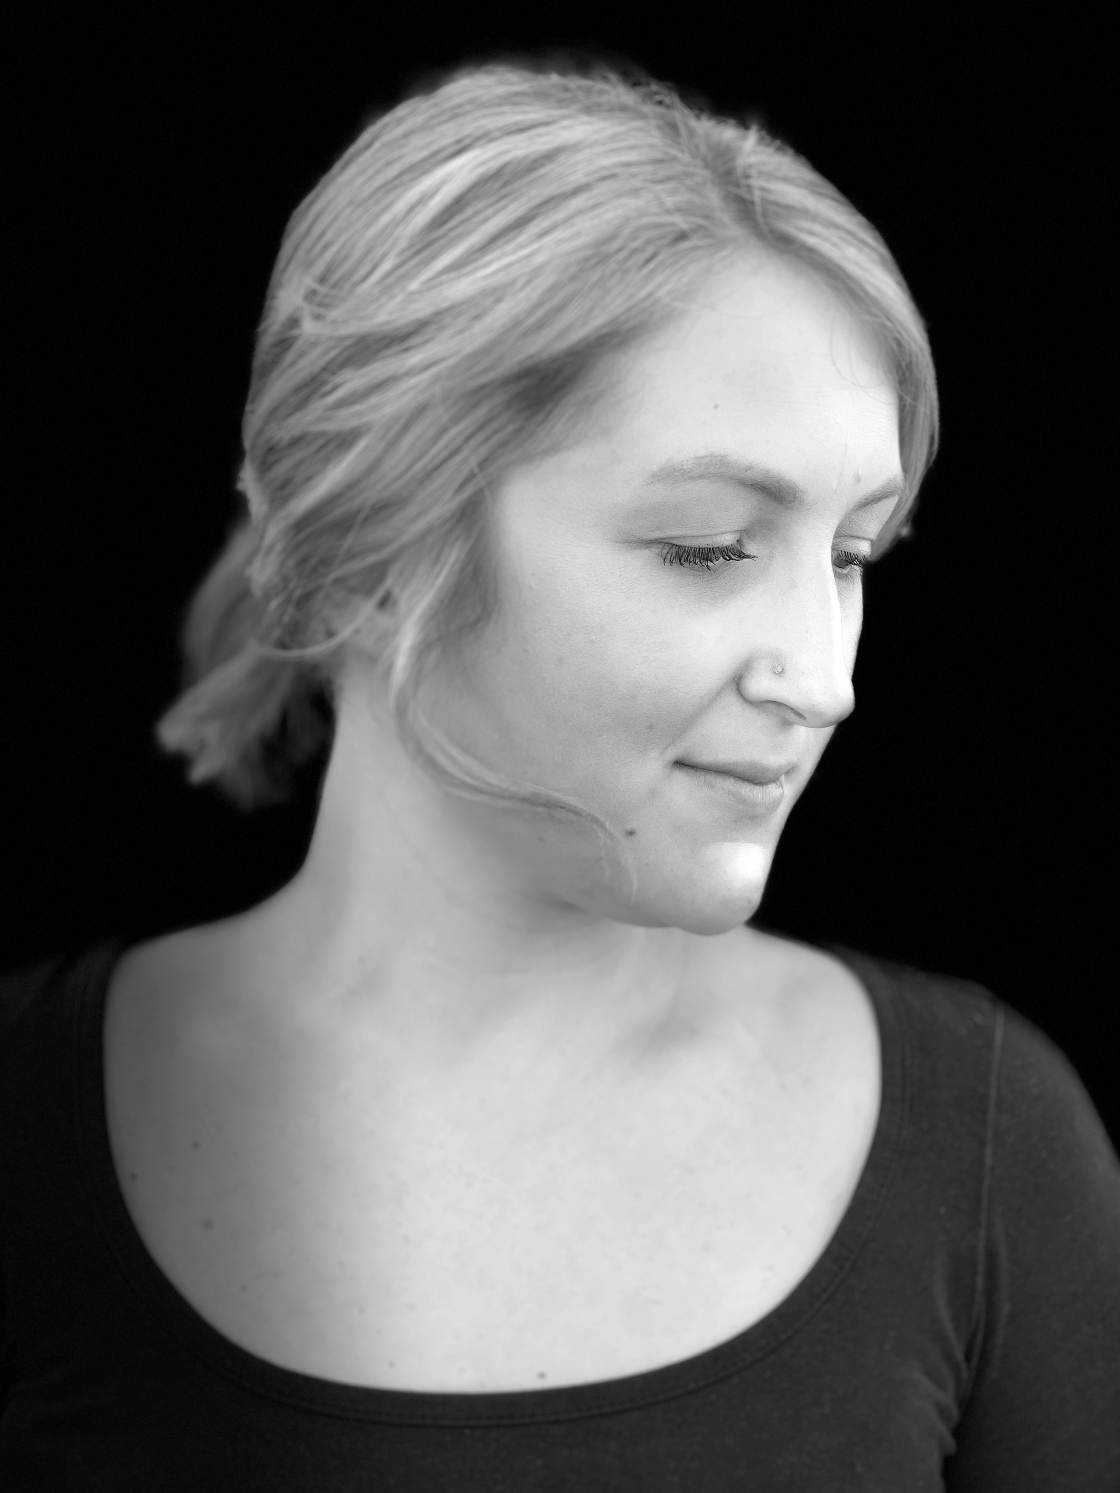
You tin apply different lighting effects when shooting in Portrait mode. But information technology's easier to experiment with the effectsafter you lot've taken the photo.
So, once you've taken a photograph with Portrait style, open it in thePhotos app, and tap Edit.
Ensure the Portrait Lighting (hexagon) icon is selected at the elevation left. The Portrait Lighting icons volition be displayed below your photo.
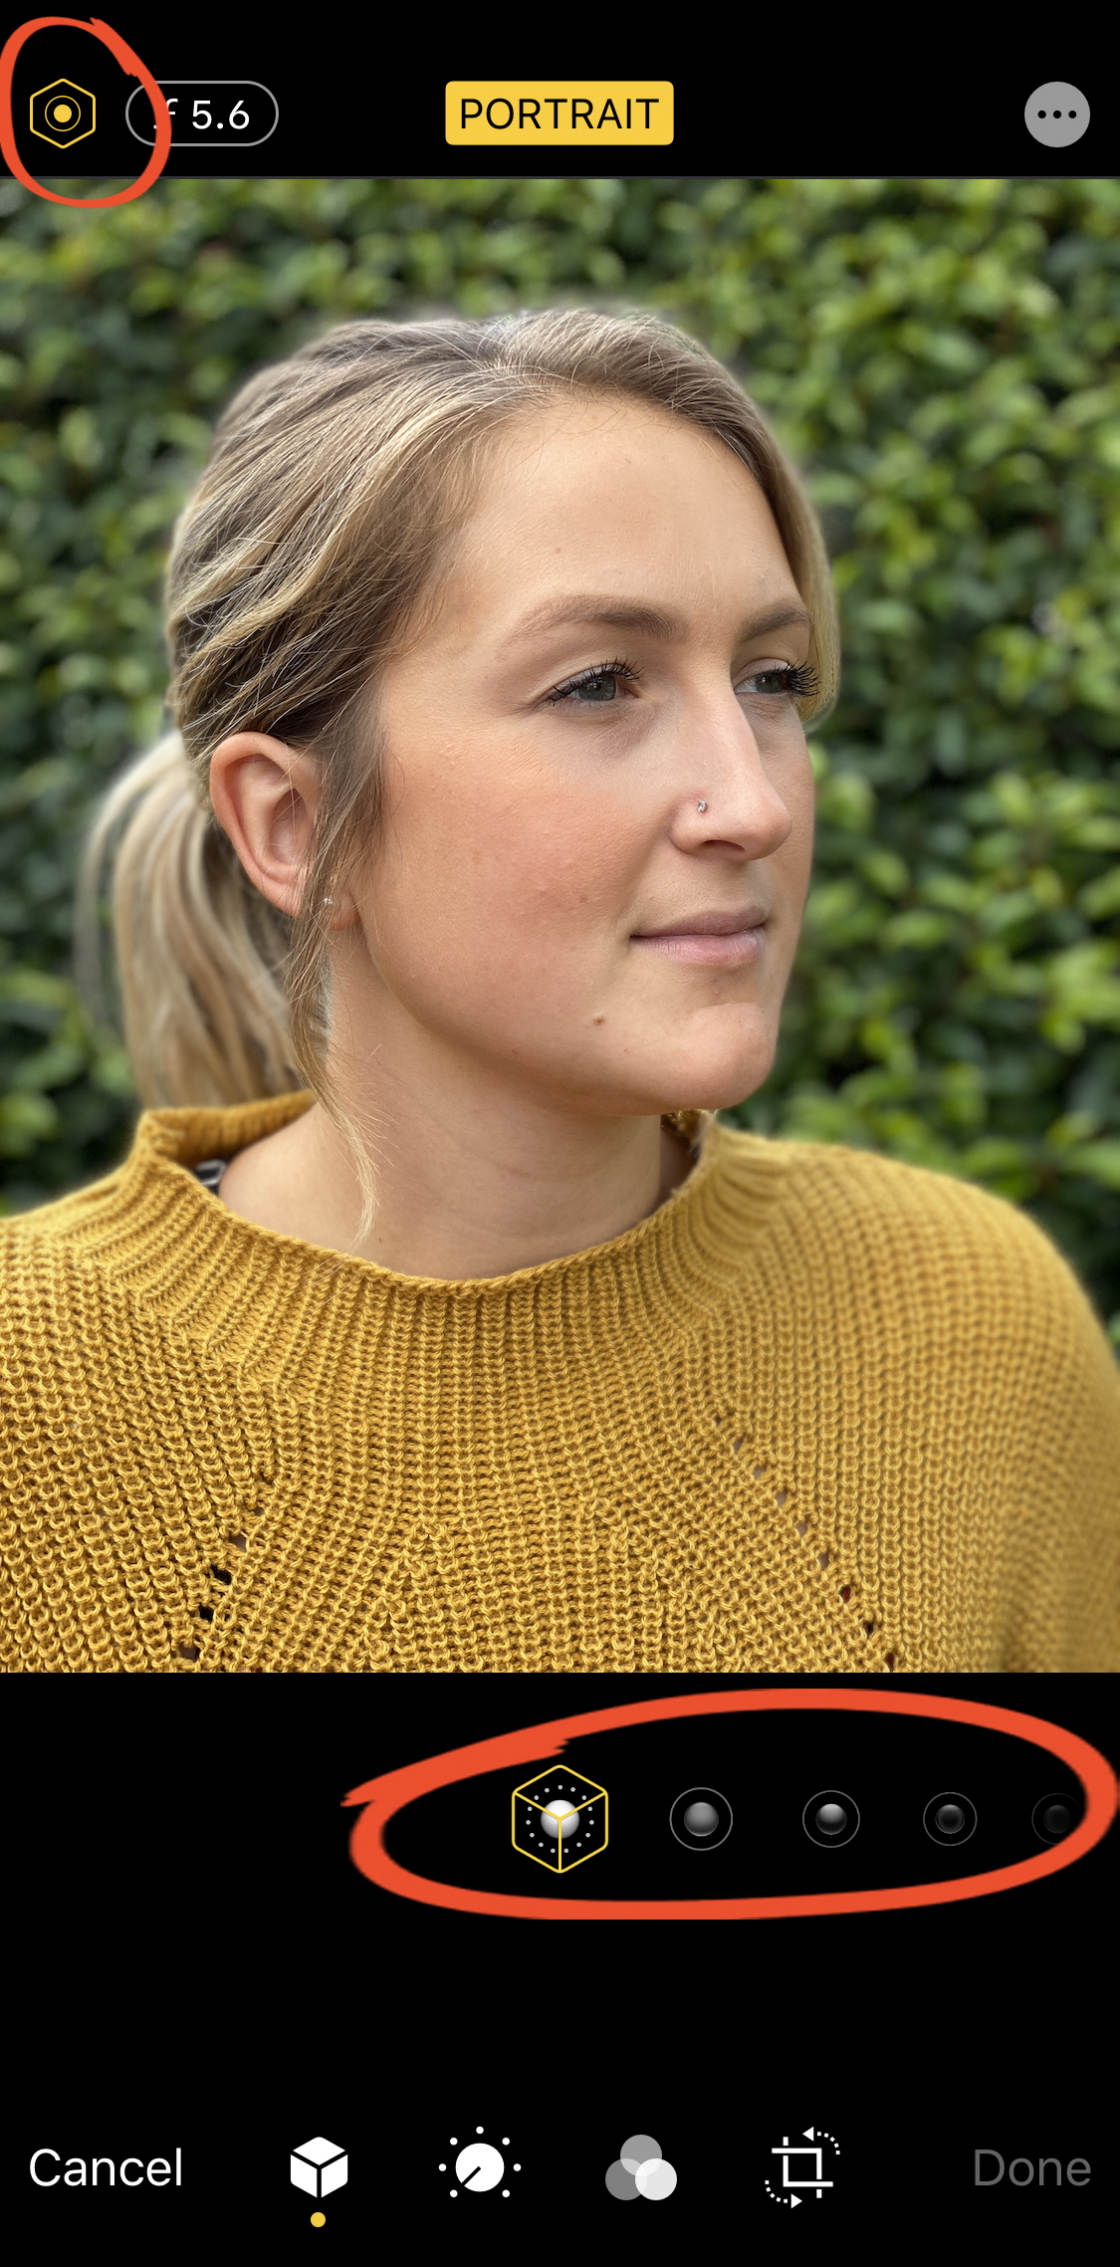
Swipe across the Portrait Lighting icons to see the different effects, due east.g. Studio Light, Profile Low-cal, Stage Light, etc.

Use the slider at the bottom of the screen to adjust the force of your chosen light effect.
TapDone to salve your edits.
Portrait Lighting offers a powerful way to quickly enhance your portrait photos. And it can actually make your discipline stand out!
7. Actuate Burst Style For Jaw-Dropping Action Shots
Practice y'all struggle to accept good photos of moving subjects?
Exercise you end up pressing the shutter button too early or too late, missing the perfect moment?

Information technology doesn't have to be this way!
Your iPhone camera has a little-known characteristic called burst style.
And once you know how to use it, you'll be able to take perfect action shots every time!
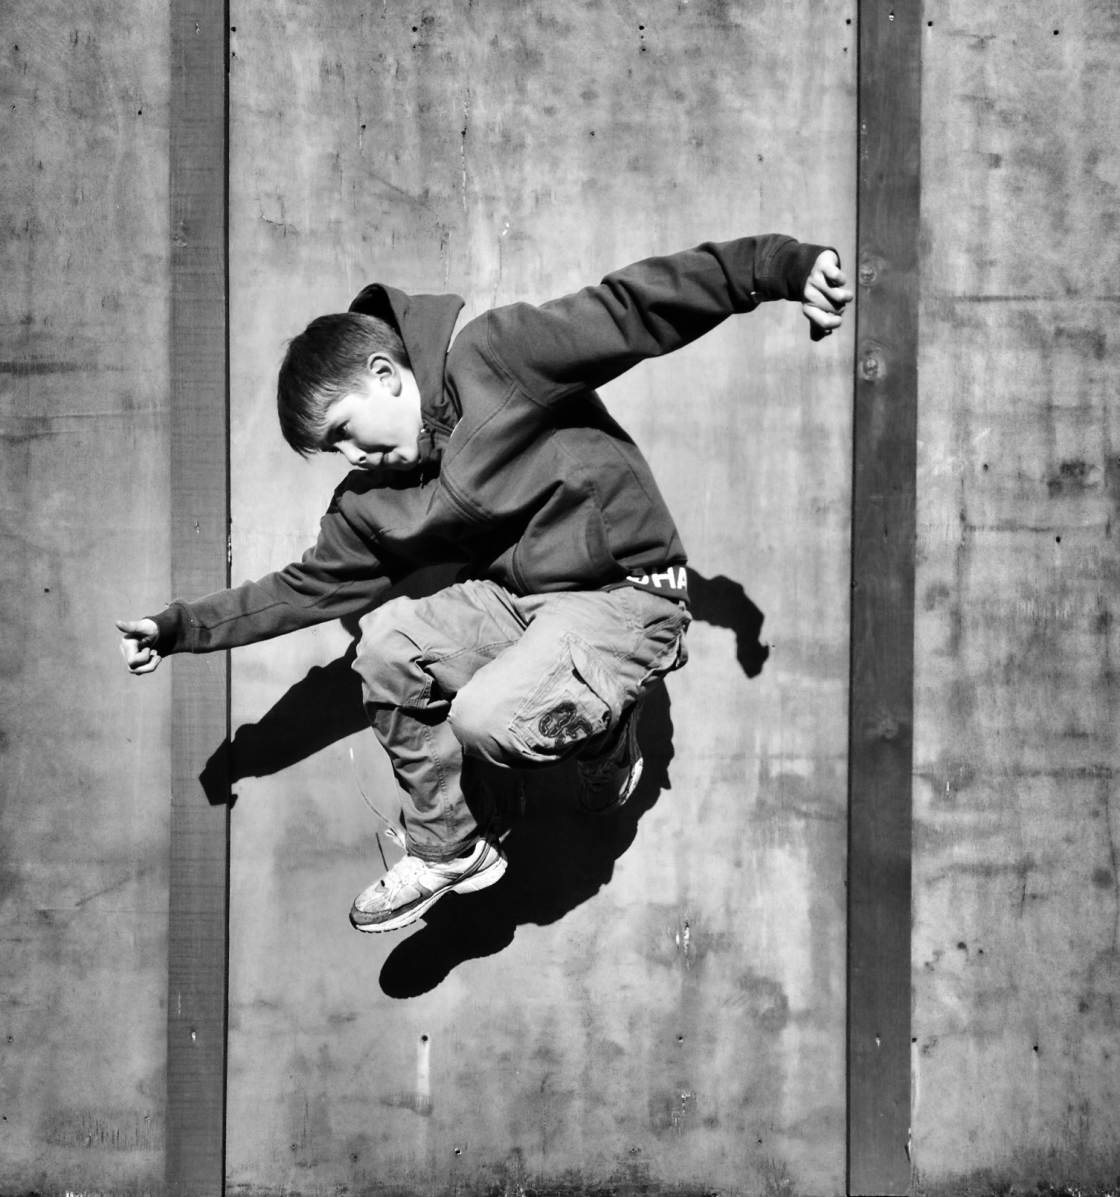
Flare-up mode takes around x photos per 2nd. This gives you the all-time gamble of getting at to the lowest degree ane photo of your subject in the perfect position or pose.
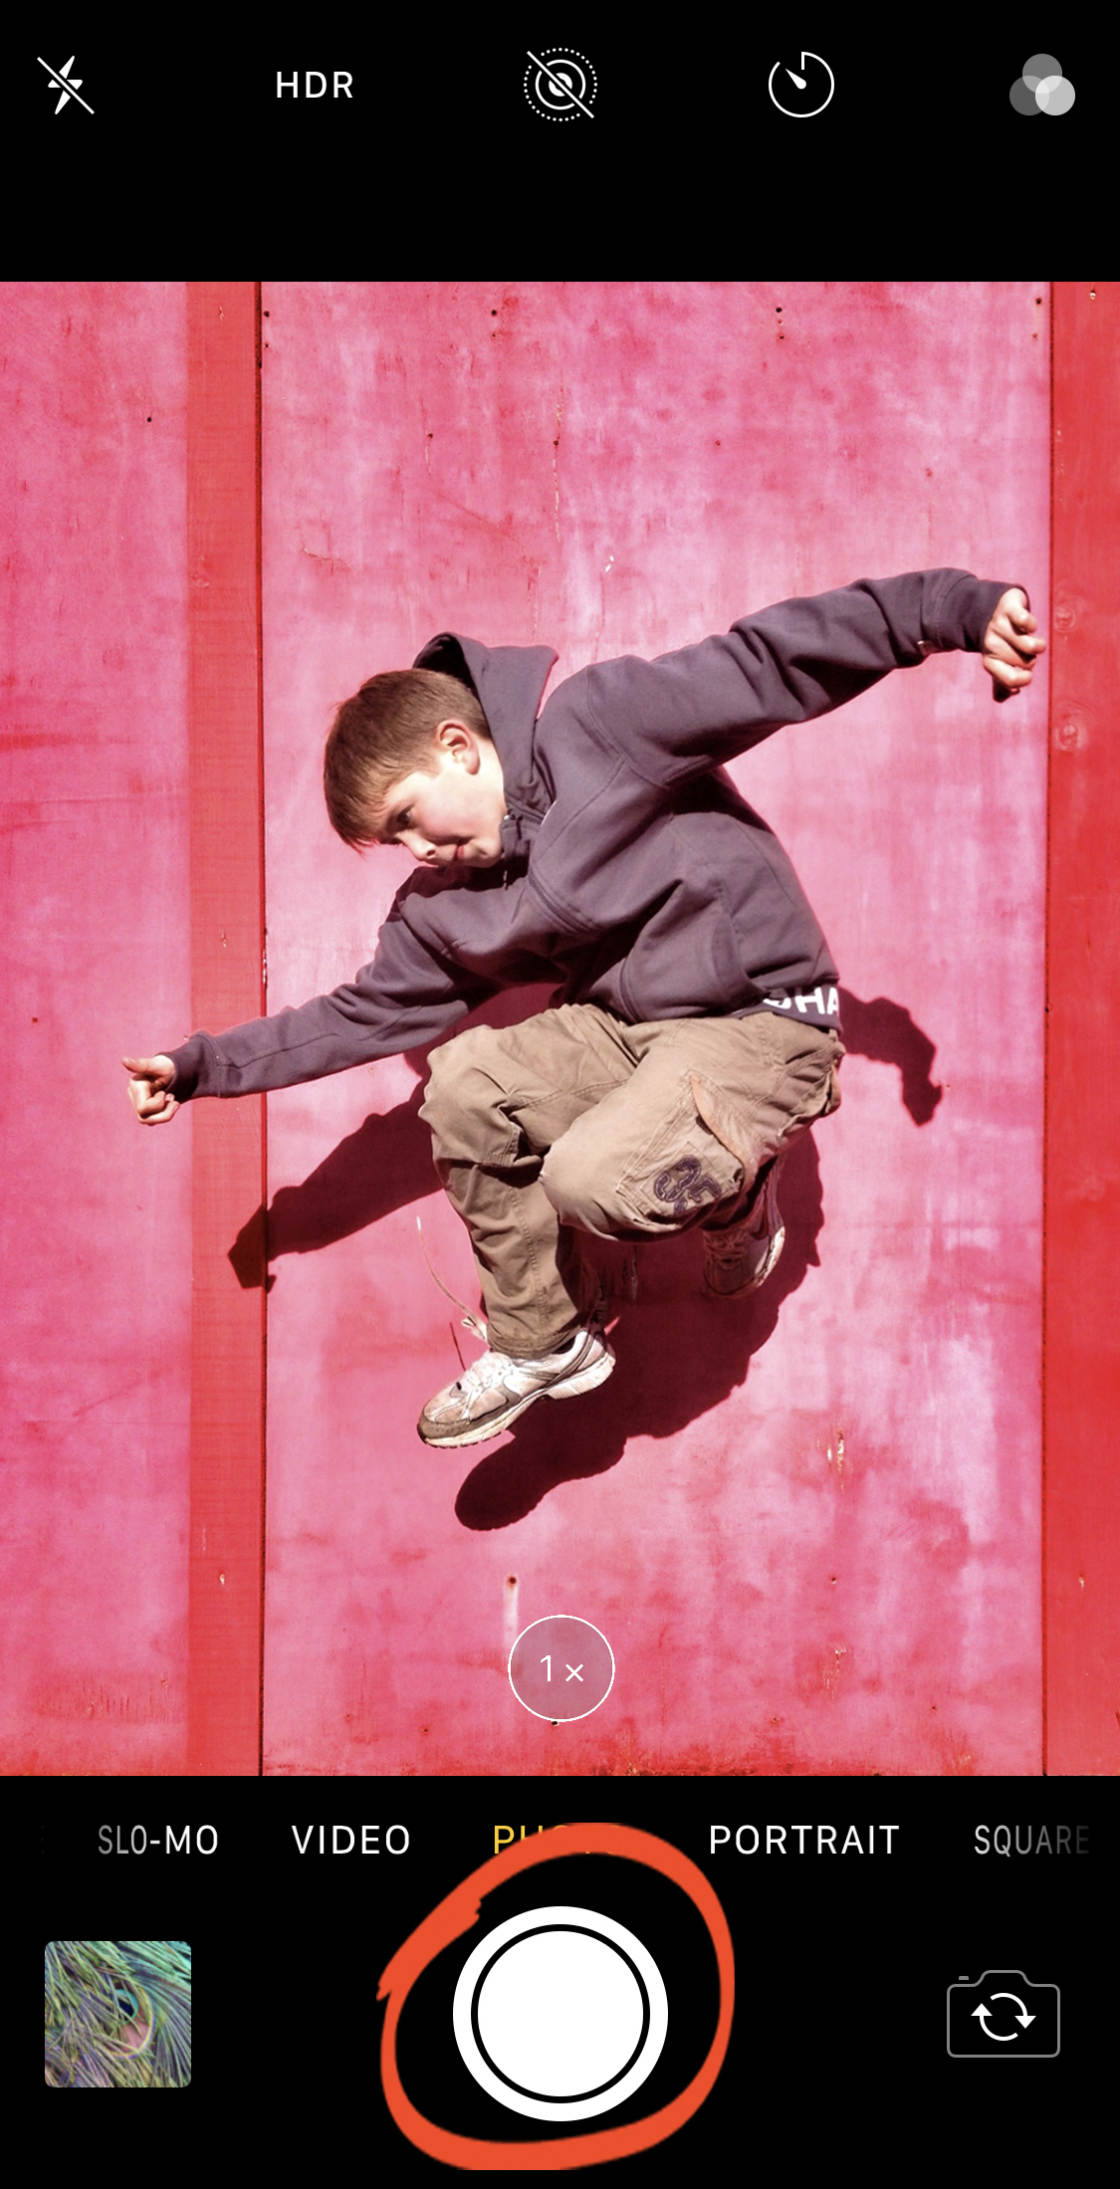
So, how do you actuate burst way on your iPhone?
It'due south actually actually simple.
On iPhone 11, 11 Pro, or 11 Pro Max, slide the shutter push to the left. The photographic camera will keep taking pictures until yous release your finger.
On iPhone XS and older, but hold downward the shutter button (don't slide it left).
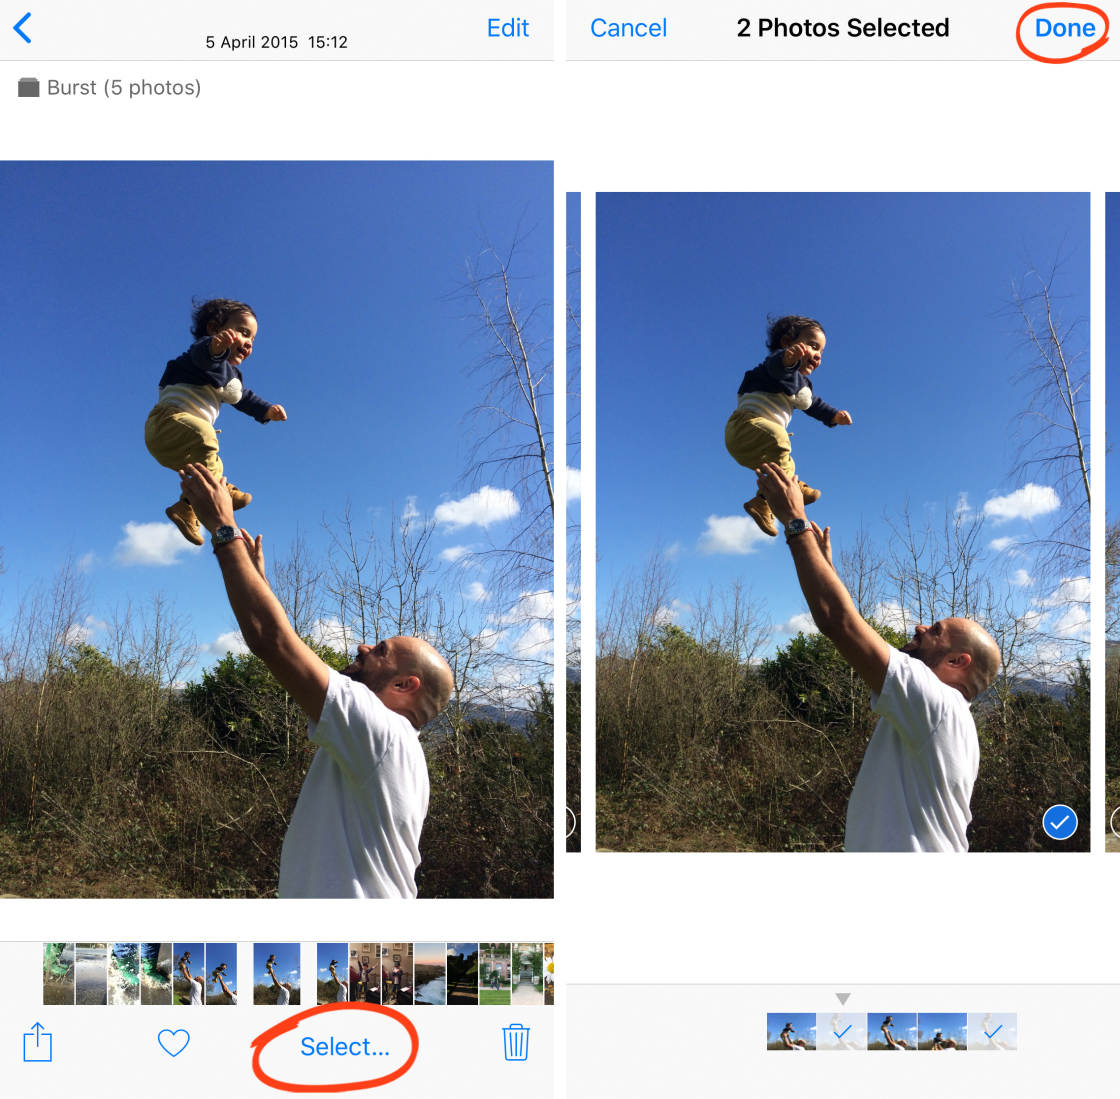
One time you've shot a burst, you can choose the all-time images to continue and discard the rest.
To select the all-time photos, open thePhotos app. Detect your flare-up and tap to open it.
TapSelect at the lesser of the screen. Roll through the photos and tap on the ones you desire to keep. So tapDone, and cull to Keep Simply Favorites.
Flare-up mode will instantly amend your iPhone action photography. You lot should apply it whenever there'southward whatsoever movement or unpredictability in the scene.
It's great for photographing children and animals. And it'due south perfect for street photography or capturing people walking, running, jumping, or cycling.
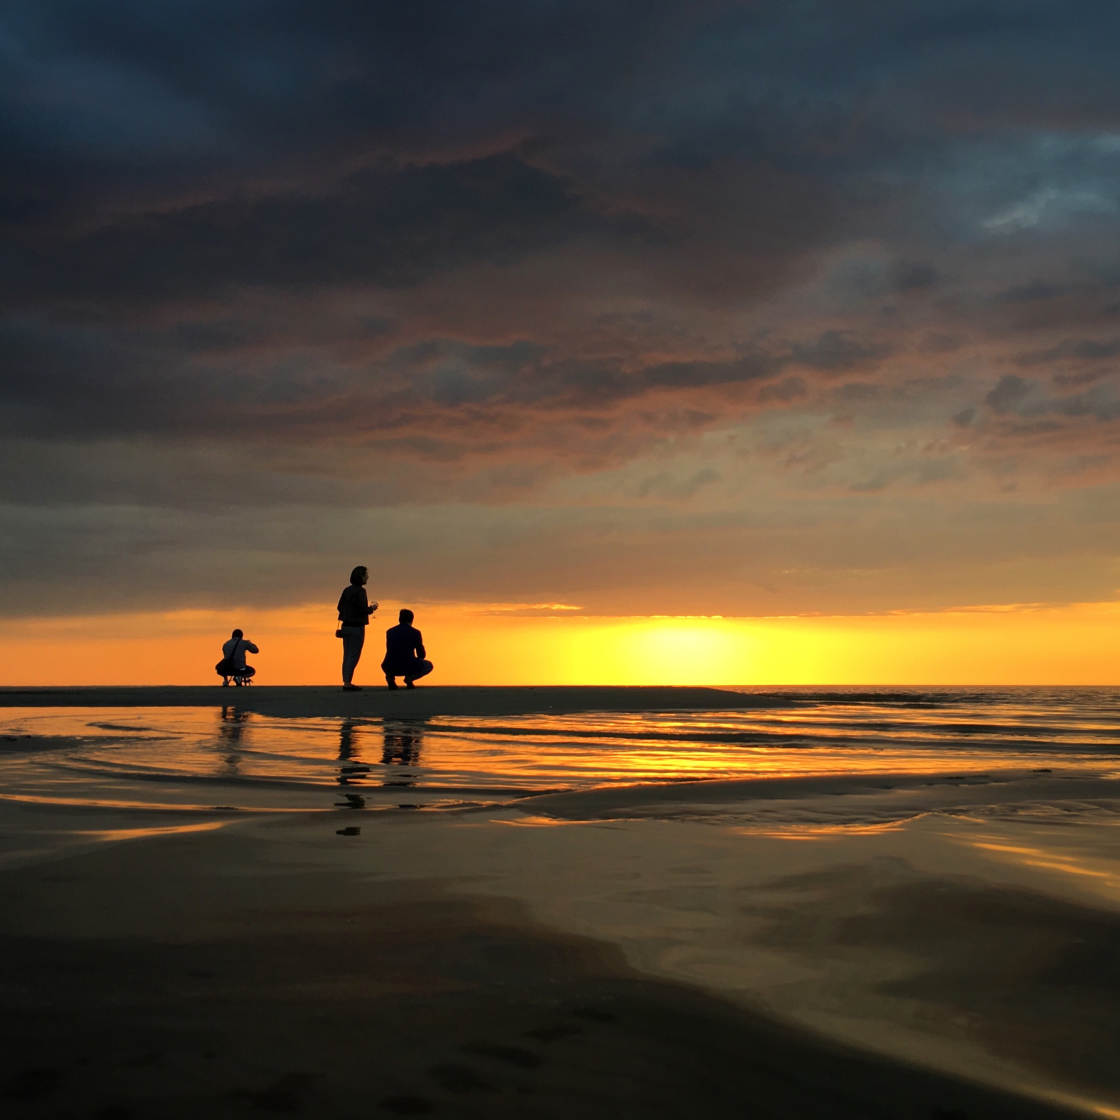
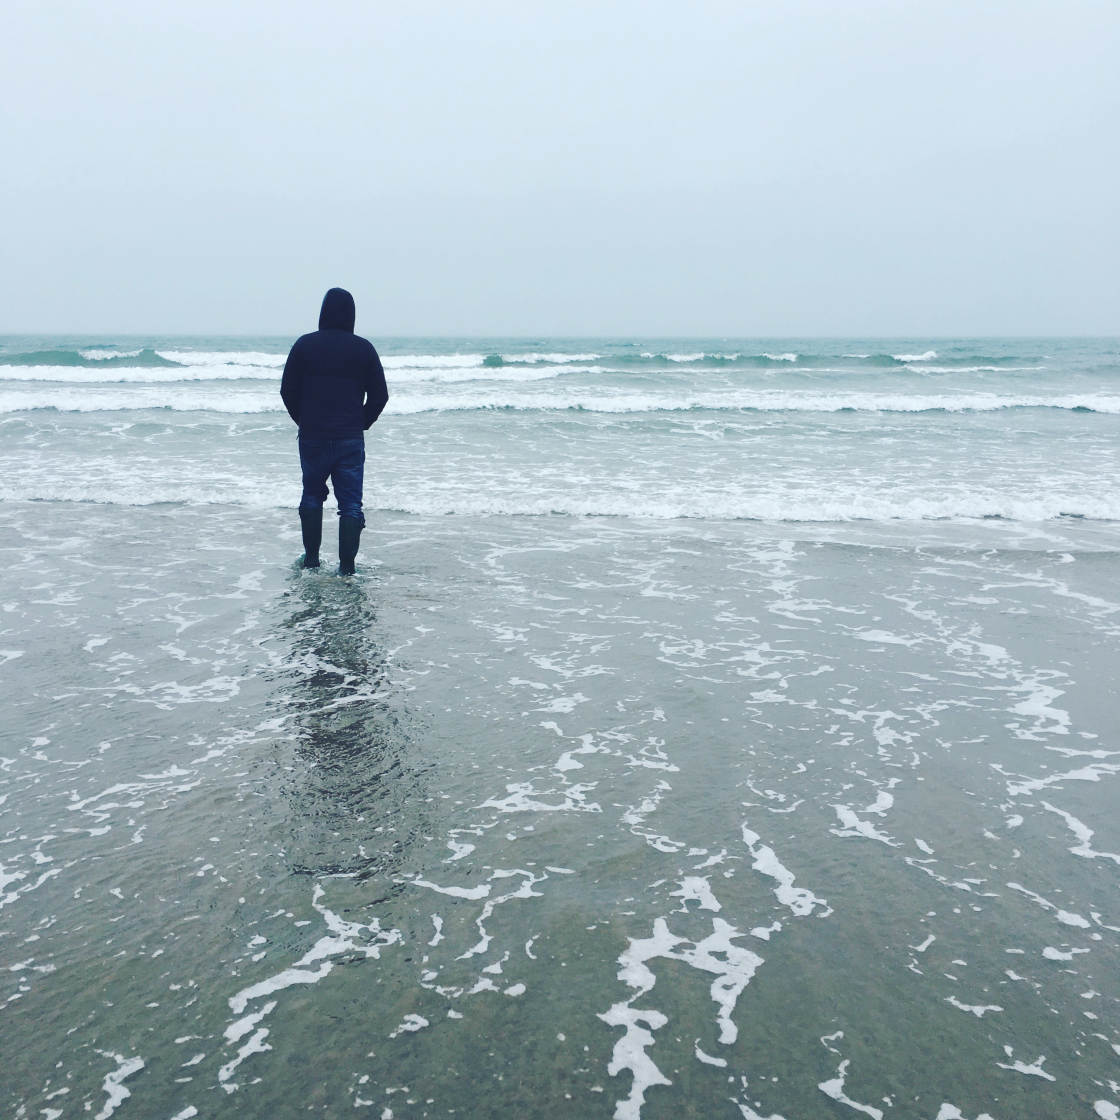
8. Shoot Live Photos To Preserve Those Special Moments
The iPhone Live Photo feature brings your pictures to life past creating a three-second moving image.
Rather than freezing a moment in time with a even so photo, use Live Photos to capture movement and sound.
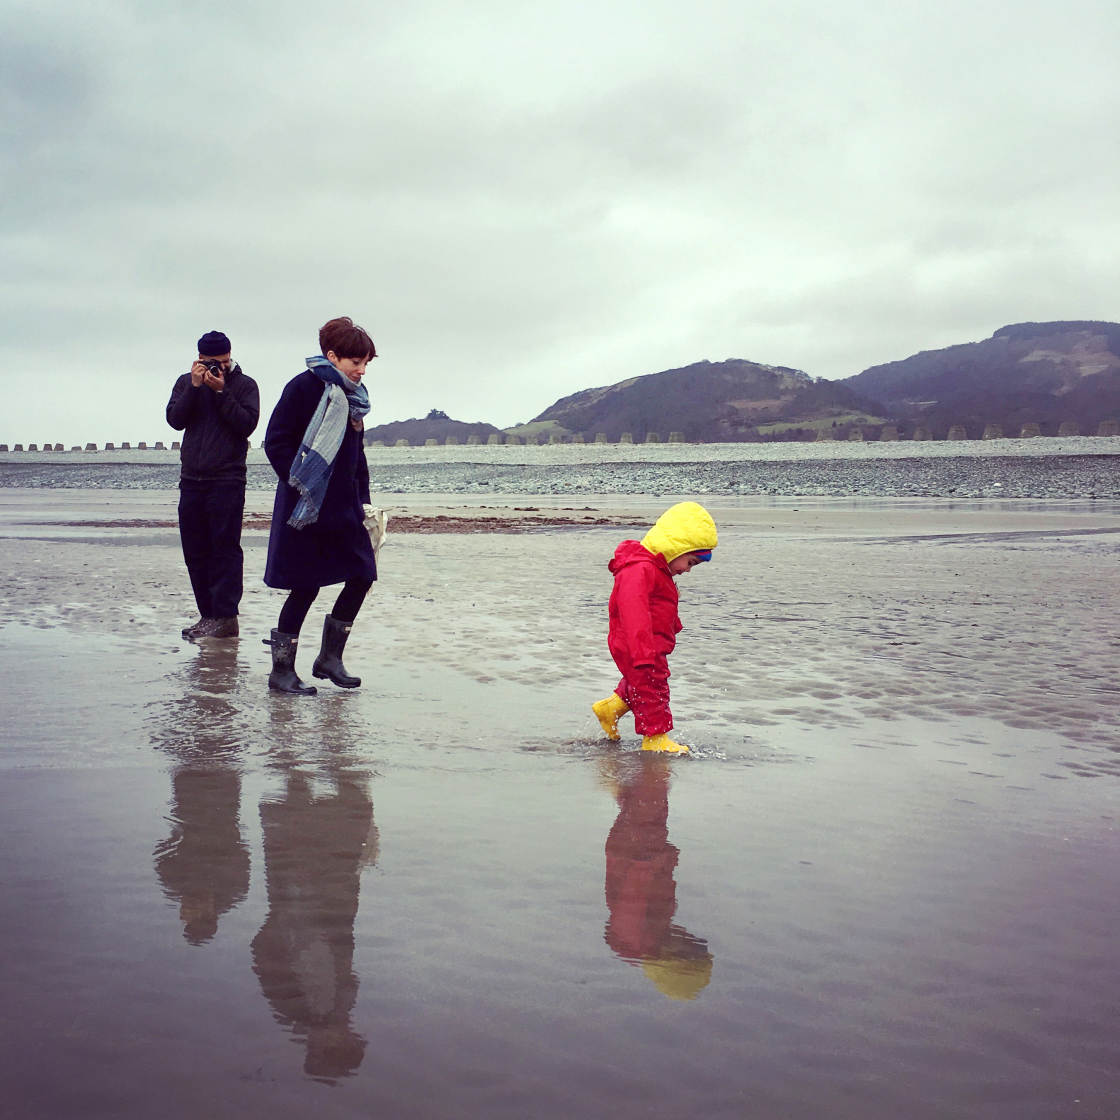
Press Play on the video below to encounter how this Live Photograph captures the movement and sound of the beach.
Alive Photos are perfect for preserving those special little moments that you couldn't capture in an ordinary nonetheless photo.
Utilize it when photographing moving subjects, children, water, fun moments, or whatever scene that has interesting sounds.
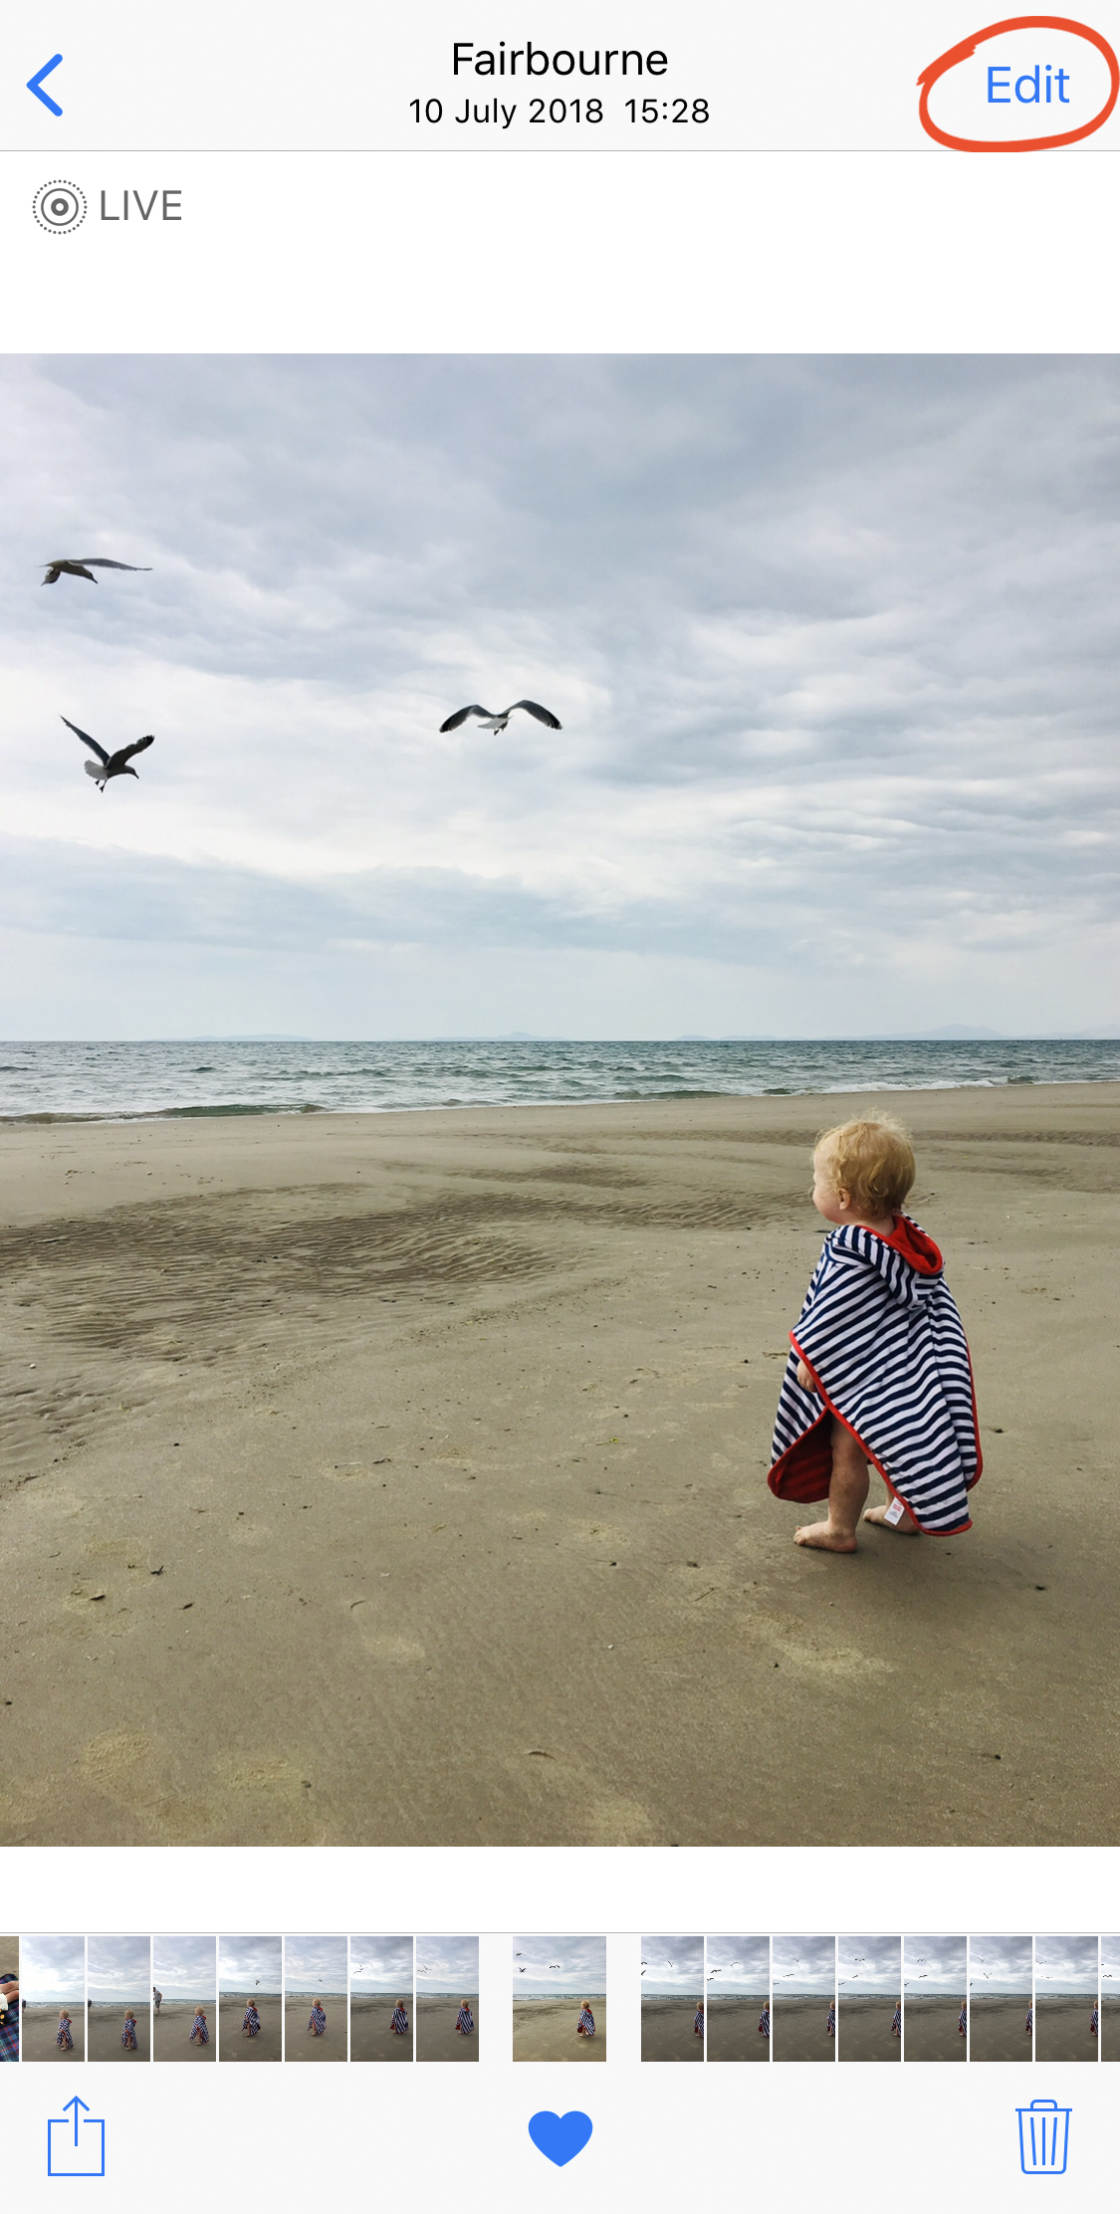
To shoot a Alive Photograph, ensure the Live Photos icon at the superlative of the screen is set to on. (If the icon has a line through information technology, it'due south off.)
And so simply press the shutter button to capture your Live Photo.
Remember that the camera automatically captures 1.5 seconds of video before and after you take the shot. And then go on the camera yet for a few seconds before and later pressing the shutter.
To play back your Live Photo, open it in the Photos app, and then hold your finger downward on the screen.
In the Photos app, you lot tin utilise different furnishings to your Alive Photo, such as Loop, Bounciness, and Long Exposure.
To access these effects, open up your Live Photograph and then swipe up.
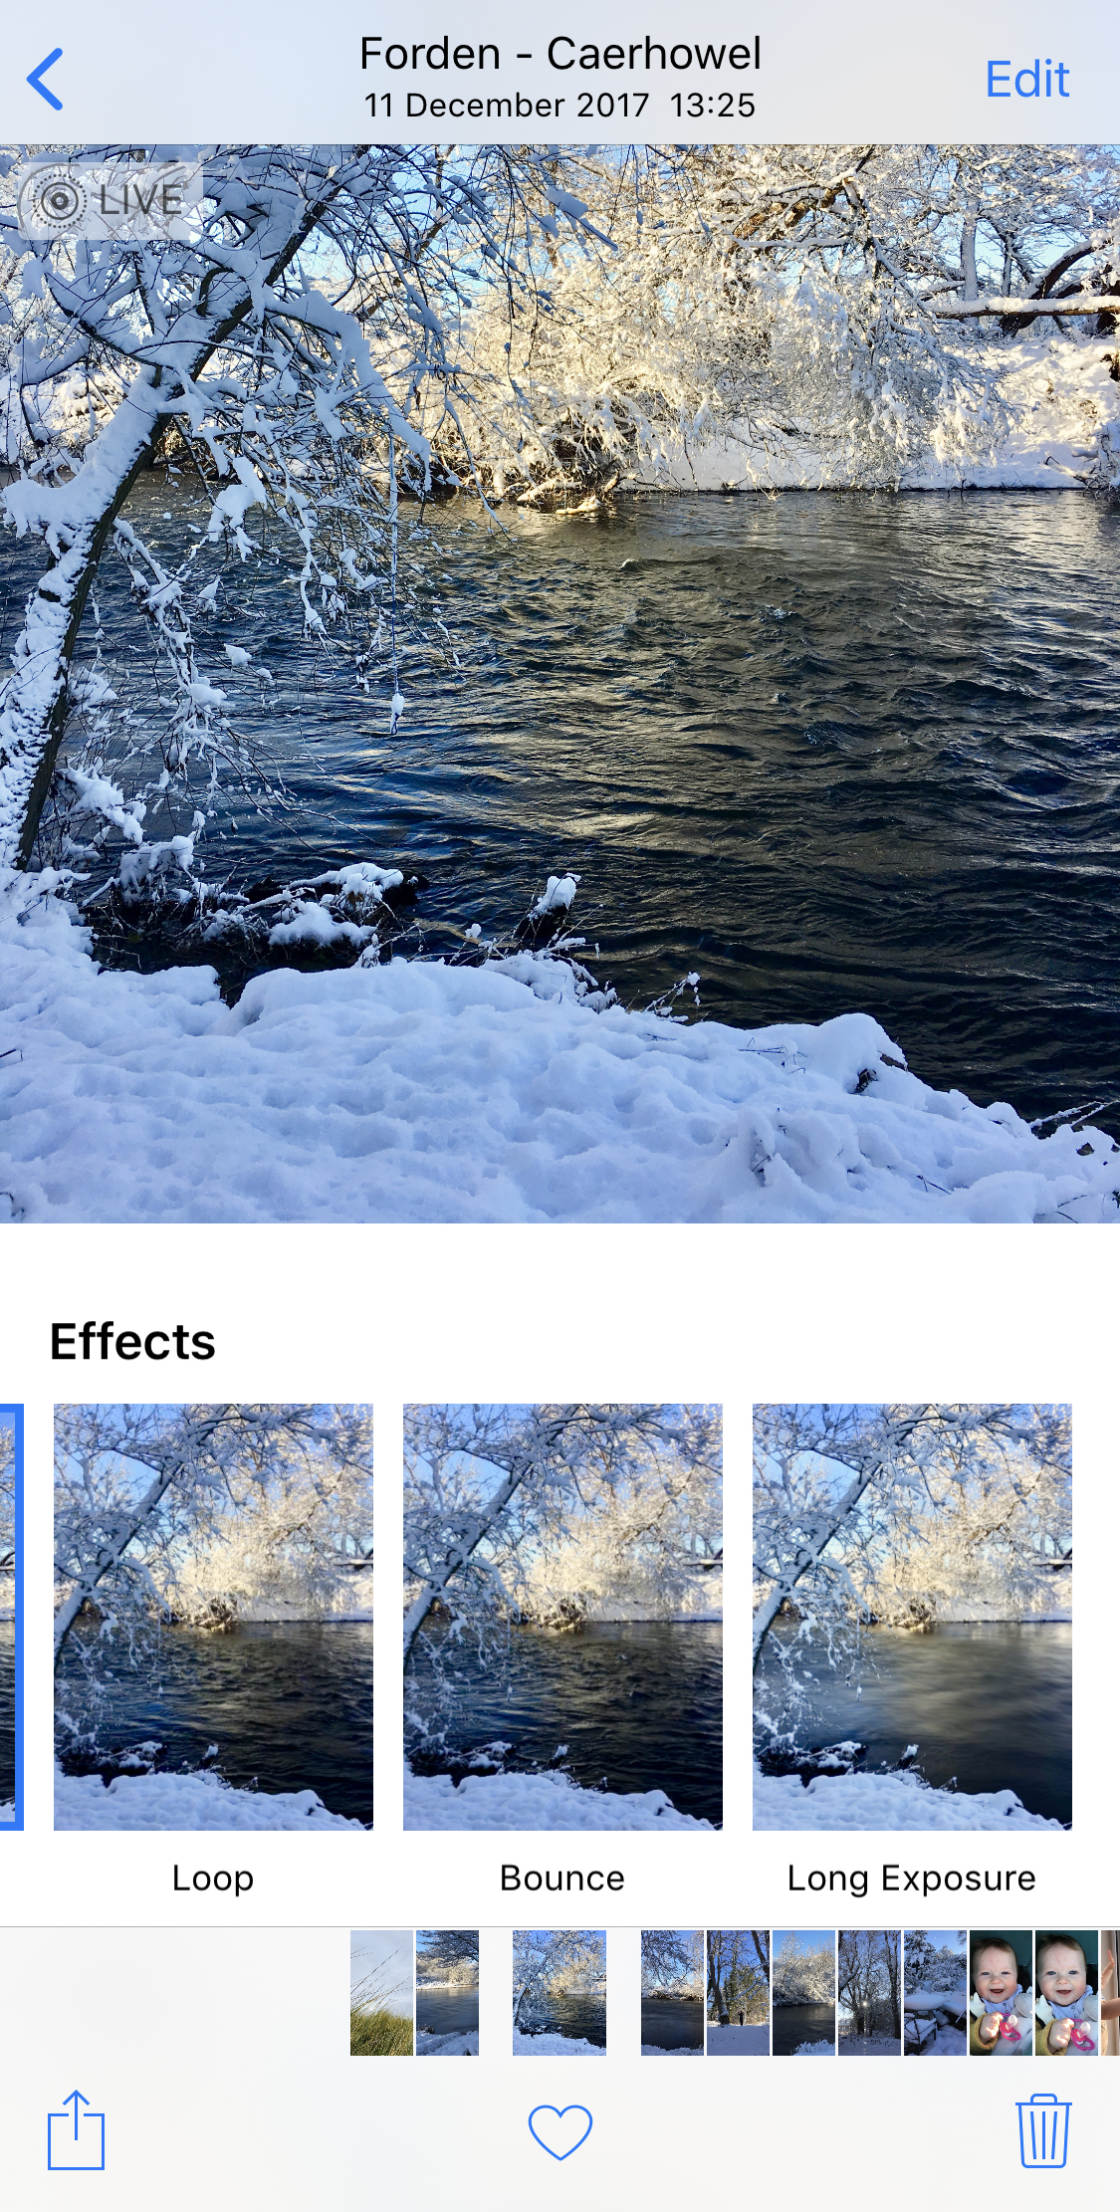
Swipe across the furnishings beneath your photo, and tap the 1 you want to use.
Loop turns your Live Photo into a continuous video loop.Bounce makes your Live Photo play forwards and then in reverse.
Long Exposure creates a slow shutter result, blurring any movement that was captured. This is perfect for creating a silky smoothen result on rivers and waterfalls.

If you lot'd prefer to convert your Live Photo to a withal paradigm, tap Edit at the tiptop of the Live Photo.
Tap the Alive icon at the bottom of the screen. And then tap the yellow Alive icon at the summit of the screen.
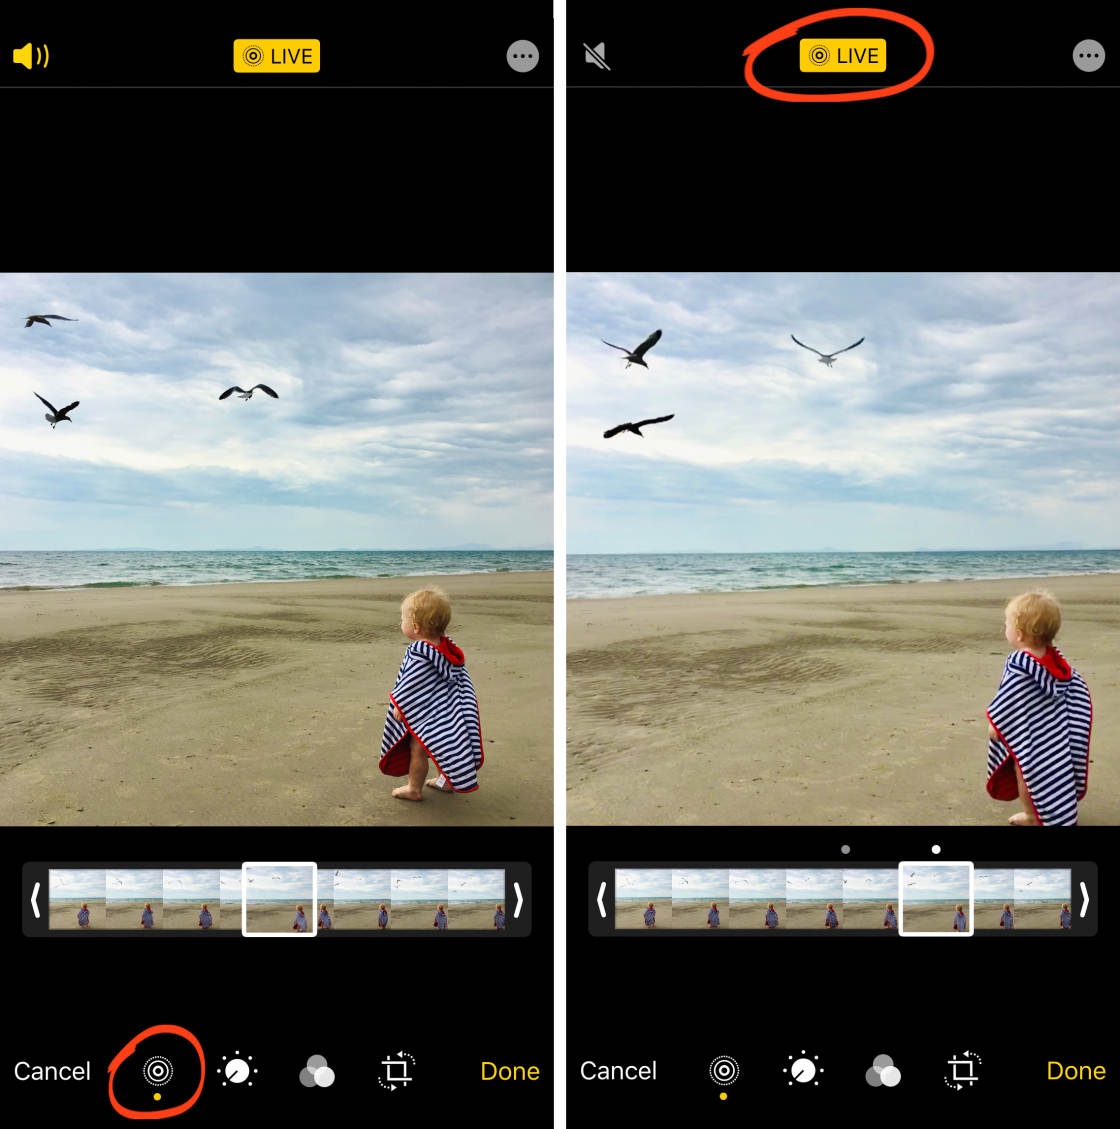
The Live Photos blitheness and sound are at present turned off. But you lot can convert it dorsum to a Live Photo at any fourth dimension by borer Live at the top of the screen.
ix. Set The Timer For Hands-Free Shooting
The self-timer in the Camera app lets you set a delay between pressing the shutter button and the photo being taken.
This means you can shoot hands-free… and announced in the photo yourself.
First, prepare your phone on an iPhone tripod (or whatever solid surface) and compose your shot.
In the iPhone 11 Camera app, tap theup-arrow to display more than iPhone camera settings at the bottom of the screen. So select the Timer icon.
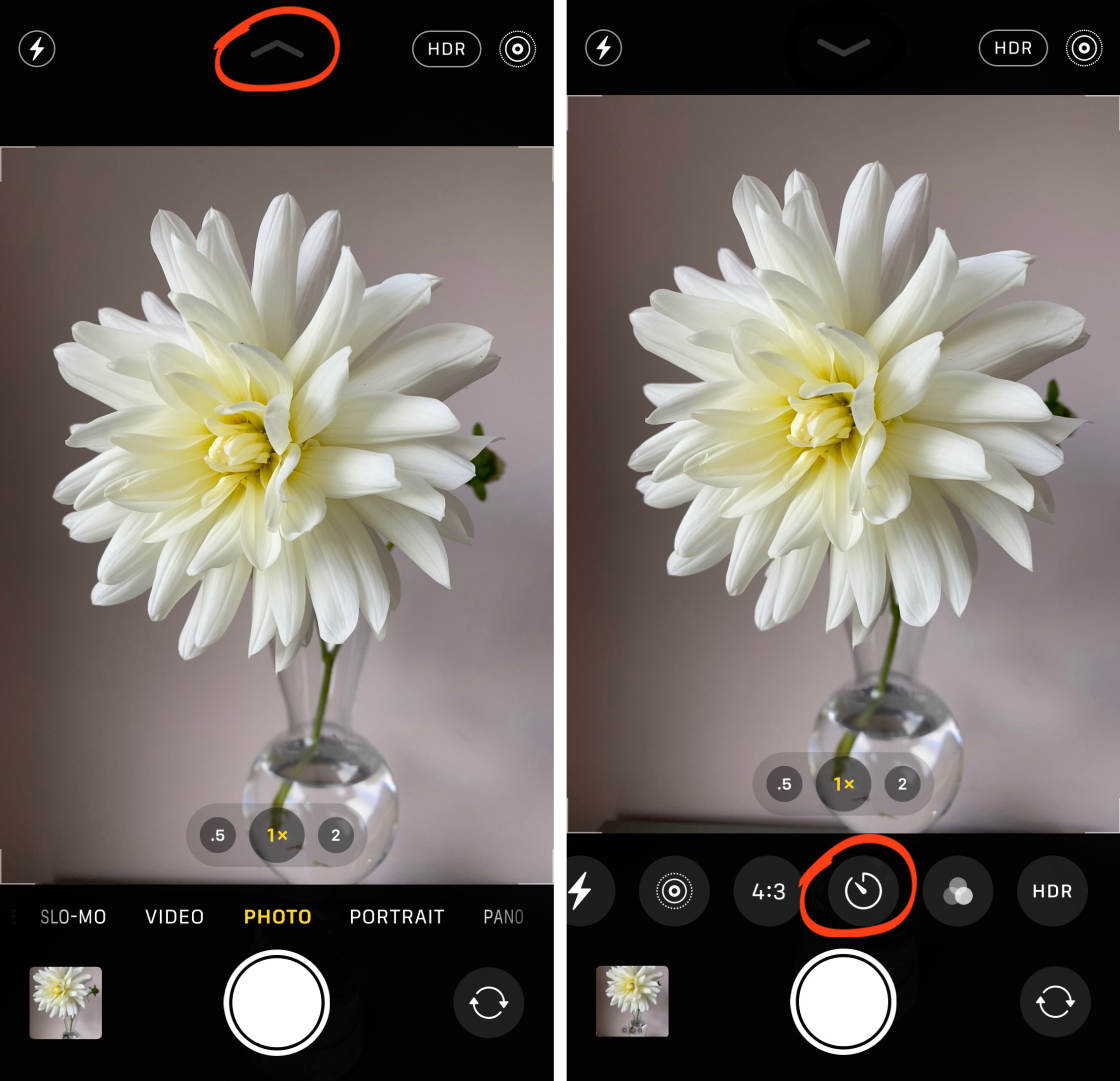
On iPhone XS and older, y'all'll find the Timer icon at the top of the screen (as shown below).
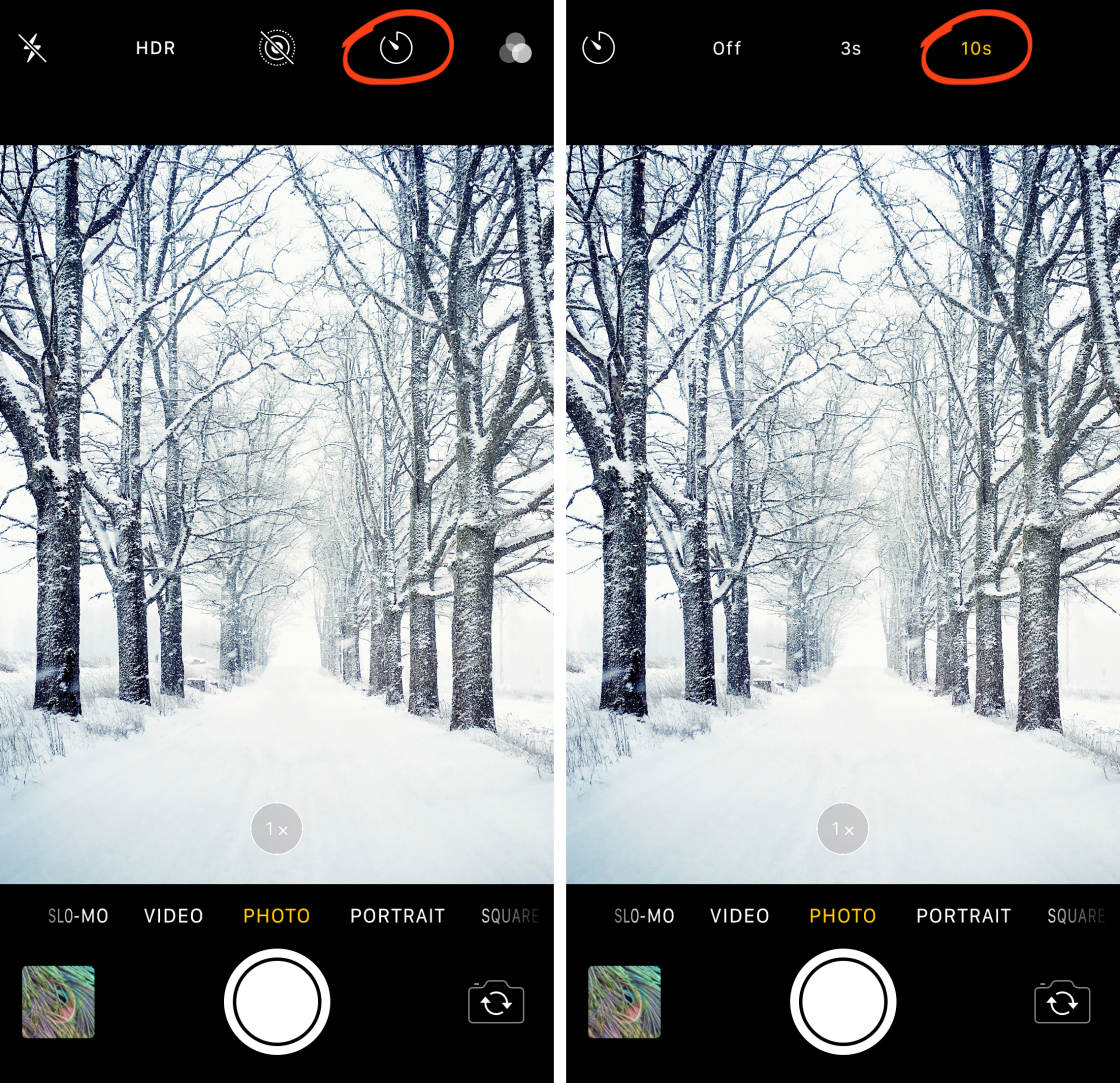
Select either a 3-2nd or 10-second delay.
When you lot press the shutter push button, the photographic camera will starting time counting down the seconds.
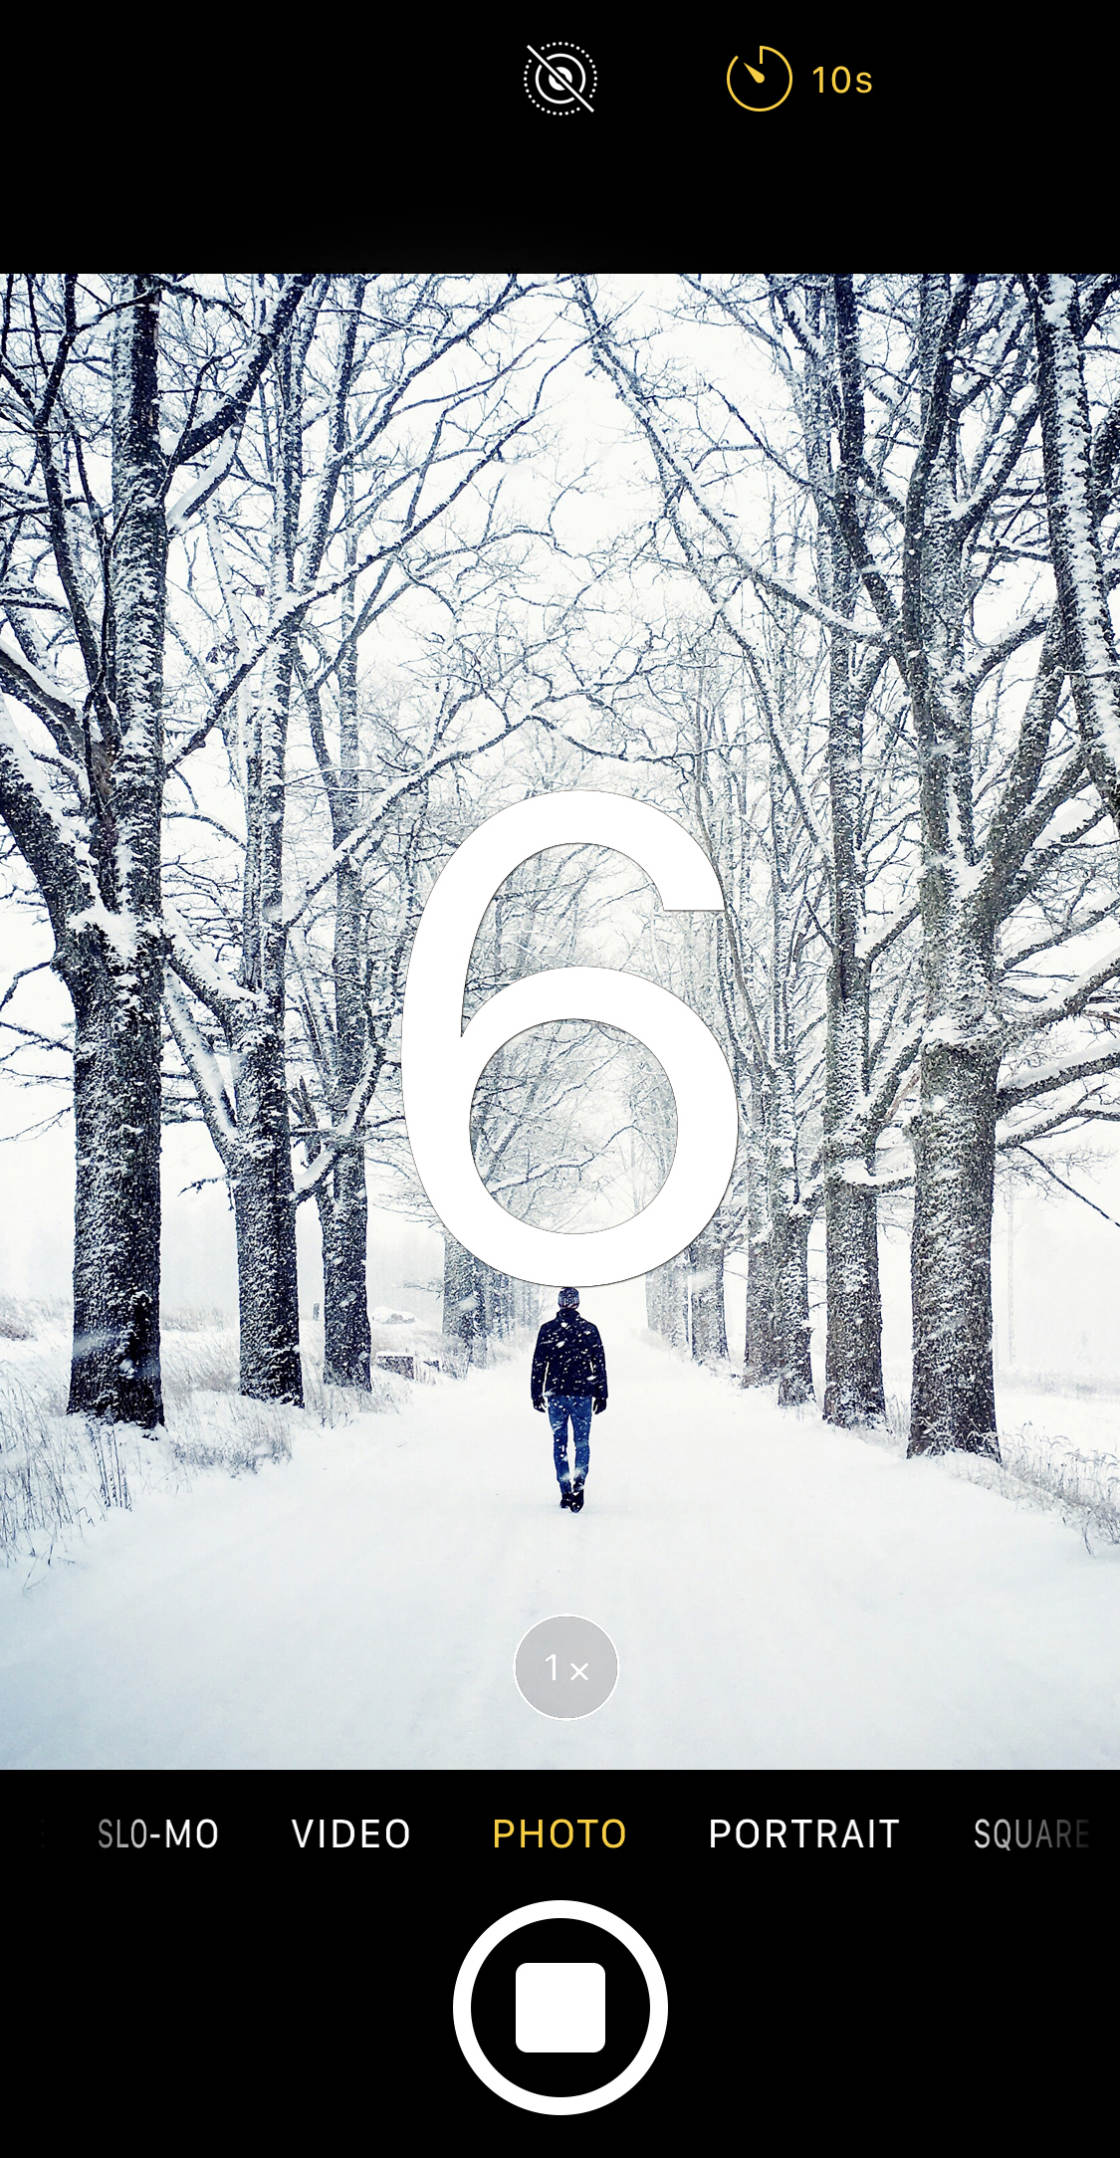
At present you can get into position in forepart of the camera.
When the shutter fires, the camera will take a burst of 10 shots.
You tin can then cull the best photos from the sequence and delete the rest (just similar you do when selecting your favorite burst mode photos).
Using the timer means yous never accept to have a boring photo over again.
You can e'er add interest to your photo by appearing in the scene yourself!
10. Switch On The Filigree In iPhone Camera Settings For Better Compositions
Did you know you lot can display gridlines in the iPhone Photographic camera app?
These gridlines will help you create stunning compositions that actually catch the viewer'south eye.
Yous can use the camera gridlines to:
- Keep the horizon level in landscape photos
- Ensure lines are straight or level in architecture photos
- Carve up the frame into iii sections for a classic rule of thirds composition
- Compose a perfectly symmetrical photo
To turn on the grid, open the Settingsapp, so select Camera. Ensure the Grid option is switched on.
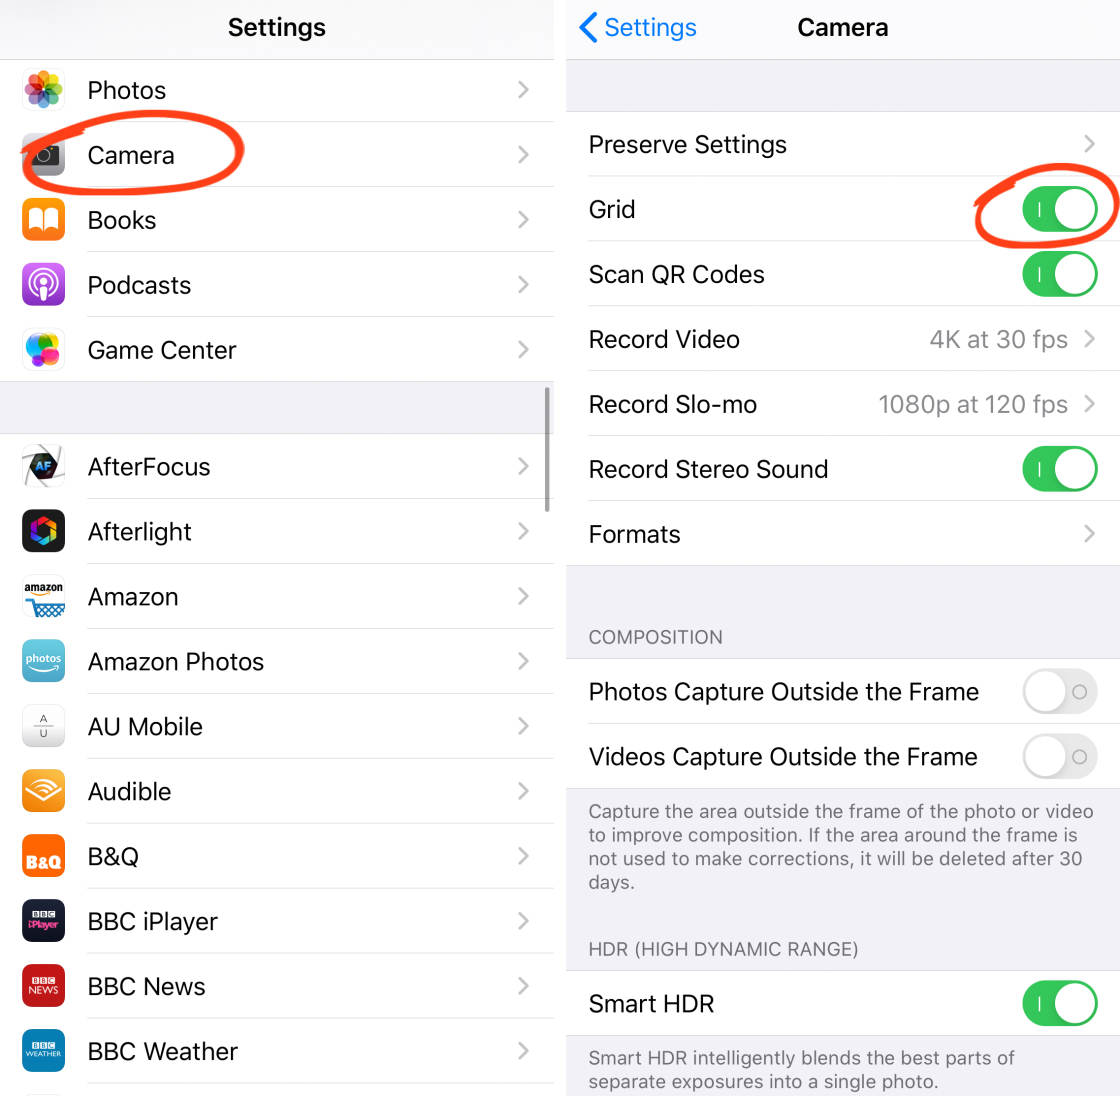
Close the iPhone camera settings, and then open thePhotographic camera app. You'll encounter ii horizontal and two vertical lines in the viewfinder.
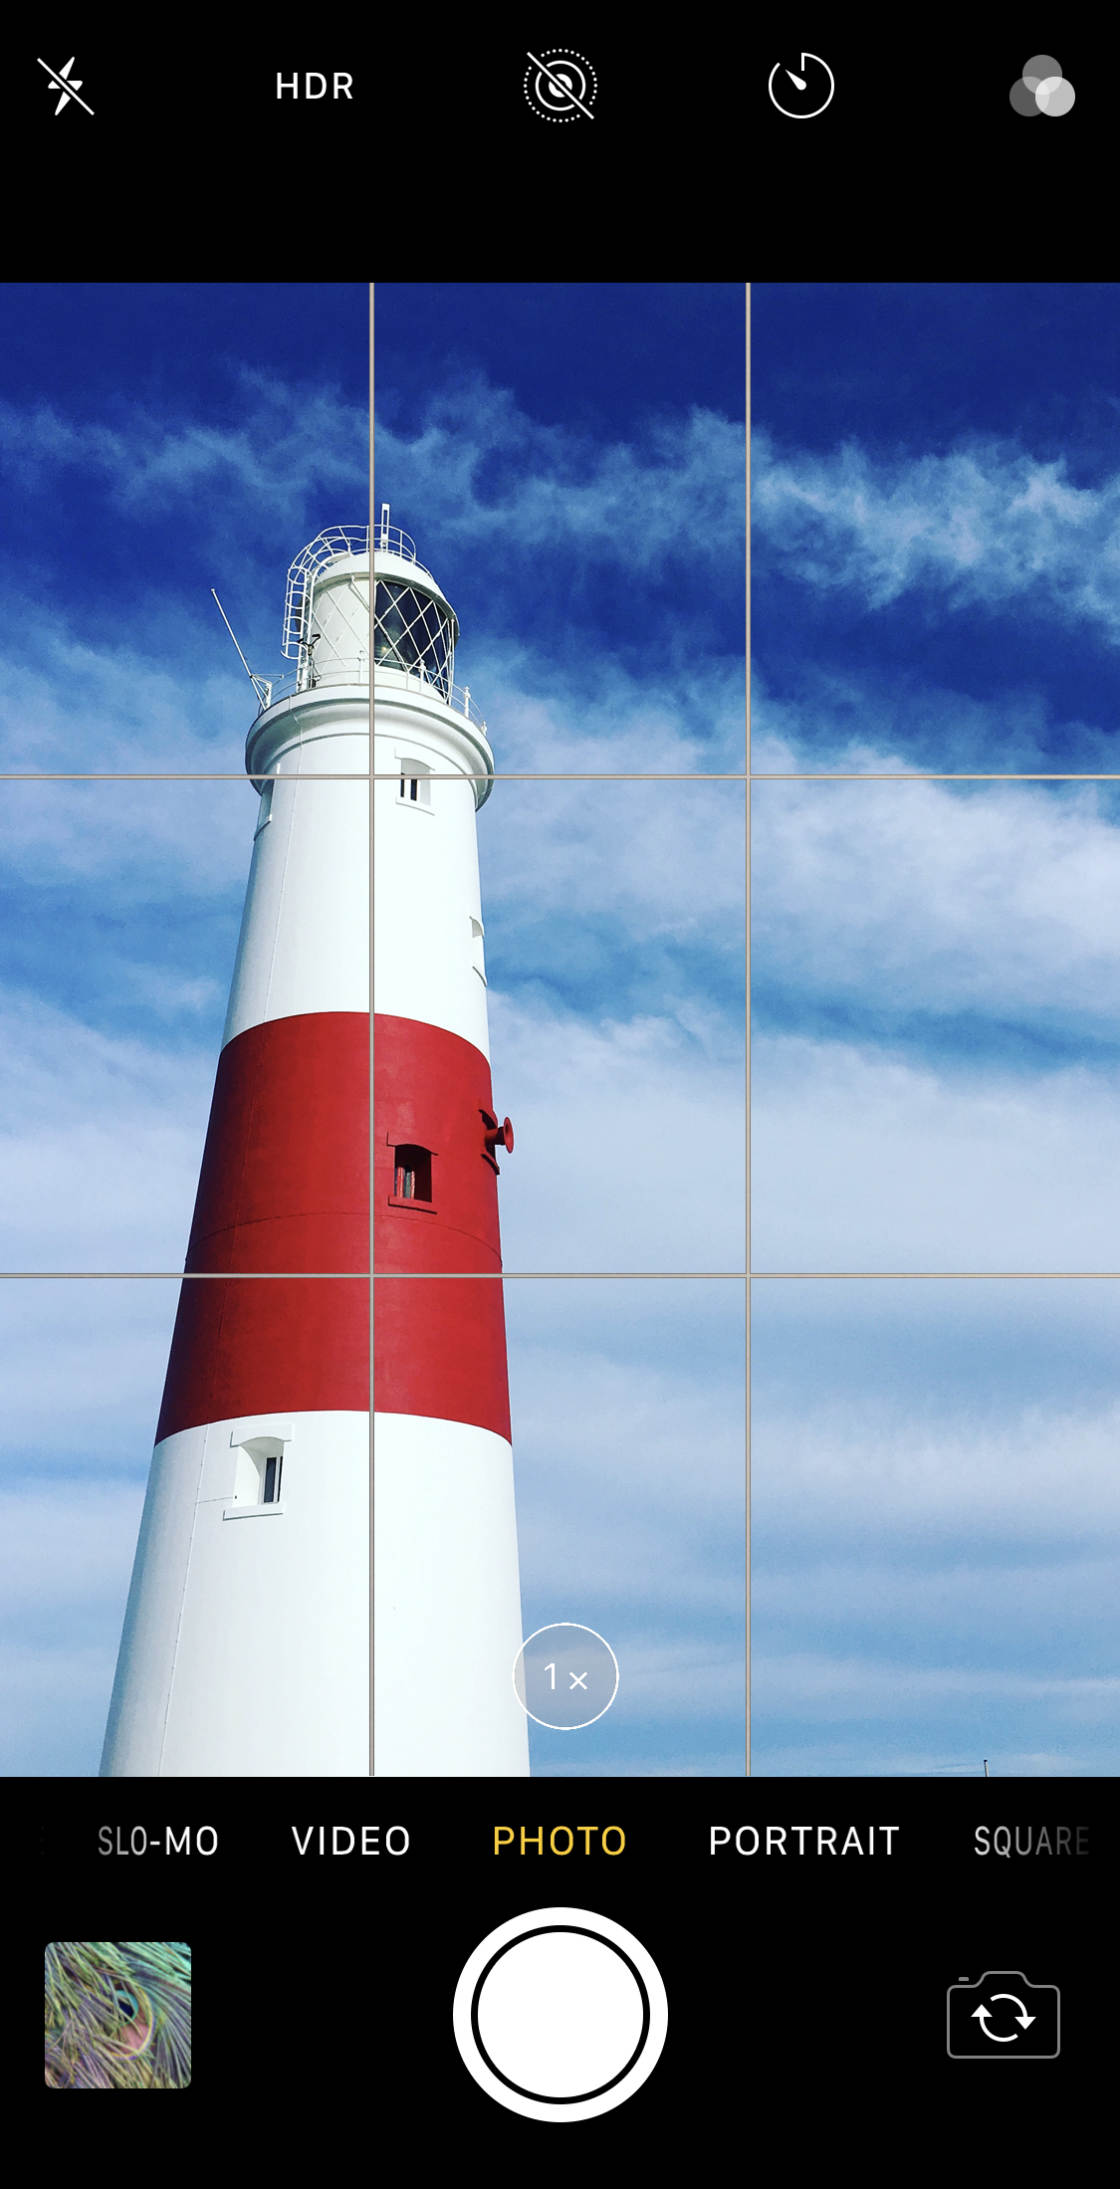
Use these lines to help you position the principal elements in the scene for a pleasing composition.
Position your main subject on 1 of the vertical gridlines (or where two lines meet) to create an off-middle "rule of thirds" composition.
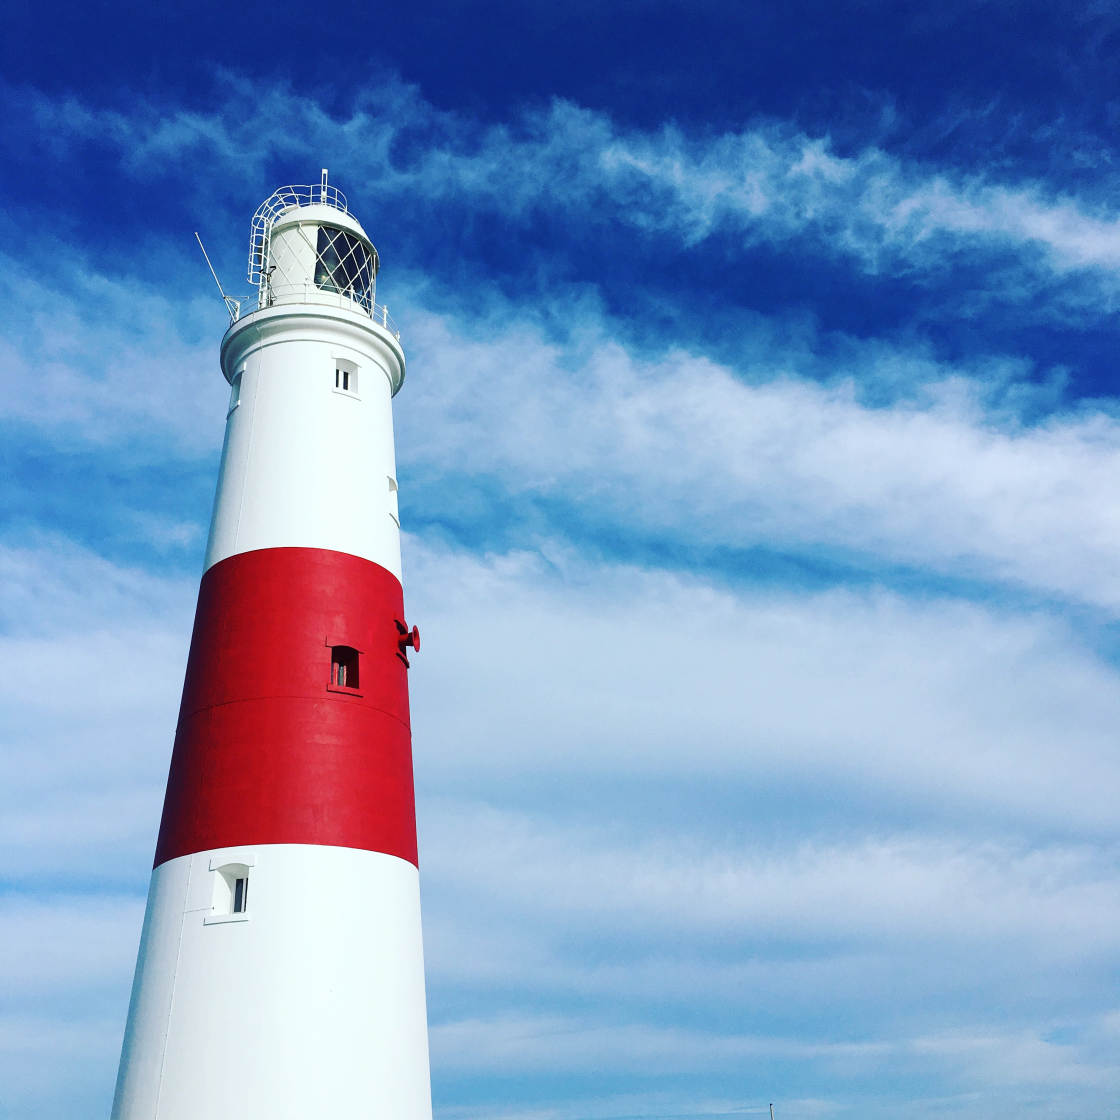
Or align the horizon along the tiptop or lesser gridline. This will ensure the horizon is perfectly level.
And your composition will be more than pleasing than if you'd placed the horizon across the middle of the frame.
Then, switch on the camera grid. And offset using information technology to etch jaw-dropping iPhone photos!

How To Change Apple Camera Settings,
Source: https://iphonephotographyschool.com/iphone-camera-settings/
Posted by: negrinsaysix.blogspot.com
0 Response to "How To Change Apple Camera Settings"
Post a Comment